Bottom wing and receiver installation – E-flite Rhapsody 25e ARF User Manual
Page 13
13
E-flite Rhapsody 25e ARF Assembly Manual
Bottom Wing and Receiver Installation
Required Parts
Fuselage assembly Y-harness
Receiver
#4 washer (2)
#6 washer (2)
Bottom wing center section
Hook and loop tape
Carbon wing tube, short
Bottom wing panel (right and left)
6-32 x 1-inch socket head machine screw (2)
4-40 x 1/2-inch socket head machine screw (2)
Required Tools and Adhesives
Hex wrench: 3/32-inch, 7/64-inch
Scissors
Threadlock
Hobby knife with #11 blade
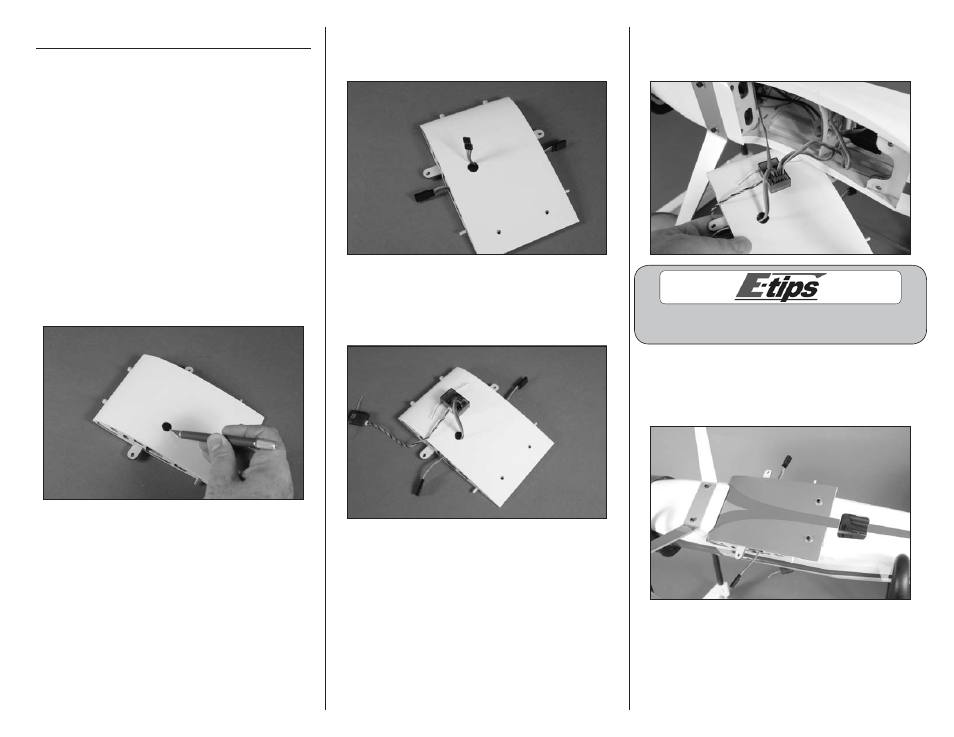
1. Use a hobby knife with a #11 blade to remove
the covering from the top of the bottom center
section for the aileron Y-harness.
2. Insert the Y-harness in the center section. Make
sure the end that plugs into the receiver is exiting
the hole in the top of the center section.
3. Use scissors to cut a piece of hook and loop
tape the size of the receiver. Use the tape to secure
the receiver to the center section as shown. Plug the
Y-harness into the aileron port of the receiver.
4. Plug the rudder, elevator and speed control
leads into the appropriate ports of the receiver
at this time.
Make sure to use threadlock on all metal-to-
metal fasteners so they don’t vibrate loose.
5. Attach the center section to the fuselage using
two 6-32 x 1-inch socket head machine screws and
two #6 washers. Use a 7/64-inch hex wrench to
tighten the screws.