E-flite Rhapsody 25e ARF User Manual
Page 10
10
E-flite Rhapsody 25e ARF Assembly Manual
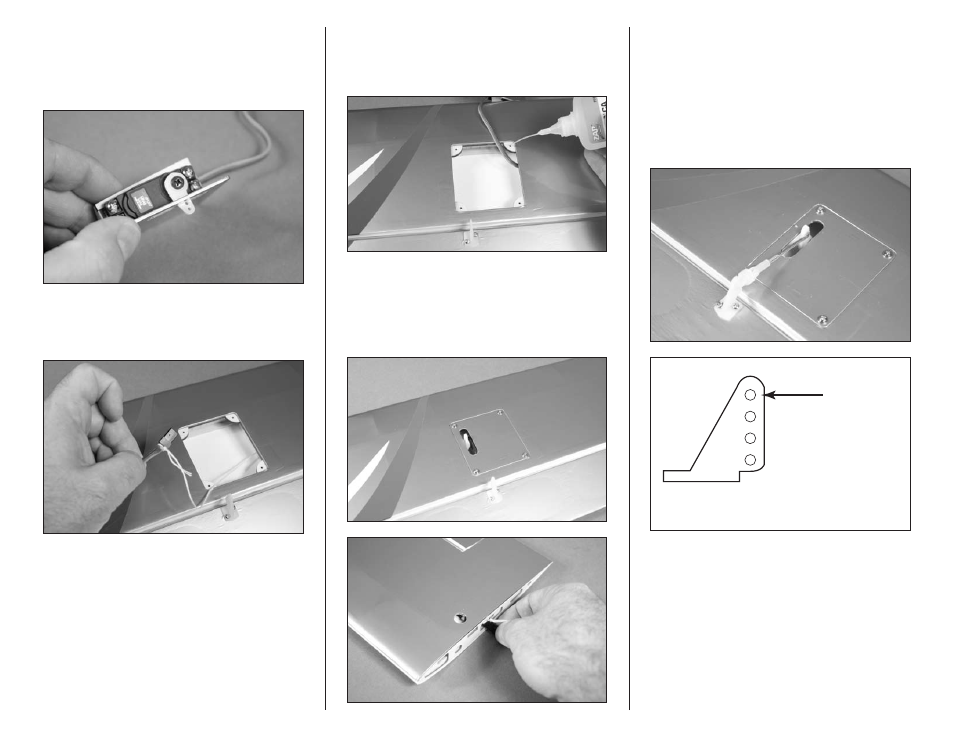
6. Use the radio system to center the aileron servo.
Use the screw from the servo to install the servo
horn on the servo as shown. Use a #1 Phillips
screwdriver to tighten the screw that secures the
servo horn to the servo output.
7. A string is located in the wing to pull the servo
lead through the wing. Tie the string to the end of
the servo lead as shown.
8. Apply 2–3 drops of thin CA in each of the servo
cover mounting holes to harden the surrounding
wood. This will help in preventing the screws from
vibrating loose.
9. Install the servo and cover using four 2mm
x 10mm sheet metal screws and a #1 Phillips
screwdriver. Carefully pull the servo lead through
the wing at this time. Leave the string tied to the
servo lead.
10. Attach the 2-56 x 1
7
/
8
-inch pushrod wire to
the servo horn using the bend in the wire. Slide a
silicone clevis keeper on a clevis. Thread the clevis
on the pushrod wire. With the servo centered,
connect the clevis to the outer hole on the control
horn. Make sure the aileron is centered when the
clevis is connected. Slide the silicone clevis keeper
over the forks of the clevis to keep it from opening
accidentally in flight.
Drawing not to scale
Attach clevis
to outer hole
11. Repeat Steps 1 though 10 to install the
remaining aileron servo.