E-flite Leader 480 User Manual
Page 7
7
E-flite Leader 480 ARF Assembly Manual
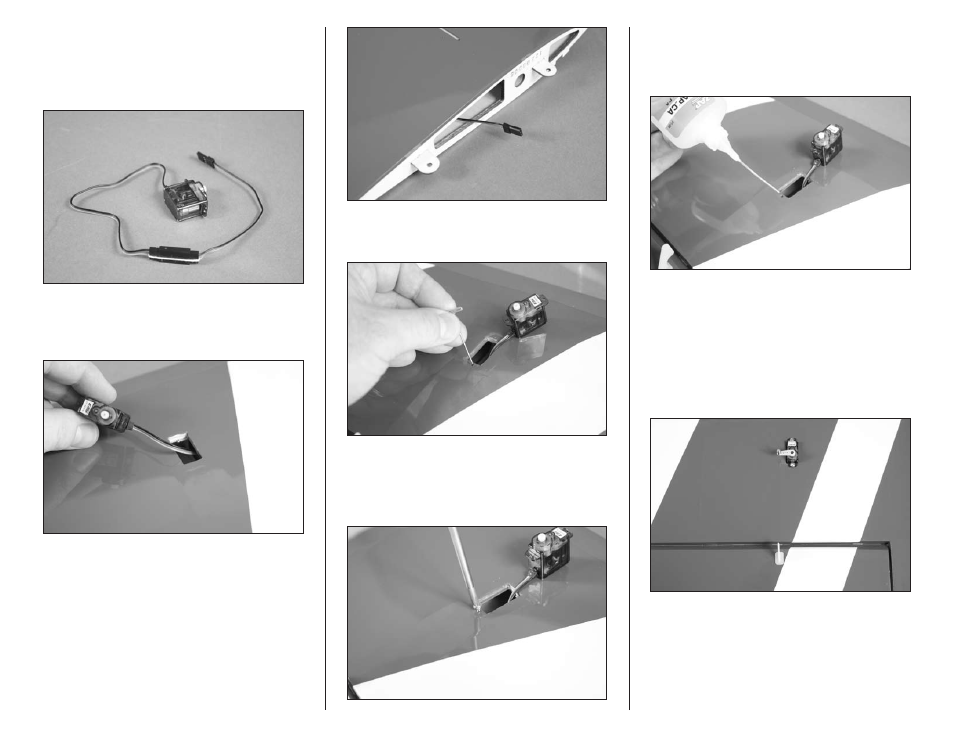
4. Connect a 6-inch (152mm) servo extension to the
servo lead. Use string of dental floss to secure the
leads so they do not accidentally disconnect inside
the wing. Use a #0 Phillips screwdriver to remove the
servo horn from the servo.
5. Insert the servo lead into the wing. Tip the wing
tip up and guide the lead out of the wing at the
wing root.
6. Use a T-pin to puncture the covering, locating the
openings for the servo mounting screws.
7. Use a #1 Phillips screwdriver to thread a servo
mounting screw into each of the holes to cut threads
in the surrounding wood. Remove the screw before
moving to the next step.
8. Apply 2–3 drops of thin CA in each of the holes
to harden the surrounding wood. This will harden
the threads so the screws do not easily strip the
surrounding wood.
9. Secure the servo in the wing using the screws
provided with the servo and a #1 Phillips screwdriver.
The output shaft of the servo faces toward the aileron
as shown. Center the aileron servo using the radio
system. Attach the servo horn prepared in step 3
using the screw removed in step 4 and a #0 Phillips
screwdriver. Note that the servo horn is parallel to the
aileron hinge line.
Note: It may be necessary to trim the servo
opening for the servo used.