Stabilizer installation – E-flite Leader 480 User Manual
Page 17
17
E-flite Leader 480 ARF Assembly Manual
Stabilizer Installation
Required parts
Fuselage assembly Stabilizer
Required Tools and Adhesives
Thin CA
Felt-tipped pen
Ruler
Hobby knife with #11 blade
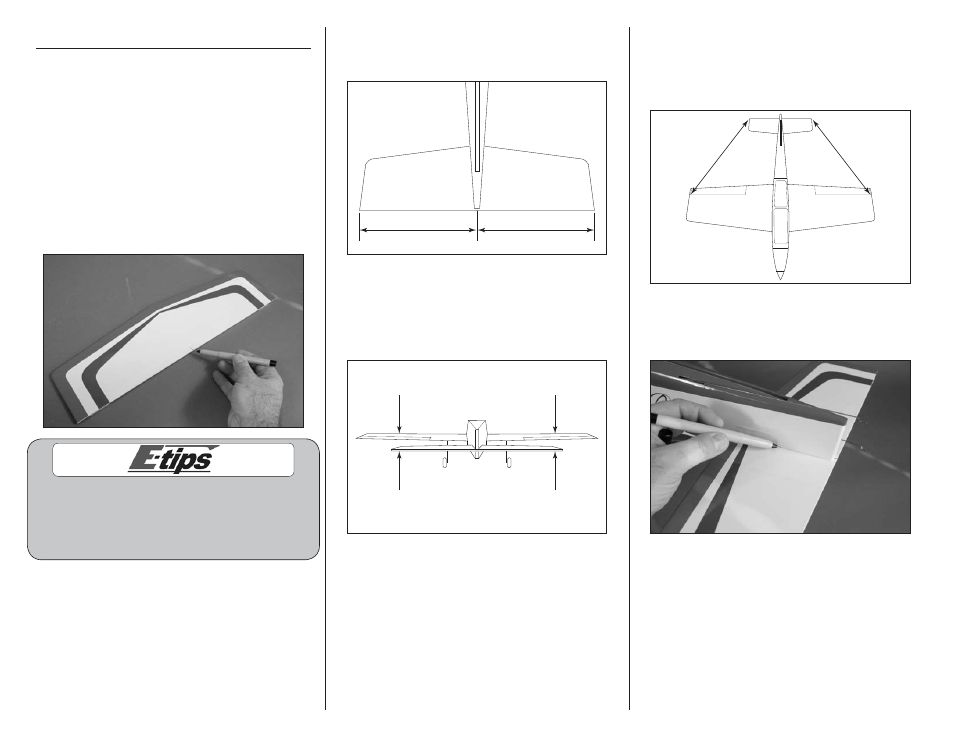
1. Remove the elevator from the stabilizer. Set
the elevator and four CA hinges aside until later.
Use a felt-tipped pen and ruler to mark a center
on the trailing edge of the stabilizer. This will
provide a starting point when checking the
alignment of the stabilizer.
It is important to check the alignment of the
stabilizer in relationship to the wing. Not doing
so may cause your airplane to require excessive
amounts of trim to correct for poor alignment,
resulting in poor flight performance.
2. Measure the distance from each stabilizer tip to
the fuselage centerline to make sure the stabilizer is
centered on the fuselage.
A
A
A=A
3. Stand back 8–10 feet (2–3 meters) and view the
aircraft from the rear. Check the alignment between
the wing and stabilizer. They must be equal distance
on each side as shown. If not, lightly sand the
stabilizer saddle to correct any alignment problems.
Check alignment
4. Measure the distance from each stabilizer tip to
the outside corner of the aileron hinge line. These
measurements must match as close as possible.
Adjust the position of the stabilizer if necessary to
position the stabilizer.
A
A
A=A
5. Once the stabilizer has been aligned to the wing,
use a felt-tipped pen to trace the outline of the
fuselage on the bottom of the stabilizer.