Receiver installation – E-flite Leader 480 User Manual
Page 11
11
E-flite Leader 480 ARF Assembly Manual
Always use threadlock on metal-to-metal fasteners
to prevent them from vibrating loose.
6. Slide the nose gear wire into the bracket and
steering arm. Use a #2 Phillips screwdriver to tighten
the screw in the steering arm on the flat of the nose
gear wire.
Always use threadlock on metal-to-metal fasteners
to prevent them from vibrating loose.
7. Use the radio system to center the rudder servo.
Align the nose gear so the wheel is parallel to the
fuselage centerline. Tighten the screw in the pushrod
connector to secure the pushrod wire. Use side cutters
to trim the excess pushrod wire 1/4-inch (6mm) past
the connector as shown.
When trimming the airplane to track straight on the
ground, the adjustment is made in the linkage for the
nose wheel steering, not with the rudder trim. This will
cause the rudder to become out of trim in the air.
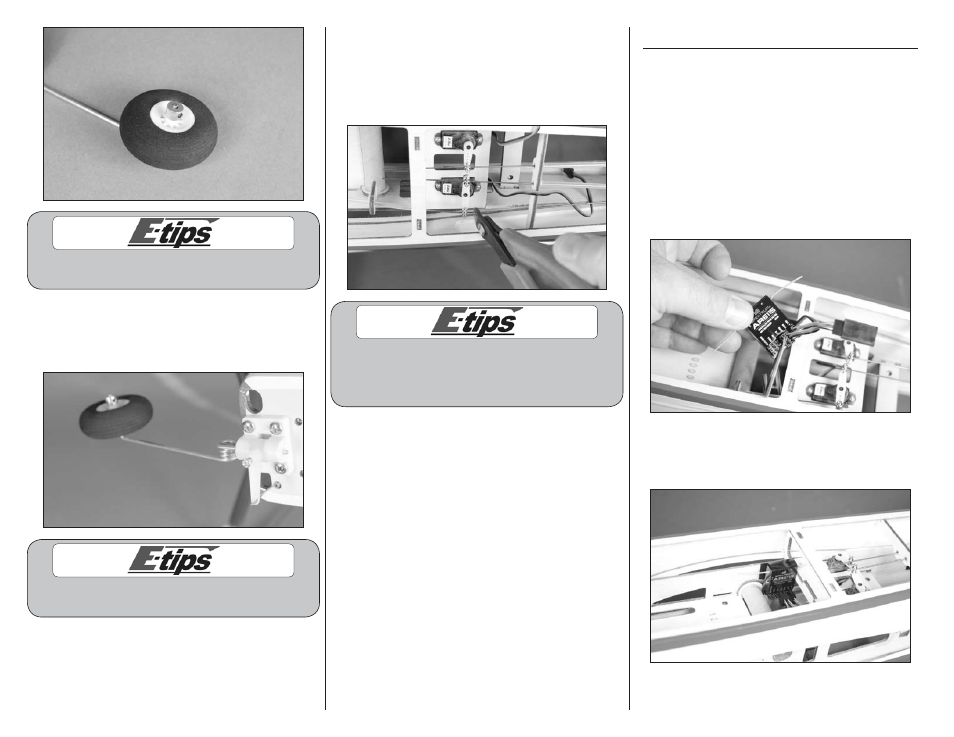
Receiver Installation
Required parts
Fuselage assembly Receiver
3-inch (76mm) servo extension
Hook and loop tape (not included)
Required Tools and Adhesives
Scissors
1. Plug the rudder and elevator servos into the
appropriate ports of the receiver. Also plug a
3-inch (76mm) servo extension into the port for
the left aileron.
2. Use scissors to cut a piece of hook and loop tape
(not included) the size of the receiver. Use the tape to
secure the receiver inside the fuselage.