Propeller removal and installation - bnf/pnp – E-flite Hawker Hurricane 25e PNP User Manual
Page 5
5
E-flite Hurricane 25e PNP/BNF Assembly Manual
EN
THE BATTERY CHARGING PROCESS
1. Charge only batteries that are cool to the touch
and are not damaged. Look at the battery to make
sure it is not damaged e.g., swollen, bent, broken or
punctured.
2. Attach the input cord of the charger to the
appropriate power supply (12V accessory outlet).
3. When the Li-Po charger has been correctly
powered up, there will be an approximate 3-second
delay, then an audible “beep” and the green (ready)
LED will flash.
4. Turn the control on the Amps selector so the arrow
points to the charging rate required for the Battery
(see chart, for example a 3200mAh Li-Po battery
will charge at 3.0 amps). DO NOT change the
charge rate once the battery begins charging.
5. Move the cell selector switch to 2-cell or 3-cell for
your battery.
6. Connect the Balancing Lead of the Battery to the 2-cell
(it has 3 pins) or 3-cell (it has 4 pins) charger port.
7. The green and red LEDs may flash during the
charging process, when the charger is balancing
cells. Balancing prolongs the life of the battery.
8. When the battery is fully charged, there will be
an audible beep for about 3 seconds, and the green
LED will shine continuously.
9. Always unplug the battery from the charger
immediately upon completion of charging.
CAUTION: Overcharging a battery can
cause a fire.
Note: Attempting to charge an over-discharged
battery will cause the charger to repeatedly
flash and beep, indicating an error has
occurred.
CAUTION: Only use a charger
specifically designed to charge a Li-Po battery.
Failure to do so could result in fire causing
injury or property damage.
CAUTION: Never exceed the
recommended charge rate.
LOW VOLTAGE CUTOFF (LVC)
When a Li-Po battery is discharged below 3V per cell,
it will not hold a charge. The ESC protects the flight
battery from over-discharge using Low Voltage Cutoff
(LVC). Before the battery charge decreases too much,
LVC removes power supply from the motor. Power to
the motor pulses, showing that some battery power
is reserved for flight control and safe landing. When
the motor pulses, land the aircraft immediately and
recharge the flight battery. Disconnect and remove
the Li-Po battery from the aircraft after use to prevent
trickle discharge. Fully charge your Li-Po battery before
storing it. During storage make sure battery charge
does not go below 3V per cell.
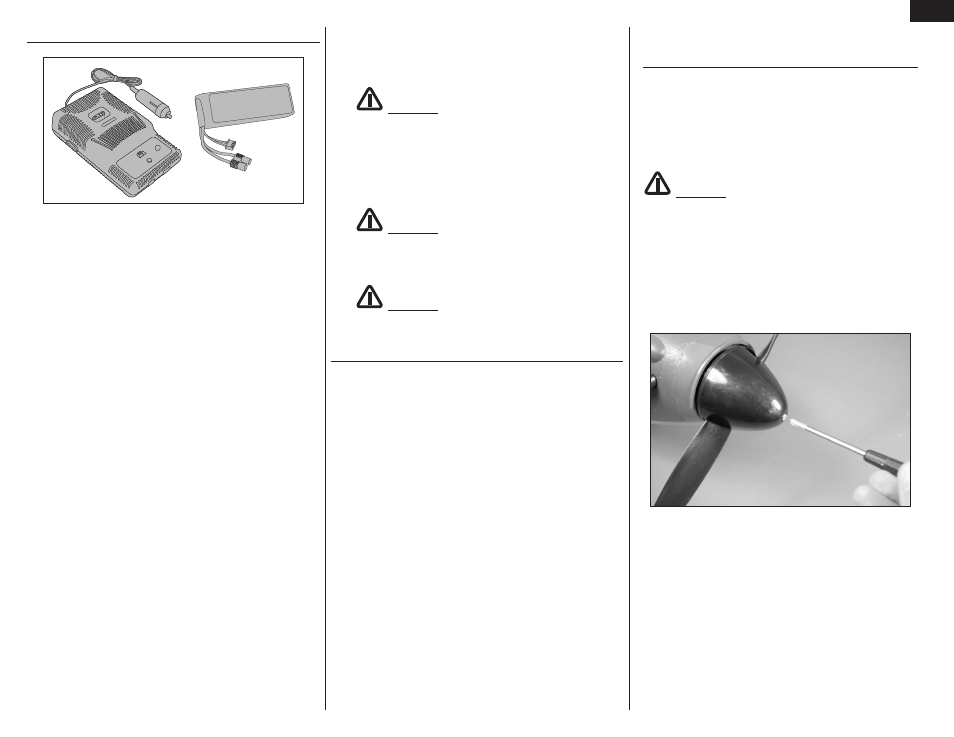
Propeller Removal and Installation -
BNF/PNP
Required Parts
Fuselage assembly
Required Tools and Adhesives
Phillips screwdriver: #1
Open-end wrench: 3/4-inch
CAUTION: We highly recommend removing the
propeller before binding the receiver to make sure the
motor does not start unexpectedly and cause personal
injury. Use this section to replace the propeller if it
becomes damaged and requires replacement.
1. Use a #1 Phillips screwdriver to remove the 3mm
x 8mm machine screw securing the spinner cone to
the propeller nut.