Servicing first and second checks – Watts 994 User Manual
Page 4
4
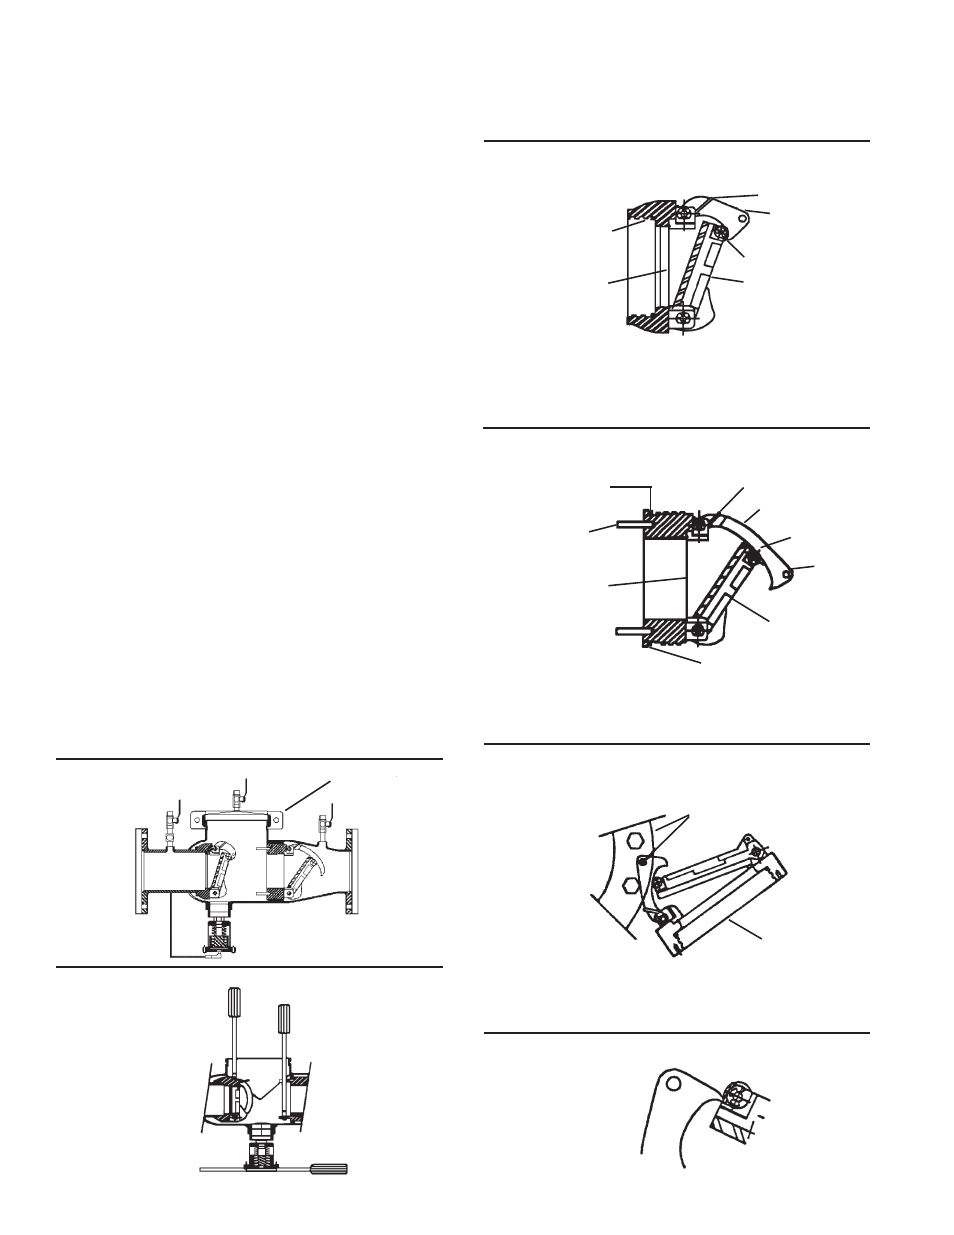
Servicing First and Second Checks
Series 994/994RPDA 4" and 6" (100 – 150mm)
Removing Check Assemblies (Before servicing
be sure shutoff valves are closed)
Figure 3
Figure 2
Figure 4
B
A
C
Screwdriver
#2 Check
#1 Check
#1 Check 2
1
⁄
2"
– 6" (65 – 150mm)
Spring
Cam Arm
Roller
Clapper
Seat
O-ring Seal &
Groove
#2 Check
Spring
Cam Arm
Roller
6” Only
Clapper
O-ring Seal & Groove
Seat
Lug
O-ring Seal & Groove
Figure 5A
6" (150mm)
2nd Check RP
Valve Outlet Flange Threaded
Stud on Flange
Cam Bar Open Pin
Figure 5B
Cleaning Position
1. Slowly open all ball valves to relieve air and water pressure.
Loosen bolts on groove coupler and remove groove couple
and cover plate from valve body.
2. Remove #1 Check Assembly by using your hands to un screw
(turn counterclockwise) Check and remove through top access
port. Do not use Check Arm as a handle to unscrew. If Check
can not be loosened by hand, insert a long screwdriver between
valve body and Check
(see figure 2). Gently apply pressure
against the Check until loos ened. Fin ish unscrewing by hand. Un-
screw #2 Check (turn counter-clock wise) by placing along screw-
driv er across lugs and applying pres sure to loosen #2 Check.
Fin ish un screw ing by hand.
3. To clean #1 Check 6" (150mm) only, locate the Check Arm
opening stud on the outlet flange of the valve assembly. Slide the
Check Arm over the stud with the check threads facing down-
ward
(figure 5A). Tighten
1
/
4
" (8mm) nut on stud to secure cam
bar. Slowly pull the assembly outward to open check allowing ex-
posure of the seat clapper area for clean ing. To clean #2 Check,
lift Cam Arm and hold in open po si tion. Raise clapper so that the
end of the Check Arm rests between roller and clapper
(fig ure
5B). Thoroughly clean the seat area and clapper sealing sur fac es
of both Checks. In spect seats, clap per sealing surfaces, Check
Arms, and O-rings for damage, nicks, and debris. If not dam-
aged, gently close the clap per. If damaged, install a new Check
assembly and/or O-ring.
4. Before reinstallation of Checks, thoroughly clean O-ring groove
and lubricate O-ring with FDA approved lubricant. Insert and
thread #2 Check first and then #1 Check. #2 Check should be
tightened by in sert ing a long screwdriver between lugs to tighten
firm ly
(see fig ure 2). Do not over tighten. Tighten #1 Check firmly
by hand only. Replace cover plate, clean groove coupler gas ket
and groove. Replace groove coupler. Repres-surize and bleed air
from all test cocks.
Figure 1
7
Note: See page 6 for additional 1
st
check servicing