Watts TK-DL User Manual
Page 3
3
Test No. 1 - Differential Test
Make sure that the test kit is at the same elevation as the device
being tested.
1. Remove the two screws from hood and remove hood so that
vent is visible.
2. Turn test kit on, wait until self check is complete.
3. Connect hose from test cock to VA HIGH.
4. Open test cock, then VA, (VB LOW should be opened and
remain open through the test). Bleed hose and test kit of air,
when bleeding hose fill vent with water, shut off VA.
5. Close #2 shutoff, then close #1 shutoff.
6. Press
PRINT HEADER button. Wait until header stops print-
ing. Press
START TEST RESUME button.
7. Slowly unscrew bleed screw on SVB (about three turns).
8. When dripping from bleed screw stops, and gauge reading
settles, this is the check differential. This must be 1 PSI or
greater.
9. Press
PAUSE STOP button.
Test No. 2 - Air Inlet (Vent Opening)
10. Press
START TEST RESUME.
11. Slowly open VA and watch vent, with finger over
DISPLAY
HOLD button. When the water level above the vent starts to
drop this is the vent opening press
DISPLAY HOLD button.
This will record the vent opening point. This value must be 1
PSI or greater.
12. Visually inspect vent to ensure that vent goes to full open
position when the pressure is at zero.
13. Press
PAUSE STOP TEST button twice.
14. Tighten bleed screw, close test cock and reinstall hood, open
shutoff #1, open shutoff #2, remove hose. Testing is com-
plete.
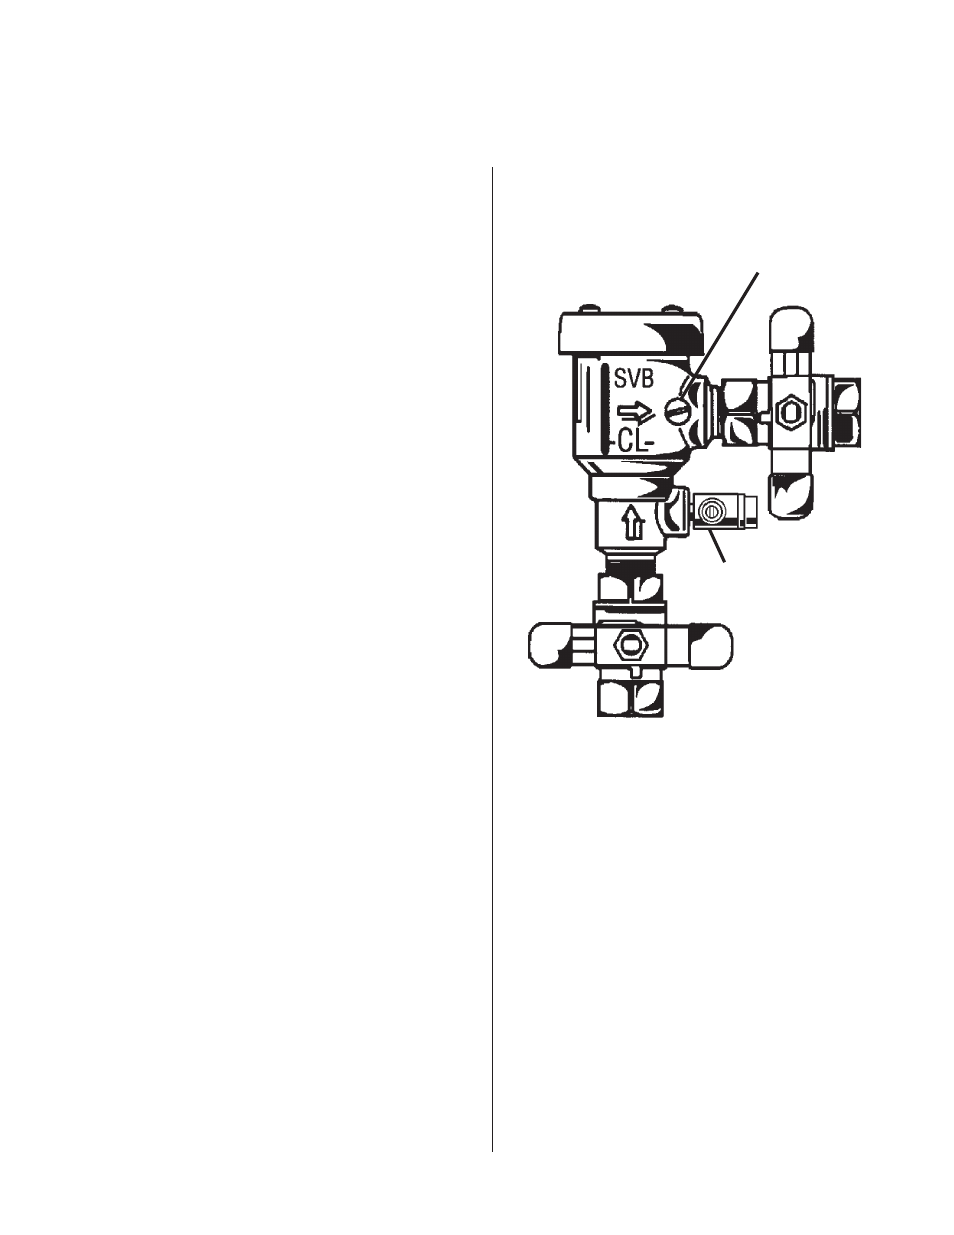
LF008PCQT
Bleed Screw
Test Cock
Test Procedure for Anti-spill, Anti-siphon Vacuum Breaker (SVB)