Ba j b, Fris19-41 – Hinkley Lighting AVA FR42873VBZ User Manual
Page 2
HANGING INSTRUCTIONS
FRIS19-41
SAFETY WARNING:
Read wiring and grounding instructions [FRIS 18]
and any additional directions. Turn power supply off during installation. If new wiring
is required, consult a qualified electrician or local authorities for code requirements.
STEP 1
1
Shut off electrical current before starting. If the fixture you are replacing is
turned on and off by a wall switch, simply turn the switch off. If not, remove the
appropriate fuse (or open the circuit breakers) until the fixture is dead.
• DO NOT restore current - either by fuse, breaker or switch - until the new
fixture is completely wired and in place.
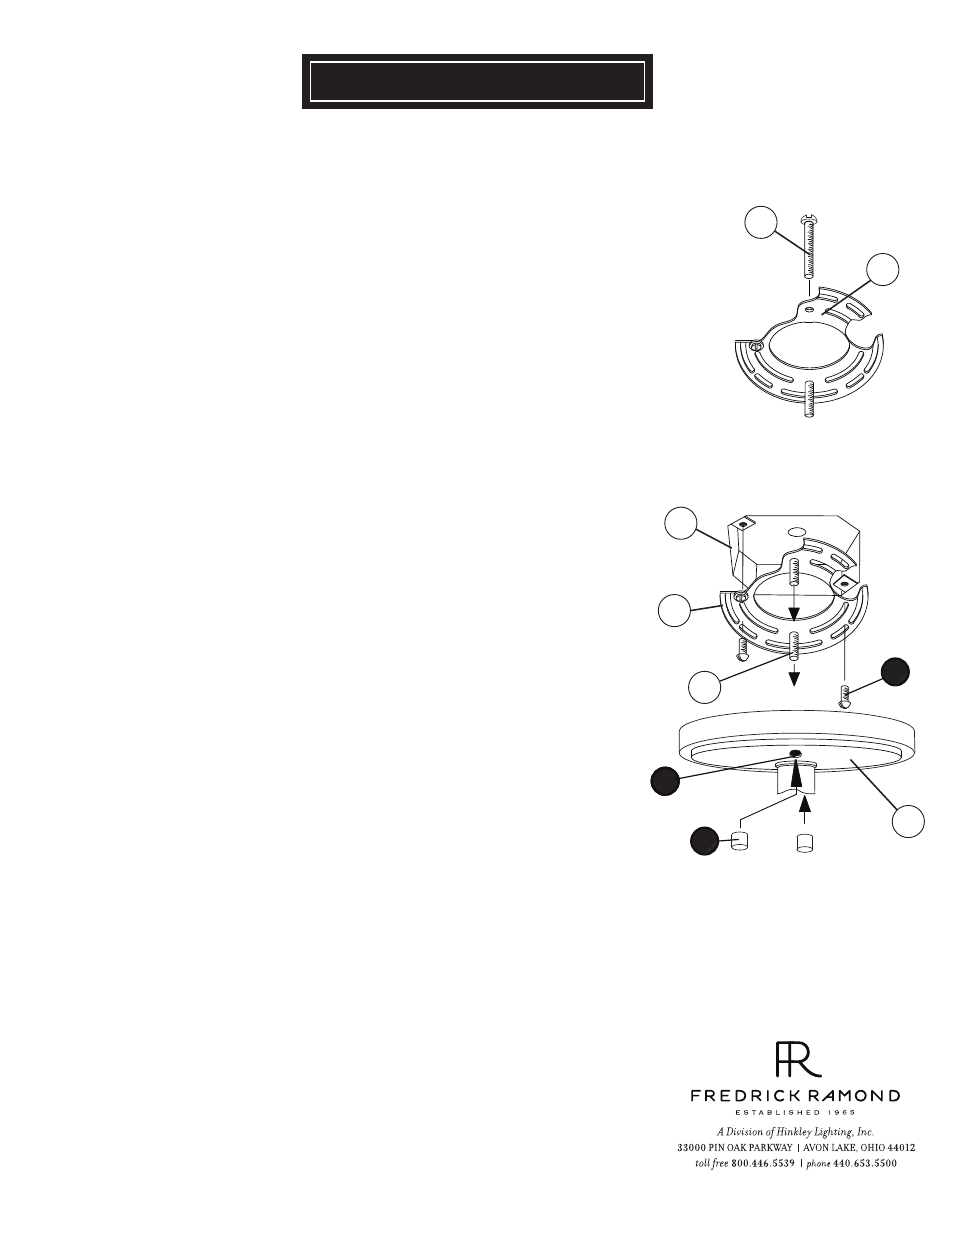
STEP 2
[DRAWING 2]
01.01.13
2223
4
1 Prepare mounting strap (a) by threading screws (b) into appropriately threaded hole
(h) - see Drawing 1. Make sure spacing of screws matches spacing of mounting holes
(3) in Canopy (c) -see Drawing 2.
2 Install mounting strap (a) to junction box (j), with two 8-32 screws (1) - see Drawing 2.
1 To mount fixture to ceiling , slip screws (b) in mounting strap (a) through
holes (3) in canopy (c) - see Drawing 2.
2 Hold canopy (c) up to ceiling and thread deocrative knobs (4) onto end of
screws (b) and tighten to secure fixture to ceiling.
3 Return to previous instruction sheet to complete fixture assembly.
c
[DRAWING 1]
STEP 3
Make electrical connections from supply wire to fixture lead wires. Refer to
instruction sheet [FRIS18] and follow all instructions to make all necessary
wiring connections. Then refer back to this sheet to continue installation of
this fixture.
STEP 4
a
1
b
a
j
b