Hinkley Lighting CARABEL FR44625BCH User Manual
Carabel
FR44625BCH
CARABEL
ASSEMBLY INSTRUCTIONS
Assembly of this fixture will be accomplished by first assembling the main body,
installing the mounting hardware to the junction box, making all necessary electrical
connections and then hanging the fixture.
SAFETY WARNING:
Read wiring and grounding instructions [FRIS 18]
and any additional directions. Turn power supply off during installation. If new wiring
is required, consult a qualified electrician or local authorities for code requirements.
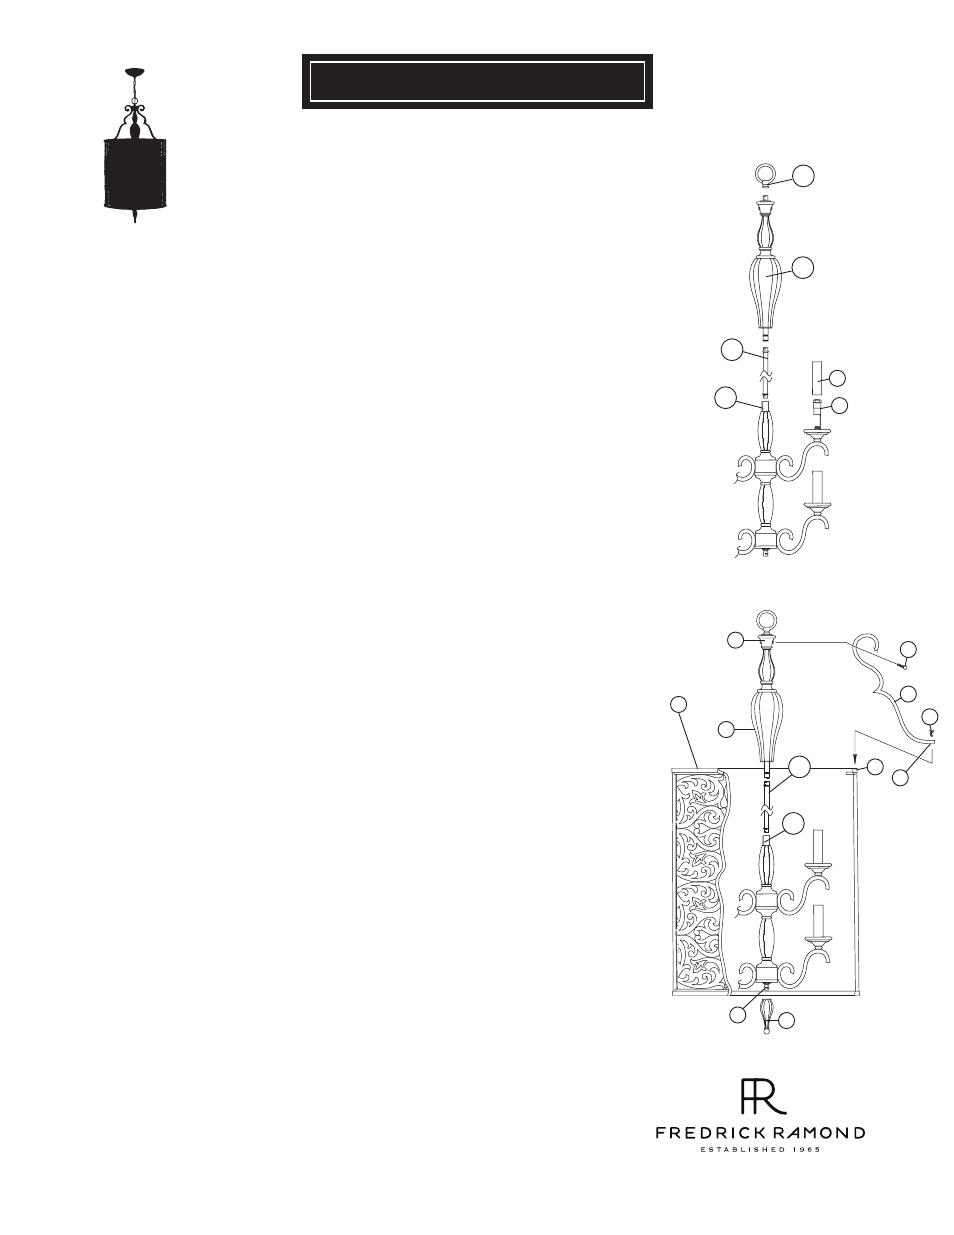
STEP 2
See Drawing 2.
1
Remove ball knobs with studs (3) from top of center column (4) .
2
Attached top of the scroll arms (5) to the center column assembly (4), using ball
knob and studs (3) .
3
Remove screw (6) from tabs (e) located at the top of cage assembly (2)
.
4
Slip center column (4) with attached scrolls (5) into cage assembly (2) , aligning
the holes (d) in the end of the scrolls, with the holes (e) located on tabs in the
cage assembly (2).
5
Slip screws (6) through the hole (d) in the end of scroll (5) and thread into tab
(e), repeat for remaining scrolls, center column (4) is now secured to the cage (2)
6
Thread bottom finial (7) onto threaded stem (f) located at the bottom of the fixture.
7
fixture can now be lamped accordingly.
STEP 2
Refer to Hanging Instruction Sheet [FRIS19] to hang fixture.
[DRAWING 2]
Bulbs:
60W CAND.
12.1.09
800.421.3517 WWW.FREDRICKRAMOND.COM
4
3
5
e
7
1
2
6
[DRAWING 1]
STEP 1
Slip center stem (1b) along wire and thread into coupler (a1).
Slip decorative upper column (2b) along wire and thread onto end
of center stem (1b).
Slip loop (3b) along wire and thread onto top of decorative
upper column (2b).
Slip candle sleeve (c) over socket (s). Center column is complete, please proceed
to STEP 2.
1
2
3
1b
1a
2b
3b
1a
1b
d
f
c
s
4