Start here, I.s.19-91, Hanging instructions – Hinkley Lighting HARLOW 4218PN User Manual
Page 2
H I N K L E Y L I G H T I N G
12600 Berea Road Cleveland, OH 44111 800.446.5539 / 216.671.3300 www.hinkleylighting.com
1. Shut off electrical current before starting. If the fixture you are replacing is
turned on and off by a wall switch, simply turn the switch off. If not, remove
the appropriate fuse (or open the circut breakers) until the fixture is dead.
• DO NOT restore current - either by fuse, breaker or switch - until the new
fixture is completely wired and in place.
start here
SAFETY WARNING: READ WIRING AND GROUNDING INSTRUCTIONS (I.S. 18)
AND ANY ADDITIONAL DIRECTIONS. TURN POWER SUPPLY OFF DURING
INSTALLATION. IF NEW WIRING IS REQUIRED, CONSULT A QUALIFIED
ELECTRICIAN OR LOCAL AUTHORITIES FOR CODE REQUIREMENTS.
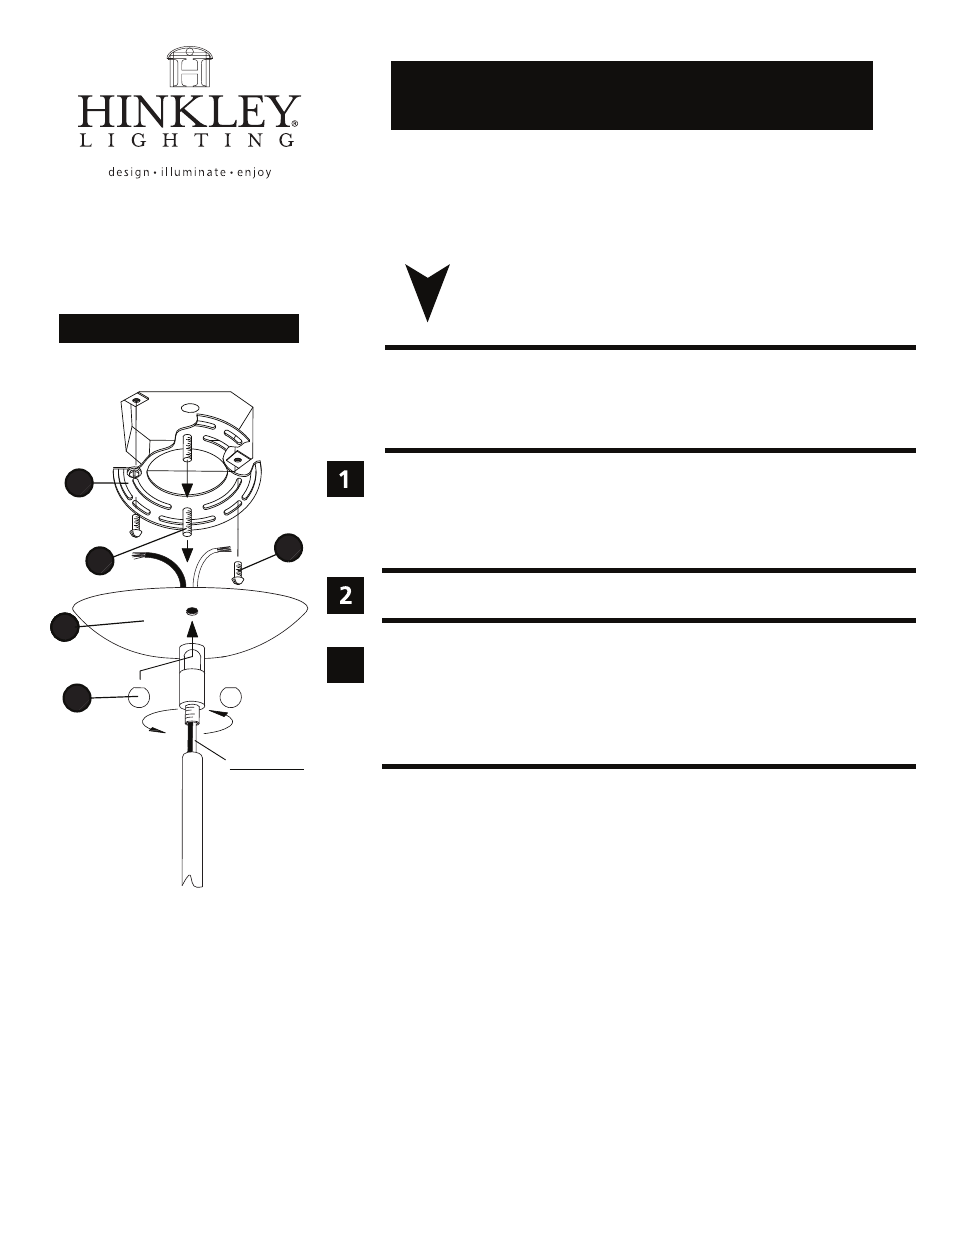
1. Thread two long 8-32 (1) screws provided into the mounting strap (2).
Note: the two screws should be threaded into holes that line up with the holes
(3) - see Drawing 2.
2. Attach mount strap (2) to junction box with two short 8-32 screws (5) .
3. Make wire connections following the instructions on (I.S.18) instruction sheet
provided.
4. Slip canopy/fixture over screws (1) and secure fixture with ball knobs (4).
Drawing 2 - Mounting instructions
I.S.19-91
hanging instructions
I.S
. 19-91
3
2223
4
2
1
in the canopy
5
1. Slip canopy assembly with swivel (3) along wire and thread onto top of rods
that are attached to fixture.
01.01.12
supply wire