Hinkley, Start here, Commencez ici – Hinkley Lighting ATRIUM 3274BZ User Manual
Page 2: Empezar aquí, Assembly instructions, Les instructions d’assemblage, Instrucciones de montaje
start here
commencez ici
empezar aquí
Assembly Instructions
Item No. 3275
Les Instructions D’assemblage
Numéro d’article: 3275
Instrucciones De Montaje
Número del artículo: 3275
L I G H T I N G
HINKLEY
english
spanish
french
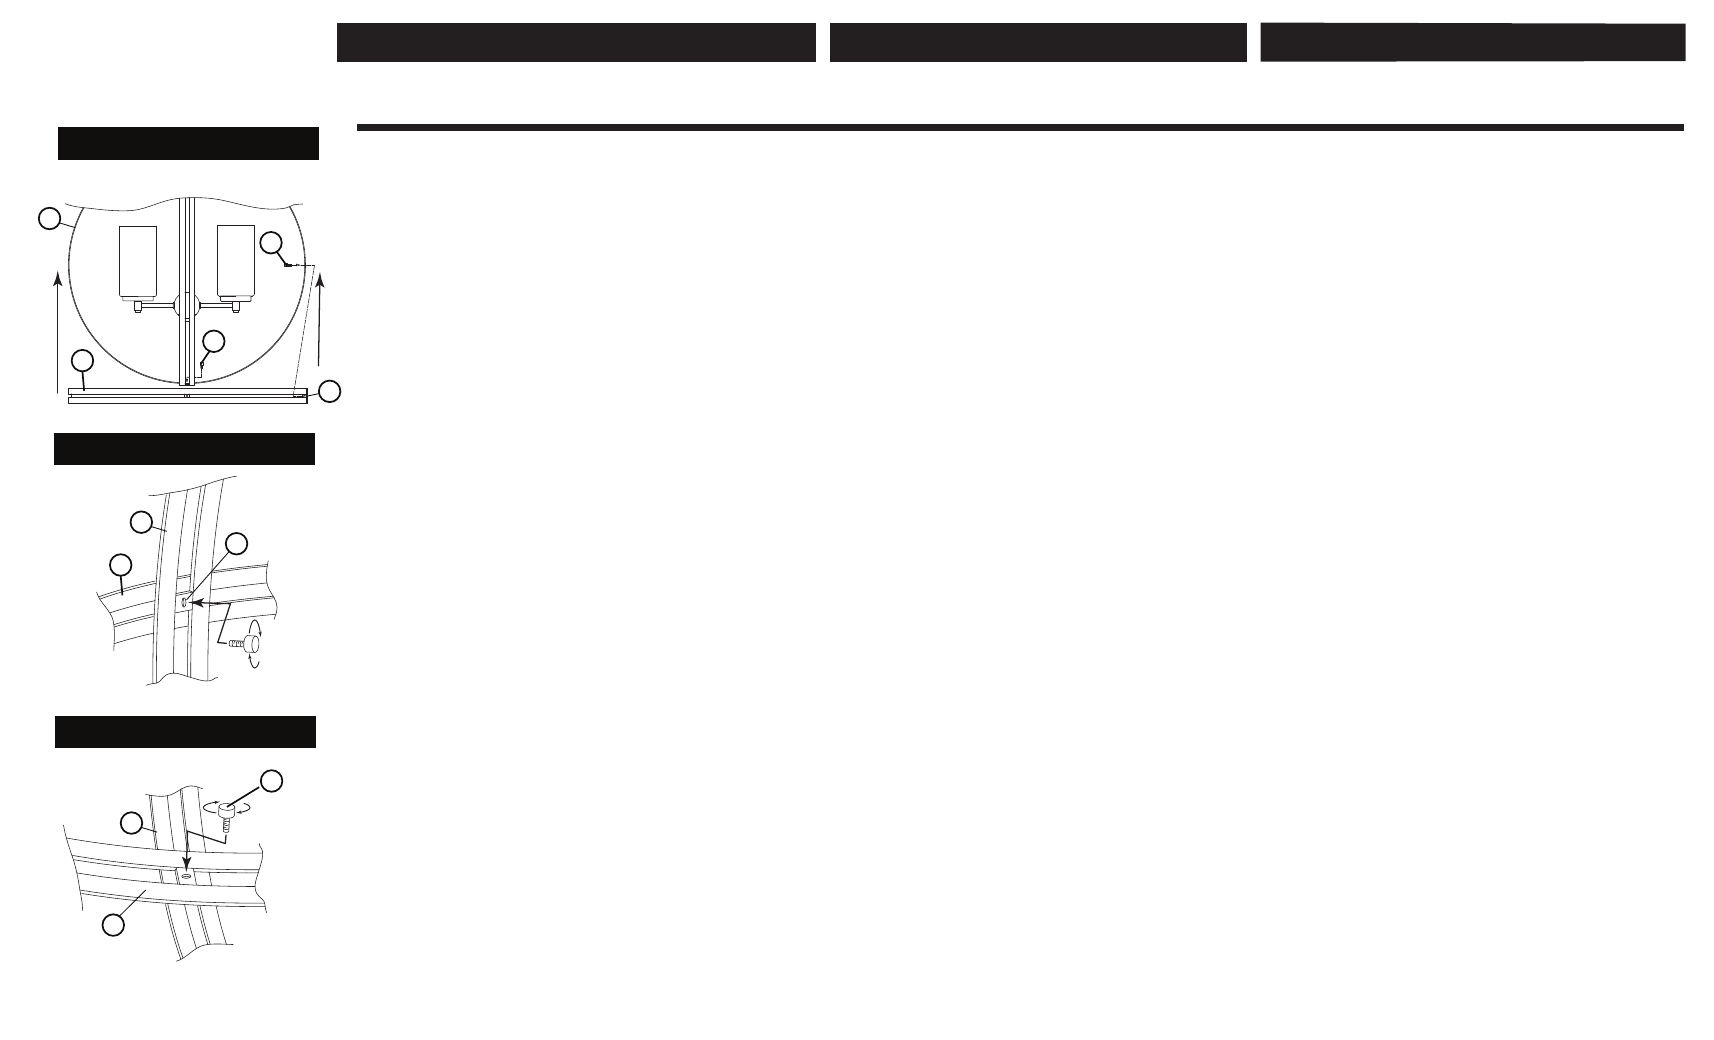
Drawing 1 - Ring Assembly
Drawing 2 - Ring Assembly
Drawing 3 - Ring Assembly
VR
HR
BK
HR
VR
HH
VH
BK
BK
VR
VR
PAGE 2
1. To complete assembly of this fixture, carefully horizontal ring (HR) over
outside of vertical rings (VR) of fixture - see Drawing 1.
2. Align the holes (VH) in the vertical ring with the holes (HH) located on
at the mid line of the horizontal ring (HR) - see Drawing 1 and 2.
3. Now while holding ring (VR) in position, slip barrel knob with studs (BK)
through hole (VH) in vertical ring (VR), and thread stud into threaded hole
(HH) of horizontal ring, and tighten to secure.
4. To complete assembly align holes at the bottom of vertical rings (VR) and
thread in barrel knob with stud (BK) to secure vertical rings (VR).
5. Fixture is complete and can be lamped accordingly.
1. Para completar el montaje de este accesorio, anillo cuidadosamente
horizontal (HR) durante exterior de los anillos verticales (VR) de fijación
- ver dibujo 1.
2. Alinear los orificios (VH) en el anillo vertical con los orificios (HH) situado
en en la línea media del anillo horizontal (HR) - ver Dibujo 1 y 2.
3. Ahora mientras que la celebración de anillo (VR) en posición, perilla
barril deslizamiento con espárragos (BK) a través del orificio (VH) en el
anillo vertical (VR), y el perno de rosca en el orificio roscado (HH) de anillo
horizontal, y apriete para asegurar.
4. Para completar el montaje alinear los agujeros en la parte inferior de los
anillos verticales (VR) y enrosque la perilla de cañón con espárrago (BK)
para fijar los anillos verticales (VR).
5. Aparato está completa y se puede lamped en consecuencia.
1. Pour terminer l'assemblage de ce luminaire, anneau soigneusement
horizontale (HR) sur en dehors d'anneaux verticaux (VR) de fixation
- voir schéma 1.
2. Aligner les trous (VH) dans l'anneau vertical avec les trous (HH) se trouvant
sur à la ligne médiane de l'anneau horizontal (HR) - voir schéma 1 et 2.
3. Or, tandis que la bague de maintien (VR) en position, glisser le bouton de
canon avec des clous (BK) à travers le trou (VH) dans l'anneau vertical (VR),
et le fil goujon dans le trou fileté (HH) de l'anneau horizontal, et serrer.
4. Pour terminer l'assemblage aligner les trous dans le bas de bagues verticales
(VR) et fil en bouton de canon avec le goujon (BK) pour fixer les anneaux
verticaux (VR).
5. Luminaire est complet et peut être lamped conséquence.