Hinkley Lighting OMNI FR47209PNI User Manual
Page 2
FRIS19-81
SAFETY WARNING:
Read wiring and grounding instructions [FRIS 18]
and any additional directions. Turn power supply off during installation. If new wiring
is required, consult a qualified electrician or local authorities for code requirements.
STEP 1
1.
Shut off electrical current before starting. If the fixture you are replacing is
turned on and off by a wall switch, simply turn the switch off. If not, remove
the appropriate fuse (or open the circut breakers) until the fixture is dead.
DO NOT restore current - either by fuse, breaker or switch - until the new
fixture is completely wired and in place.
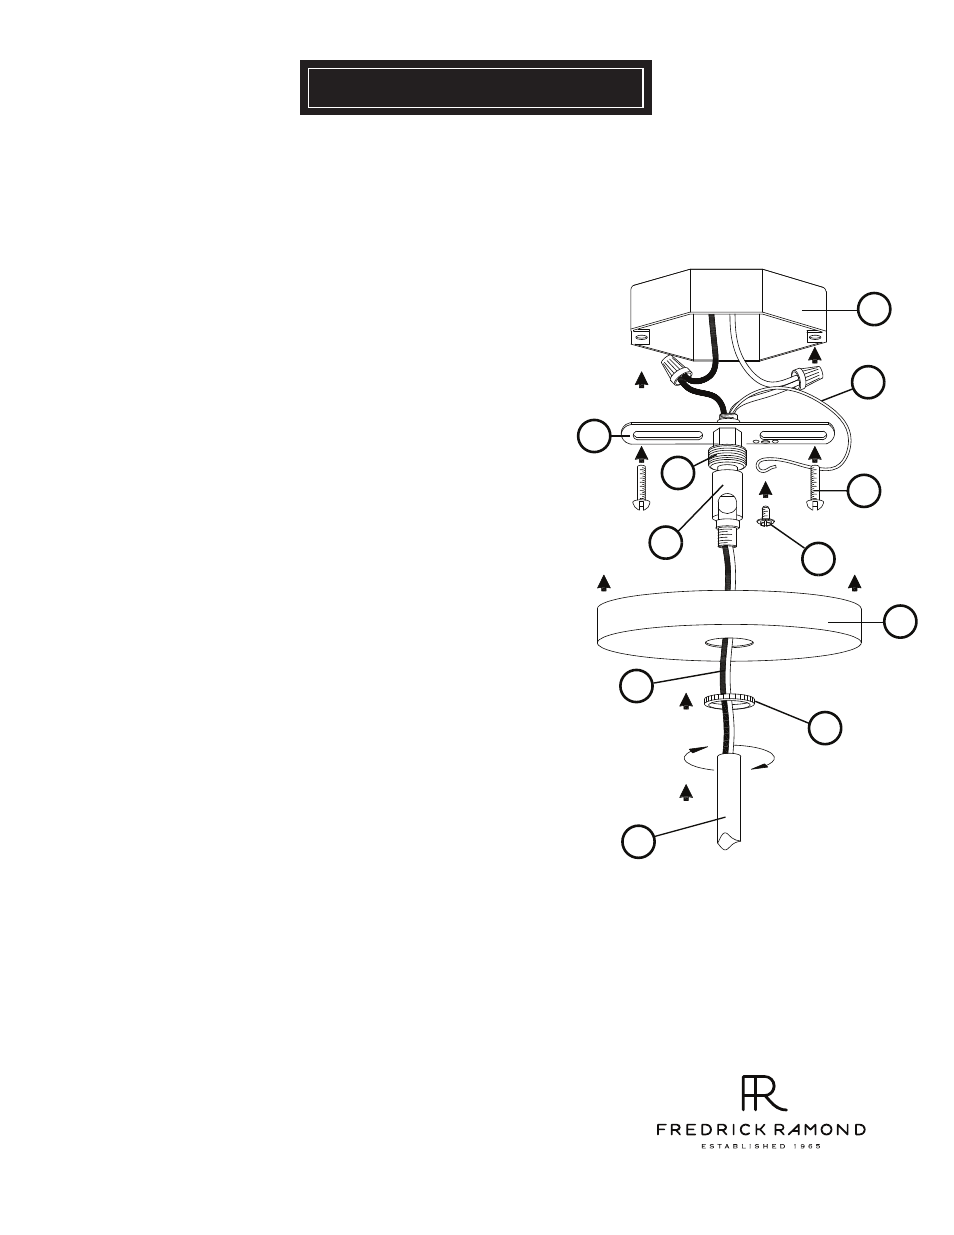
STEP 2
1. In the following order : take retainer ring (L) , canopy (H) and
slide them over the stems (R) attached previously.
2. Thread supply wires (S) through center of swivel (E) that is
attached to mounting strap (A).
3. Slide swivel with mounting strap along wire and thread end of
swivel into top of stems (R).
4. Lift fixture and attach mounting strap (A) to junction box (C)
using 2-8/32 screws (B).
5. Make all necessary electrical connections following instruction
sheet (IS-18) provided. Ground wire (D) can be attached to
mounting strap (A) using green ground screw (G).
6. Slip canopy (H) up along rods (R) and over mounting strap with
swivel and hold in position.
7. Slip retainer ring (I) up to canopy and thread onto coupler (F), to
secure canopy.
8. Return to assembly instructions to complete fixture construciton.
6.12.08
800.421.3517 WWW.FREDRICKRAMOND.COM
H
I
R
A
B
C
G
E
F
D
S