Element wiper contact adjustment, Figure 16 adjust element contact up and down, Figure 17 adjust element contact in and out – Bird Technologies 4391A User Manual
Page 32
20
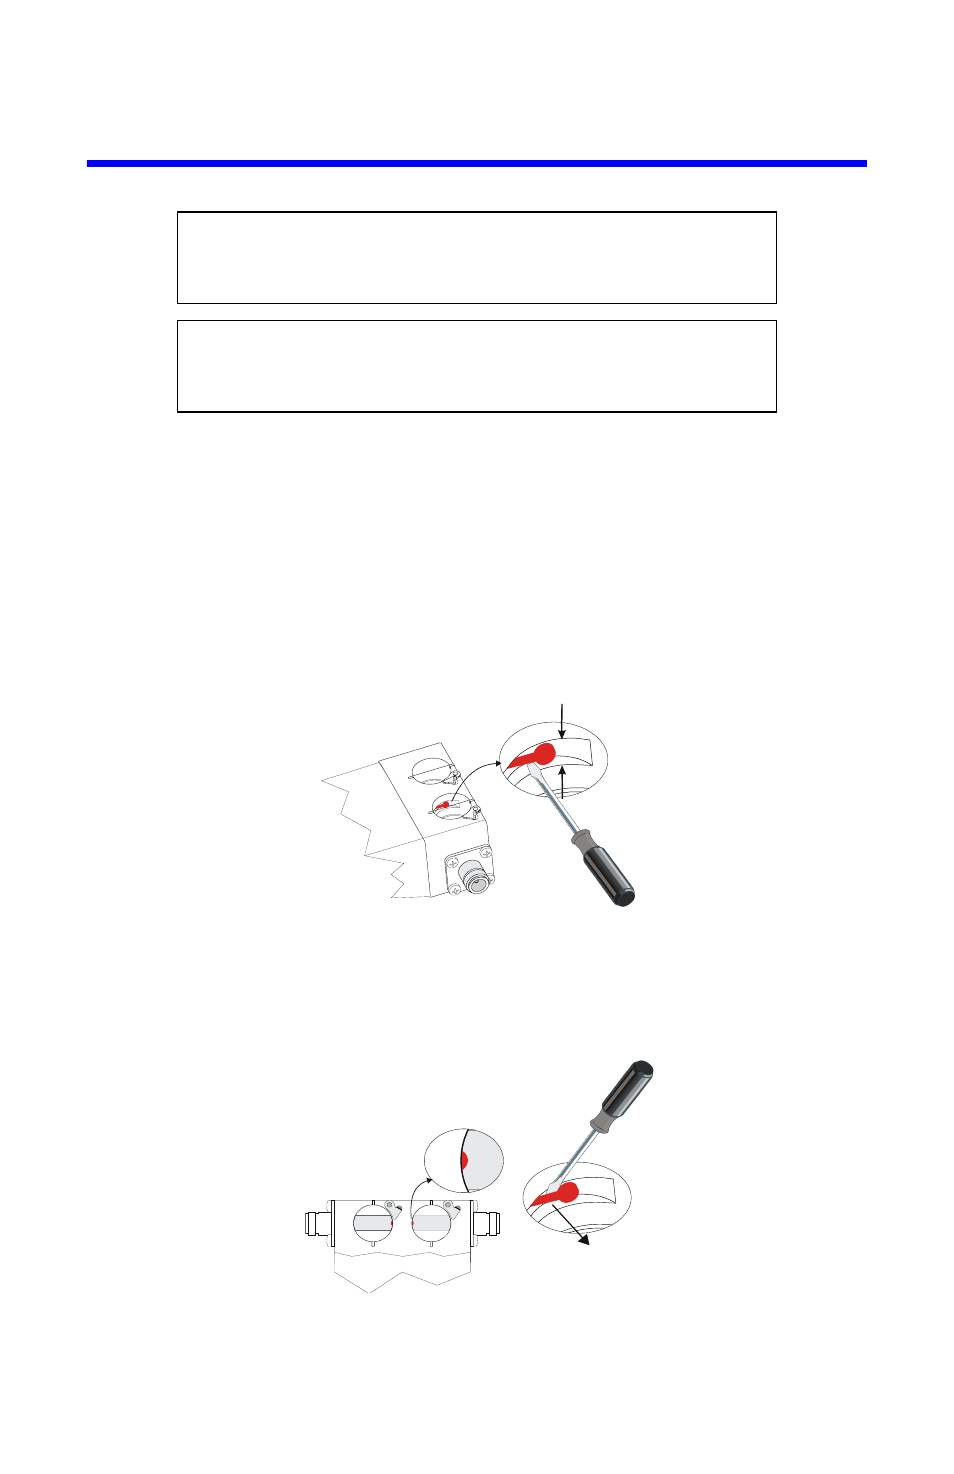
Element Wiper Contact Adjustment
Note: Continuous insertion or rotation of the element might cause a
slight change in the position of the contact spring in the element
socket. If the contact spring changes position, you might experience
erratic power readings.
1.
Place the flat side of a small flat head screwdriver behind the contact bar as
indicated.
2.
Bend the contact bar so that the contact rests in the center of the slot adja-
cent to the element socket (Figure 16).
Figure 16 Adjust Element Contact Up and Down
3.
Bend the contact slightly toward the center of the element socket bore.
Note: Ensure the profile of the element contact is visible when viewing
the element socket from the top of the socket bore (Figure 17).
Figure 17 Adjust Element Contact In and Out
Note: If the contact is accidently moved too far into the element
bore, the element will not slide into the socket.
4.
Move the contact back into the recessed area and repeat the process.
CAUTION
If the element cannot be fully inserted into the socket, do not
force it. You might damage the element.
CAUTION
Be careful not to bend the spring out so far that it interferes
with insertion of the elements.