Module status led’s – Rockwell Automation 1771-DB Basic Module User Manual - Series A User Manual
Page 20
Installing the BASIC Module
Chapter 3
3–6
When the ACTIVE LED comes on observe the sign-on message displayed
on the terminal followed by
tREADY.
You are now ready to begin BASIC programming. Refer to Chapter 6 for
an example program to help you get your processor and BASIC Module
communicating properly.
Important: If you break communications with the module check that the
terminal is set at the proper baud rate.
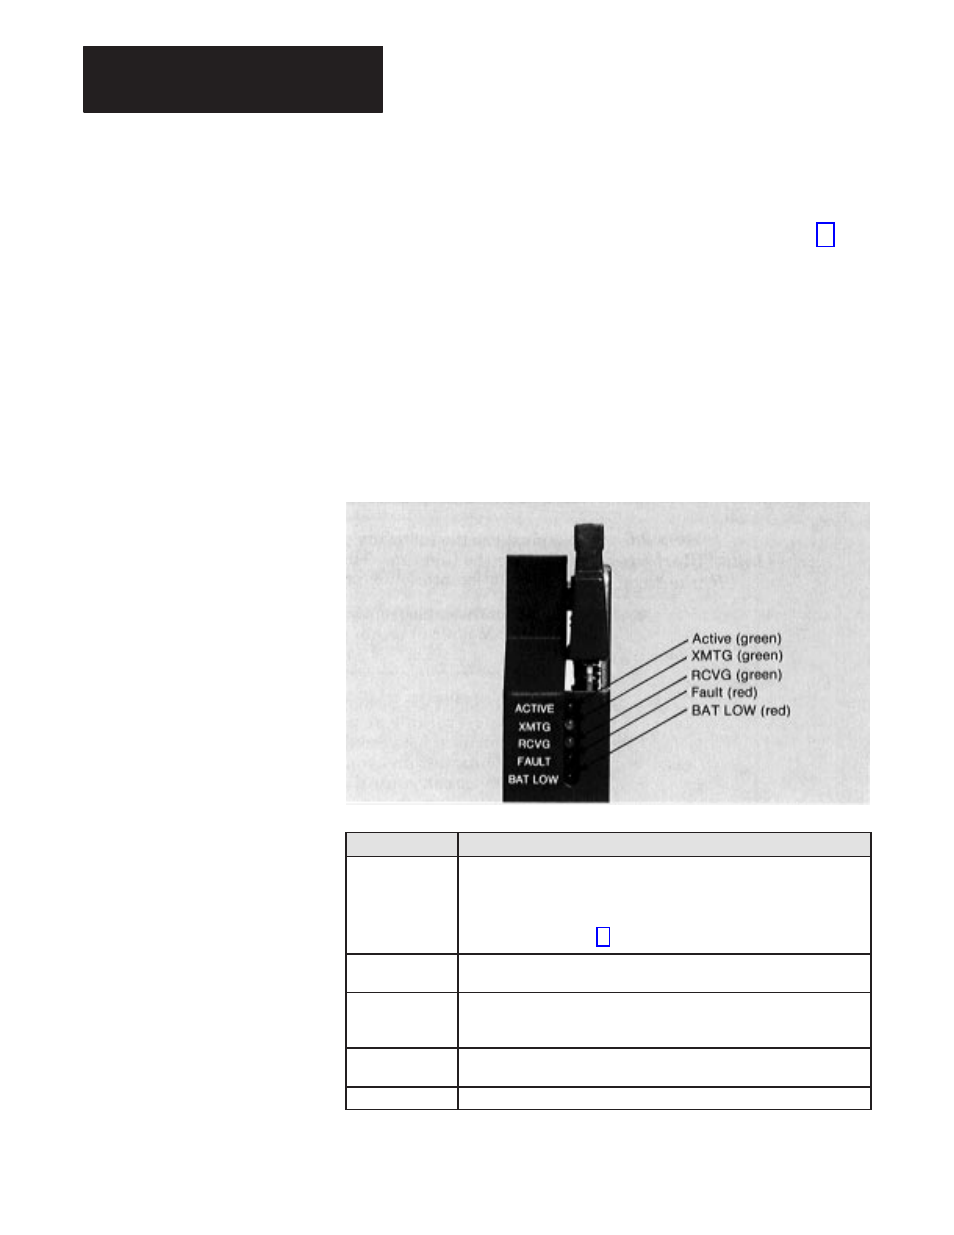
There are five LED’s (figure 3.3) on the front panel of the module which
indicate the status of the module.
Figure 3.3
Module Status Indicators
LED
Description
ACTIVE (green)
Indicates the module has passed power-up diagnostics. You can program
using CALL 79 to:
G
remain on (default).
G
remain on in RUN mode and blink every second when in COMMAND
mode. Refer to Chapter 5 for an explanation of CALL 79.
XMTG (green)
ON when data is transmitting on the peripheral port. Lights for either RS-422
or RS-423/RS-232C output.
RCVG (green)
ON when data is transmitting on the peripheral port. Lights for either RS-422
or RS-423/RS-232C input. This LED does not indicate whether or not valid
data was received.
FAULT (red)
When LED is on, indicates either a hardware problem or block-transfer
problem. See below.
BAT LOW (red)
Lights when the battery voltage drops below about 3.0V DC.
3.2.6
Initial Start-up Procedure
(continued)
3.3
Module Status LED’s