Install the 24v dc expansion power supply – Rockwell Automation 1738-EP24DC ArmorPoint I/O 24V dc Expansion Power Supply User Manual
Page 5
Publication 1738-IN020A-EN-E - June 2004
ArmorPoint I/O 24V dc Expansion Power Supply, Series A 5
Install the mounting base as follows:
1. Lay out the required points as shown above in the drilling
dimension drawing.
2. Drill the necessary holes for #8 (M4) machine or self-tapping
screws.
3. Mount the base using #8 (M4) screws.
4. Ground the system using the ground lug connection. (The
ground lug connection is also a mounting hole.)
Install the 24V dc
Expansion Power Supply
To install the power supply, proceed as follows.
1. Using a bladed screwdriver, rotate the keyswitch on the
mounting base clockwise until the number 1 aligns with the
notch in the base.
2. Position the power supply vertically above the mounting base.
3. Push the power supply down until it engages the orange
latching mechanism. You will hear a clicking sound when the
power supply is properly engaged.
The locking mechanism will lock the power supply to the base.
To remove the power supply from the mounting base:
1. Put a flat blade screwdriver into the slot of the orange latching
mechanism.
2. Push the screwdriver toward the I/O module to disengage the
latch.
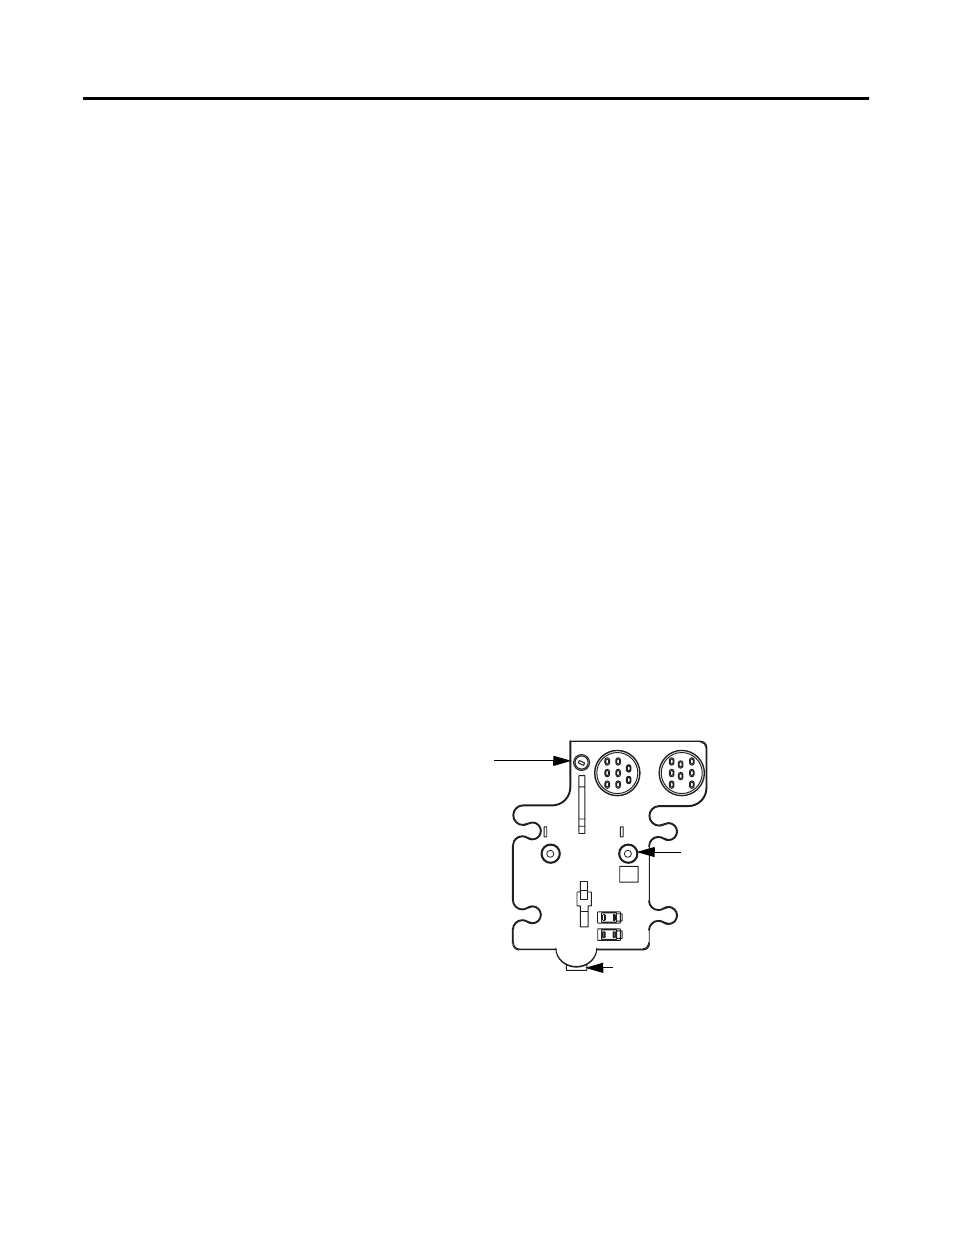
Ground lug connection
Latching mechanism
Mounting base
43675
Keyswitch-
Set to position 1
for the 1738 24V
dc expansion
power supply