Set the node address – Rockwell Automation 1756-DNB ControlLogix DeviceNet Scanner Module Installation Instructions User Manual
Page 13
ControlLogix DeviceNet Scanner Module 13
Publication
1756-IN566D-EN-P - June 2008
5. In the Data Rate field, select the communication (data) rate.
6. Click Apply.
7. Cycle power to the 1756-DNB scanner module.
Set the Node Address
The 1756-DNB scanner module supports DeviceNet node addresses 00...63.
The factory default setting is node address 63.
Change the node address by setting the rotary switches or commissioning the
1756-DNB scanner module in RSNetWorx for DeviceNet software.
Use the switches to select any network address from 00 through 63. When
the switches are set outside of this range (except for 888), you can configure
the node address with RSNetWorx for DeviceNet software. When all three
switches are set to 8, the 1756-DNB scanner module will reset to factory
default settings at powerup. See Restore the Factory Default Settings on
page 15
for more information. See the following table for switch settings.
Switch Settings
Switch Settings
Switch Setting
Node Address
0...63
DeviceNet node address 00...63
88
When all three switches are set to 8, resets the 1756-DNB scanner
module to factory default settings. Do not use for normal operation.
All other values
Select the node address with RSNetWorx for DeviceNet software.
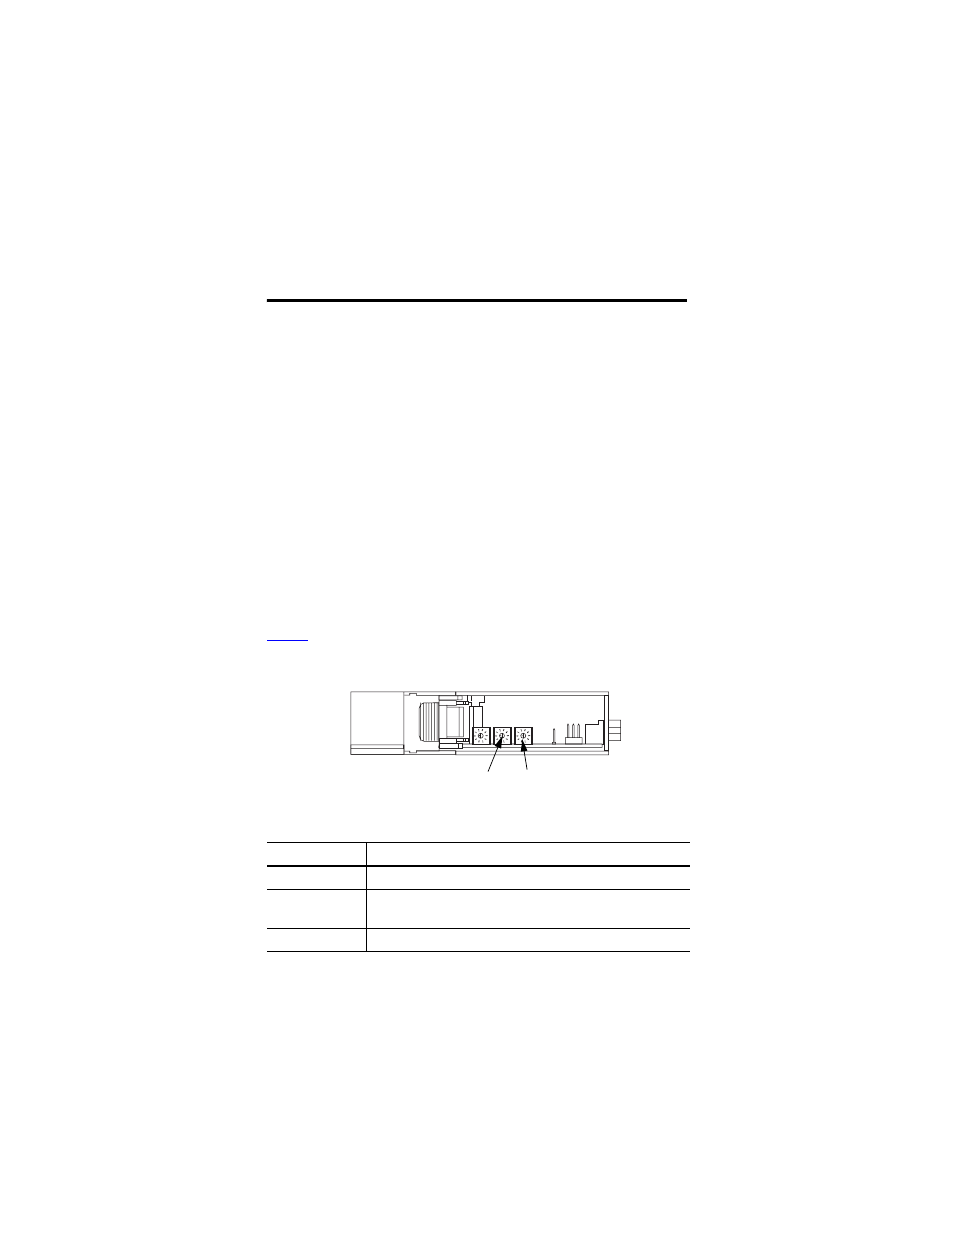
DeviceNet Node Address Rotary Switches
Front of Module
Top of Module
31587
Least Significant Digit Switch
Most Significant Digit Switch