Install the ferrite at the power supply – Rockwell Automation 1786-RPFRXL ControlNet Fiber Ring Modules Installation Instructions User Manual
Page 16
16 ControlNet Fiber-optic Ring Repeater Modules
Rockwell Automation Publication 1786-IN003D-EN-P - April 2011
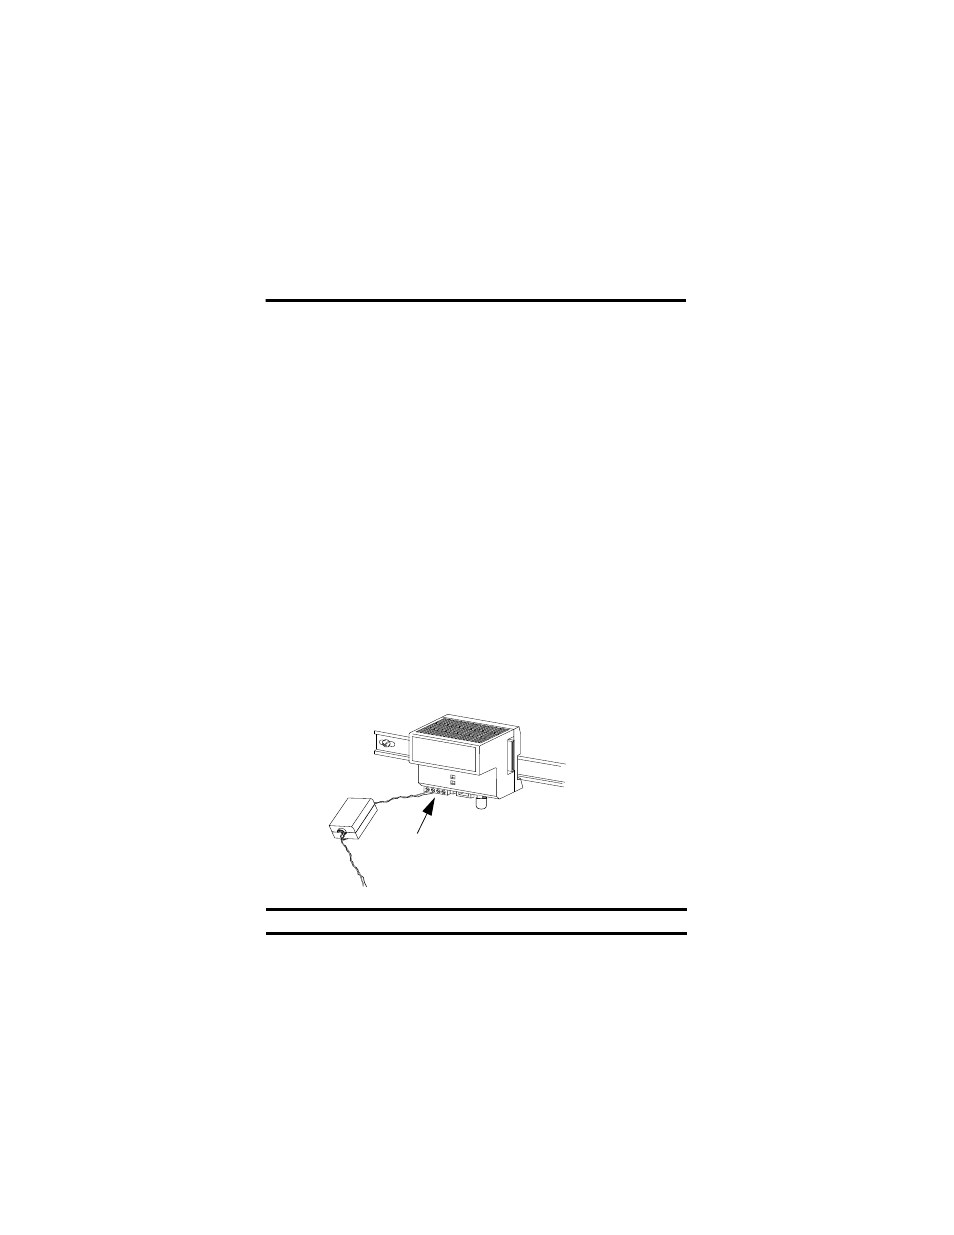
Install the Ferrite at the Power Supply
Do these steps to attach the ferrite to the power supply of the
1786-RPA/B module.
1. Use the key supplied with the ferrite to open it.
Be careful not to damage the wires.
2. Form a loop with both wires (+ and -) approximately 100 mm (4 in.)
away from the power supply connector of the 1786-RPA/B module.
3. Loop the wires through the ferrite.
4. Close the ferrite.
Be careful not to damage the wires.
5. Strip approximately 6 mm (0.24 in.) of wire from the end that will
connect to the power supply connector on the 1786-RPA/B module.
6. Remove the power supply connector from the 1786-RPA/B module.
7. Install the stripped ends of the wires in the power supply connector on
the 1786-RPA/B module as shown below.
IMPORTANT
Do not use more than one ferrite per 1786-RPA/B module.
Connect Power Supply Wires
31528