Setup, Worldwide representation, Ba c – Rockwell Automation 1397 Blower Motor Starter Inst. User Manual
Page 8: R0 18
Man|Aut
16
A
18
13
15
6
4
2
R
R
0
95
96
97
98
T1
T2
T3
5
-
13
2
-2
T1
3
-4
T2
4
-6
T3
5
-
14
REPLACE WITH
LITTLEFUSDE, TYPE CCMR, 600V 2.5A
13FU
14FU
15FU
2
-1
L1
3
-3
L2
4
-5
L3
P8
L3
L2
L1
Man|Aut
16
15
13
A
R
R
0
18
b
a
c
Rockwell Automation helps its customers receive a superior return on their investment by bringing
together leading brands in industrial automation, creating a broad spectrum of easy-to-integrate
products. These are supported by local technical resources available worldwide, a global network
of system solutions providers, and the advanced technology resources of Rockwell.
Worldwide representation.
Argentina • Australia • Austria • Bahrain • Belgium • Bolivia • Brazil • Bulgaria • Canada • Chile • China, People’s Republic of • Colombia • Costa Rica • Croatia • Cyprus
Czech Republic • Denmark • Dominican Republic • Ecuador • Egypt • El Salvador • Finland • France • Germany • Ghana • Greece • Guatemala • Honduras • Hong Kong
Hungary • Iceland • India • Indonesia • Iran • Ireland • Israel • Italy • Jamaica • Japan • Jordan • Korea • Kuwait • Lebanon • Macau • Malaysia • Malta • Mexico
Morocco • The Netherlands • New Zealand • Nigeria • Norway • Oman • Pakistan • Panama • Peru • Philippines • Poland • Portugal • Puerto Rico • Qatar • Romania • Russia
Saudi Arabia • Singapore • Slovakia • Slovenia • South Africa, Republic of • Spain • Sweden • Switzerland • Taiwan • Thailand • Trinidad • Tunisia • Turkey • United Arab Emirates
United Kingdom • United States • Uruguay • Venezuela
Rockwell Automation Headquarters, 1201 South Second Street, Milwaukee, WI 53204-2496 USA, Tel: (1) 414 382-2000, Fax: (1) 414 382-4444
Publication 1397-5.20 — April, 1998
P/N 184665 (01)
Supersedes August, 1997
Copyright 1998 Rockwell International Corporation Printed in USA
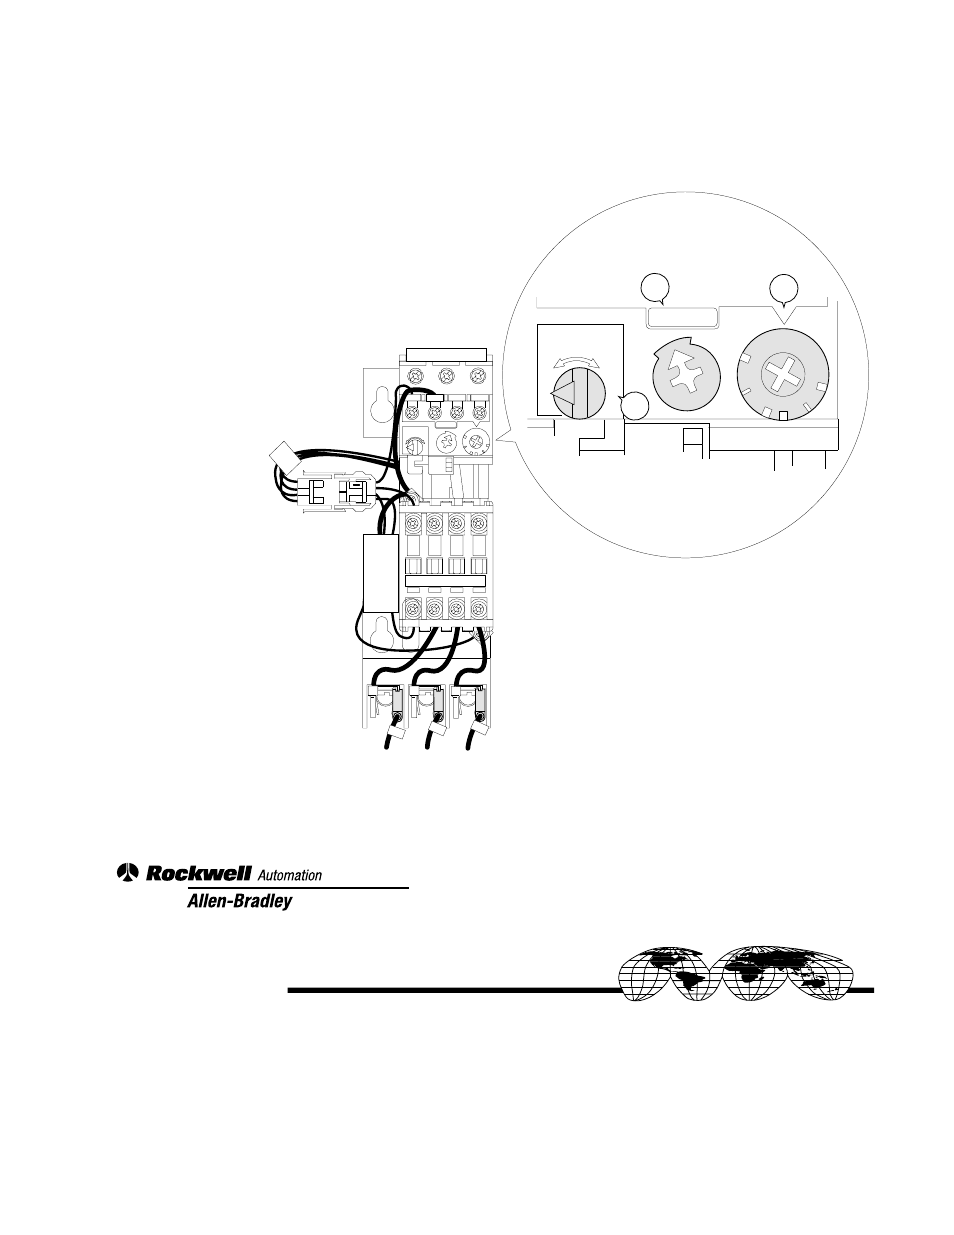
Setup
To configure a Blower Motor Starter to a selected blower motor:
a
Set the overload relay dial to the full load current on the blower
motor’s nameplate.
b
Set the Auto/Manual dial to "Aut".
c
Set the reset dial to "R".
Connect the blower motor leads to Blower Motor
Starter terminals T1, T2
&
T3 and check for proper
rotation. If the motor runs backwards, swap the
blower motor leads at Blower Motor Starter
terminals T1
&
T2.