Installing the 1394 fan kit – Rockwell Automation 1394-FK10TS_FK22TS Fan Kit Installation Instructions User Manual
Page 3
1394 Fan Kit 3
Publication 1394-IN067A-EN-P — January 2005
Installing the 1394 Fan Kit
To install the 1394 fan kit:
1. Remove all input power to the drive. Allow five minutes for the DC
bus to completely discharge before proceeding.
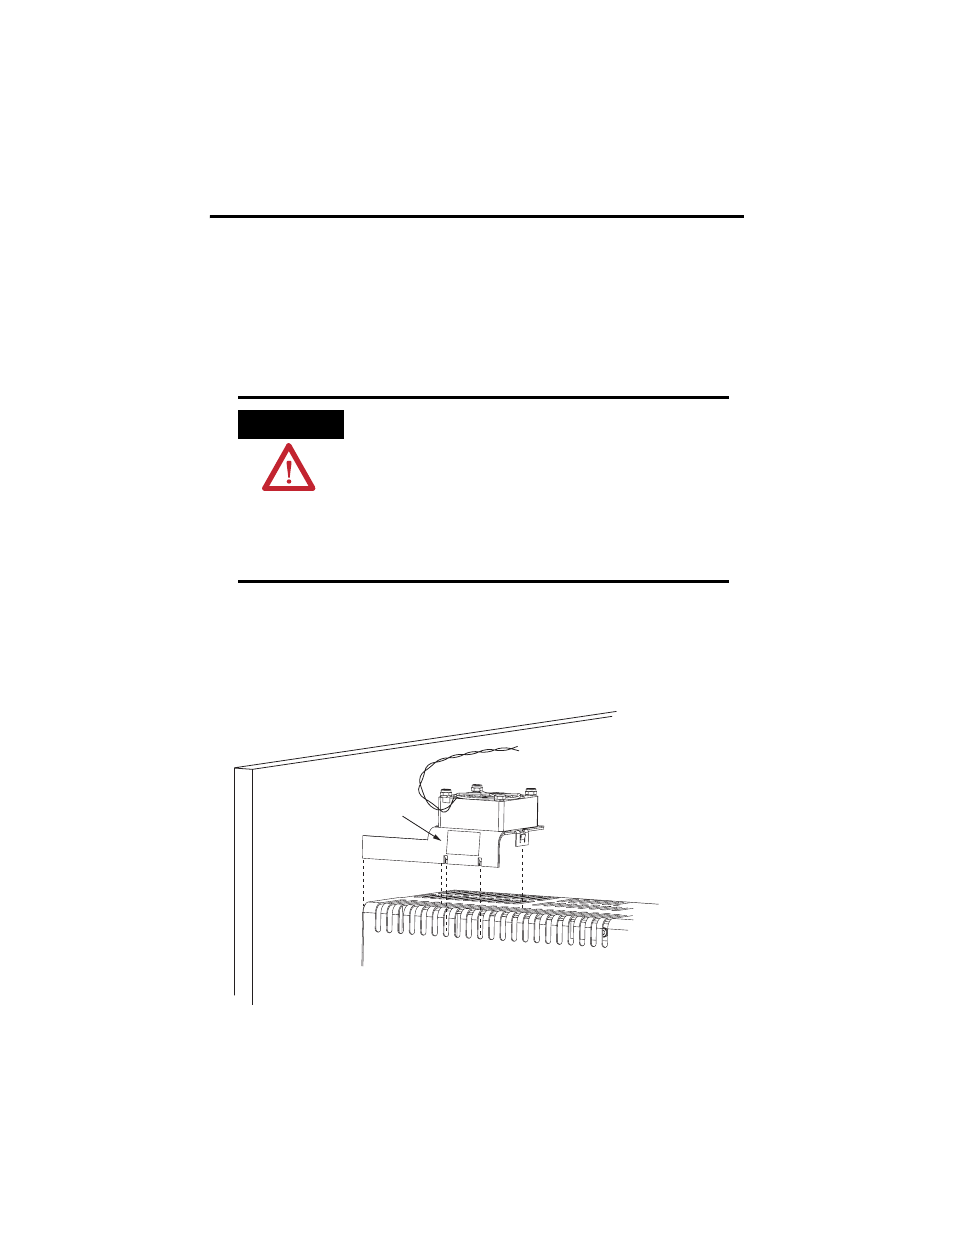
2. Position fan kit over the system module vent slots by aligning the
bracket flush with the panel (refer to Figure 1).
Figure 1
Aligning the 1394 Fan Kit Over the System Module
ATTENTION
This product contains stored energy devices. To
avoid hazard of electrical shock, verify that all
voltage on capacitors has been discharged before
attempting to service, repair, or remove this unit.
You should only attempt the procedures in this
document if you are qualified to do so and are
familiar with solid-state control equipment and
the safety procedures in publication NFPA 70E.
Align bracket
flush with the panel
and back of the
system module.
Align bracket tabs in vent slots
7 and 10 on 22 kW system modules,
8 and 11 on 5/10 kW system modules.
Align bracket snap-locks in vent slots
5 and 12 on 22 kW system modules,
6 and 13 on 5/10 kW system modules
(rear snap-lock hidden from view).
1394
x-SJT22-x (22 kW)
system module is shown
For use
with
22 kW
Modules
5 6 7 8 9 10 11 12 13
1 2 3 4
Fan kit kW rating
Fan wires