Software installation – UVP ChemiDoc-It 2 Imagers User Manual
Page 12
GelDoc-It
2
and ChemiDoc-It
2
Imagers
12
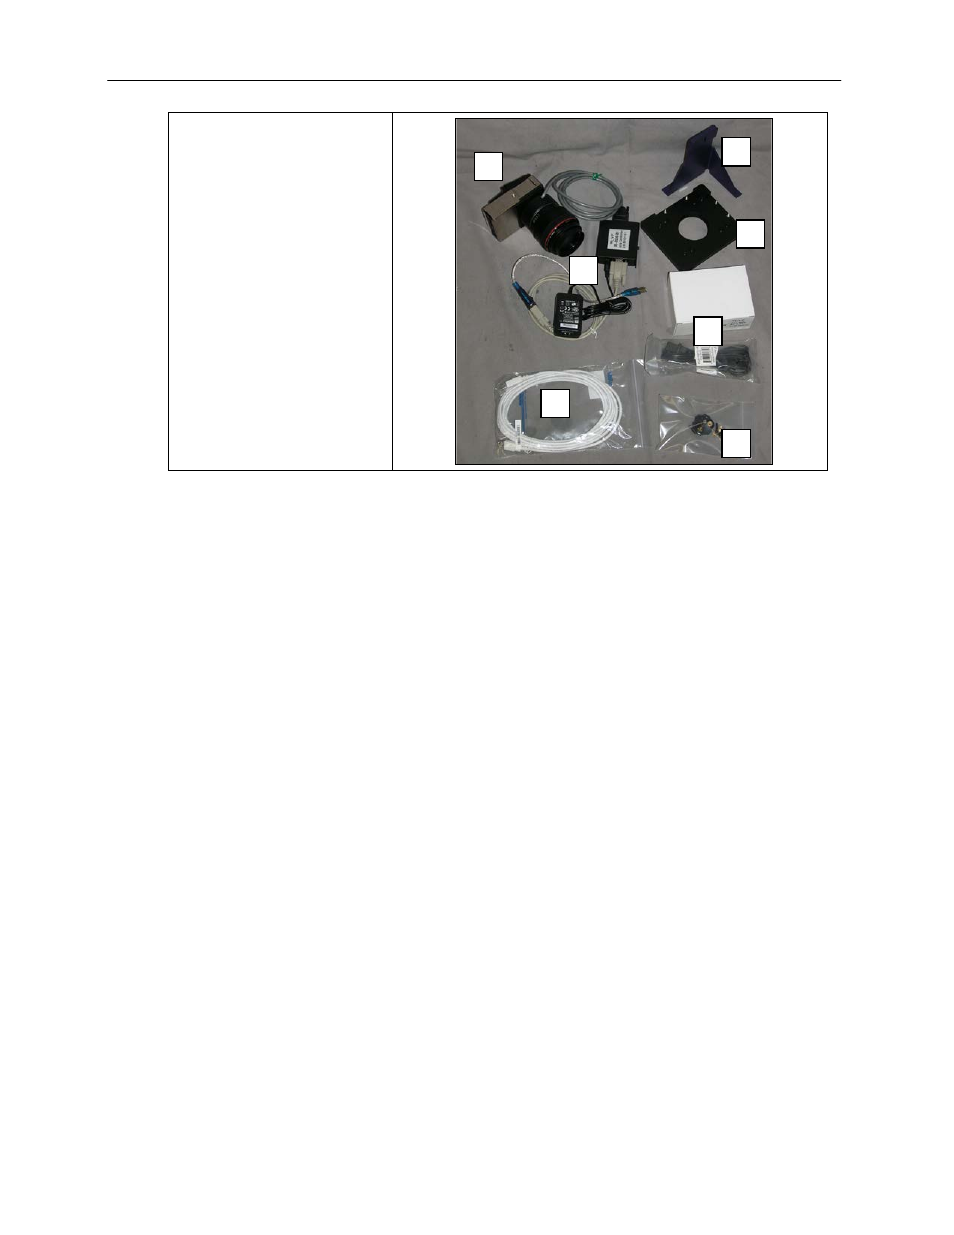
1. USB Cable
2. MegaCam 810/OptiChemi
610/BioChemi 510 Camera
3. Base Mount (ships attached
to the darkroom)
4. Bracket
5. Black Thumb Screw and
Brass Thumb Nuts
6. Camera Lens & Controller
7. Lens Controller Power
Supply Cable
Hardware Installation
The photograph shows the parts required for assembly of the MegaCam 810 and BioChemi 510 camera
kits with the motorized lens on the ChemiDoc-It
2
Imager. The OptiChemi 610 camera will have a
different appearance but will be installed in the same manner.
Note: The image above shows the 50mm f/1.2 lens (6). Another lens and/or lens controller may be
shipped with the system.
1. Attach the camera bracket (4) to the base mount with the brass thumb nuts (5).
2. If not already removed, take the lens cap off the lens. Do not unscrew the lens cap, as it will simply
pull straight off.
3. Place the camera/lens assembly in the hole in the base mount. Then, use the black thumb screw
(5) to secure the camera in place, attaching it through the hole at the top of the bracket (4).
Note: When looking at the darkroom from the front, the MegaCam 810, OptiChemi 610 and BioChemi
510 cameras attach to the bracket with the Black Thumb Screw at the right of the system. The USB and
power cables will extend from the front of the camera, facing the user.
Software Installation
Installing VisionWorksLS Software
1. Insert the VisionWorksLS flash drive into the computer.
2. Click on the Install button for VisionWorksLS.
3. Click OK, Next, agree to “I accept terms of licensing agreement”, then Next. Leave all options in
their default settings. Then click Next, Next, Install and finally Finish.
3
4
5
6
7
1
2