Installation, Gtmf remote control installation – Regency Horizon HZI540PB Large Gas Insert User Manual
Page 22
22
L540PB-2 / HZI540PB-2 Direct Vent Gas Insert
INSTALLATION
Note: GTMF remote control installation must be completed prior to the unit
being installed.
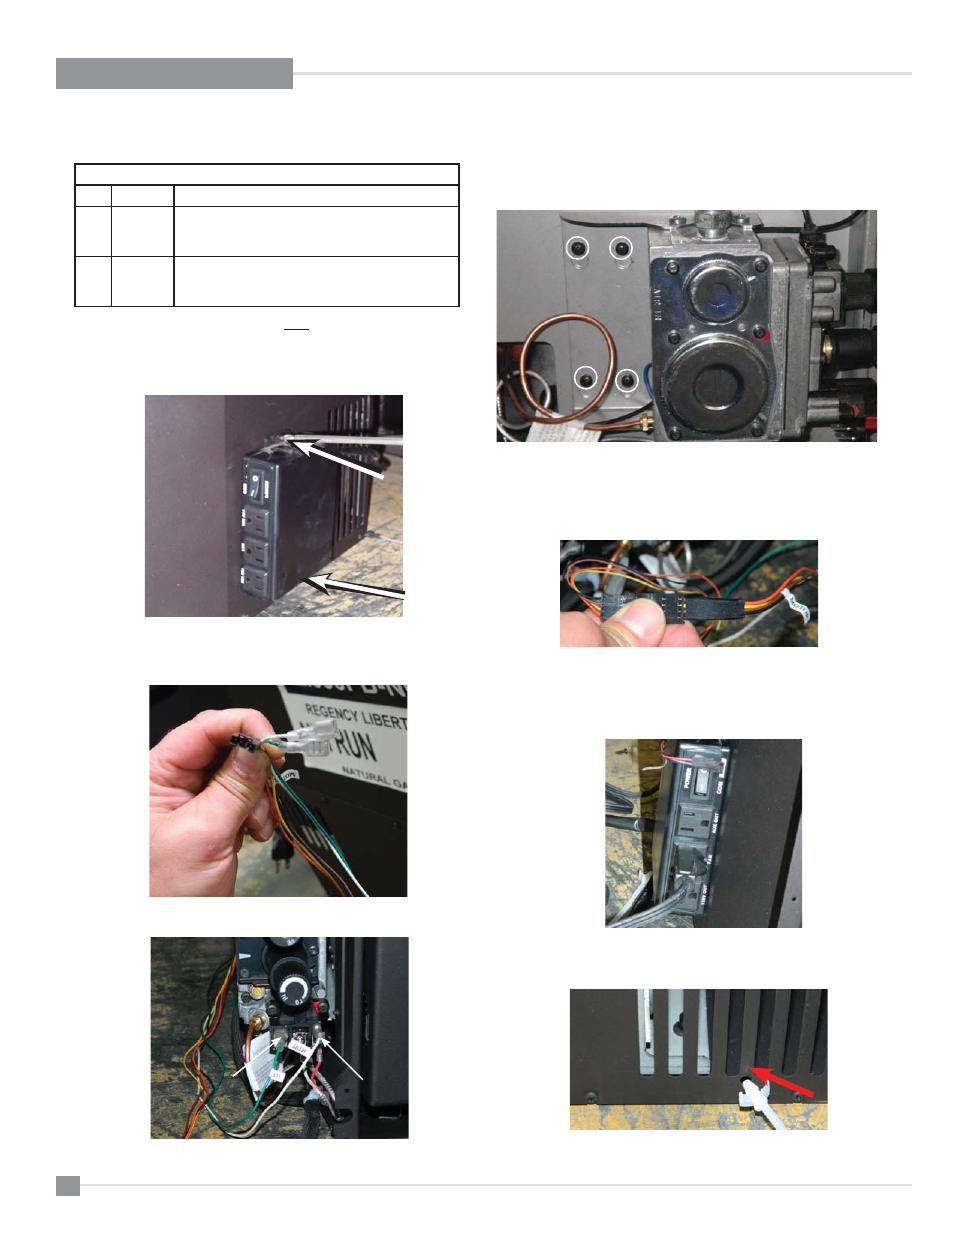
1. Install Fan Control Module to the right side of the unit with 2 screws as
shown below.
GTMF Remote Receiver Components
1
946-682
GTMF remote control
1 946-683
(or)
946-984
Stepper Motor (NG)
Stepper Motor (LP)
1
946-699
10 foot wiring harness package
(Discard existing 2ft wire harness-contained in
946-682 remote control)
2. Bring the TH, TPTH, and Stepper motor wires around back of the unit
to the left side - where the valve is located. All remaining wires from the
wiring harness must remain near the fan control module.
3. Connect the TH/TP-TH wires from the harness to the valve terminals also
marked TH/TP-TH - locations as shown below.
5. Install stepper motor (installation instructions provided by SIT) - reinstall
valve.
6. Connect the stepper motor wire (marked motor) from the harness into the
stepper motor wire on the motor.
7. Cut the cable tie to release the power cord bundled on the left side,
bring around to the back of the unit to the right side near the fan control
module.
8. Plug power cord into the outlet marked FAN on the fan control module.
See below.
9. Secure cable ties to the unit as shown by inserting cable ties into round
holes. There will be a total of 4 cable ties that need to be inserted into the
holes. (2 on the back and 2 on the right side located on the lower side of
the fi rebox).
TPTH Wire
TH Wire
4. Valve must be removed to install stepper motor - loosen 4 screws that
secure the Gas Valve Mounting bracket, slide bracket up to release.
GTMF REMOTE CONTROL INSTALLATION