Installation, Optional hearth trim-contour/standard faceplate – Regency Horizon HZI234E Small Gas Insert User Manual
Page 31
Regency
®
HZI234E Direct Vent Gas Insert
31
INSTALLATION
OPTIONAL HEARTH TRIM-CONTOUR/STANDARD FACEPLATE
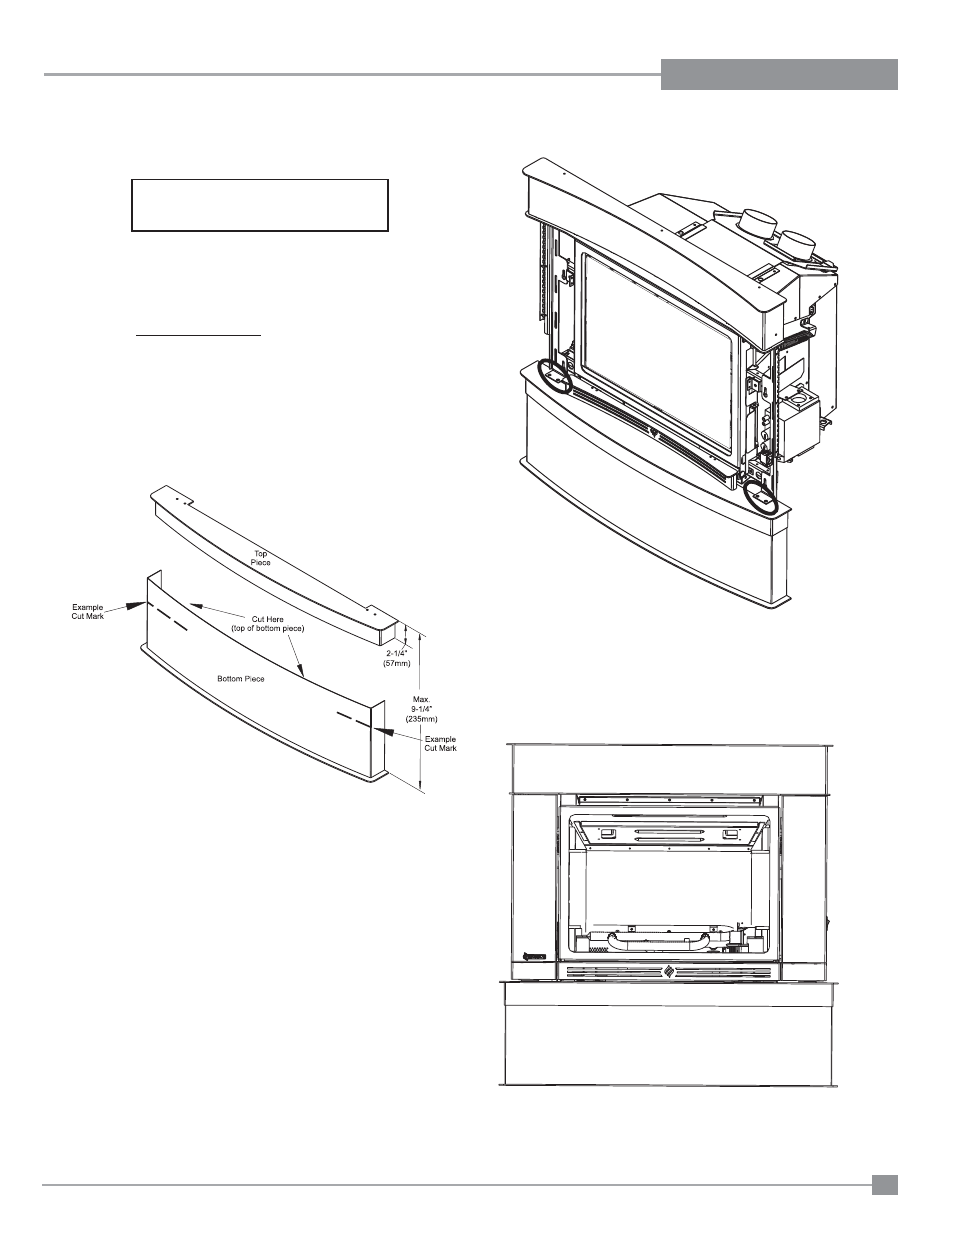
1) Open the left and right side faceplate panels.
2) Align the screw holes on the hearth trim with the screw holes on the
fl anges on the left and right side faceplate. Secure in place using 2
screws on each side as shown in diagram 1.
3) Close the left and right side faceplate panels.
Completed Hearth Trim Installation:
Faceplate shown without left
and right side panels to show
mounting of hearth trim.
a) The Hearth Trim can be adjusted to custom fi t an installation by
pulling apart the top piece from the bottom piece.
b) Cut the top of the bottom piece of the hearth trim to the appropriate
height using a metal cutting blade.
NOTE: The tab bends at the back of the top piece of the hearth trim
should be used as the measuring point to the hearth to measure the
height required.
c) Reattach the top piece of the hearth trim to the cut bottom piece by
fi tting in place.
Hearth Trim Contents List:
4
Screws (10-24 x 1/2" Truss Head)
1 Hearth
Trim
Customize Hearth Trim:
Hearth Trim Installation:
Diagram 1
Note: Only used with either the contour or contemporary faceplate.