Getting help – STEMCO Kit 50034 User Manual
Page 2
Tool Kit 50034
Removal and Installation Guide for kit 50032
01 577 9020
JAN 2012
GETTING HELP
USE THE STEMCO Kaiser TECHNICAL SERVICE LINE
888-854-6474
WARNING: STRIKING STEEL PARTS WITH HAMMERS CAN RESULT IN CHIP PROJECTILES, ALWAYS WEAR SAFETY GLASSES TO PROTECT YOURSELF AGAINST
INJURY. STEMCO Kaiser IS NOT RESPONSIBLE FOR ANY INJURY THAT MAY OCCUR DURING THIS PROCESS.
4641 Industrial Drive, Millington, MI 48746 • 888-854-6474 • Fax: 989-871-4640 www.stemcogaff.com
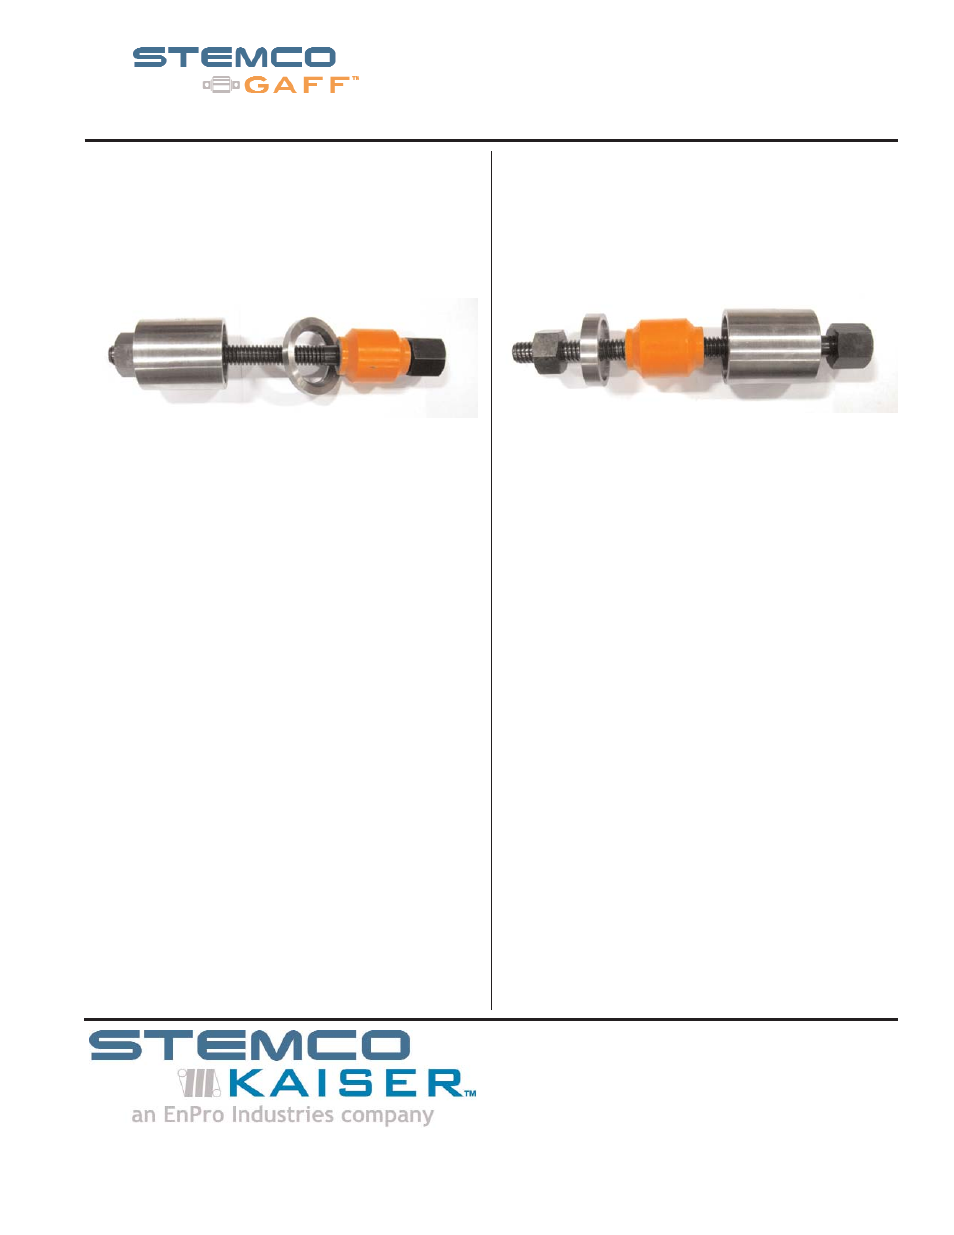
Installation Tool Setup
(New Bushing into Control Arm)
1st Installation Tool Setup
(Bushing Pre-Installation)
1. Inspect the control arm to make sure that it is
still meets it’s manufactures specifications.
2. Inspect the control arm for cleanliness, look
closely for any burrs.
3. Place the bushing onto the bolt. Lubricate the
bushing for easy install, STEMCO Kaiser
recommends using water as it will evaporate,
other lubricants can be used that will not affect
the STEMCO Gaff Bushing.
4. Place the installation guide onto the bolt,
making sure that the chamfer end is facing the
bushing.
5. Align the bolt assembly up to the control arm.
6. On the opposite side of the control arm place
the removal cup so that it is facing the bushing.
7. Add the nut and tighten, which will pull the
bushing into the control arm. Install the bushing
into the control arm, and stop when the
bushing slightly passes the bore into the
removal cup.
8. Remove the 1st installation setup
2nd Installation Tool Setup
(Bushing Alignment)
1.
Place the removal cup onto the bolt so that the
back end of the cup is flat against the head of
the bolt.
2. Push the bolt through the bushing that is
partially installed into the control arm.
3. Place the installation washer on to the bolt,
make sure that the recessed depth is facing
the bushing so that the bushing is installed to
the correct depth into the control arm.
4. Add the nut and tighten, until both the
installation washer and the removal cup are
flush with each side of the control arm.
5. Remove the 2nd installation tool setup.
6. Check that the bushing is aligned correctly into
the control arm bore, so that it is evenly spaced
between each end of the bore.