Clean grinding area, Remove the discharge flange, Cleaning and service – Retsch SM 100 User Manual
Page 38: Warning
Cleaning and service
38
•
Check again that the plunger can be easily moved up and down without
tilting.
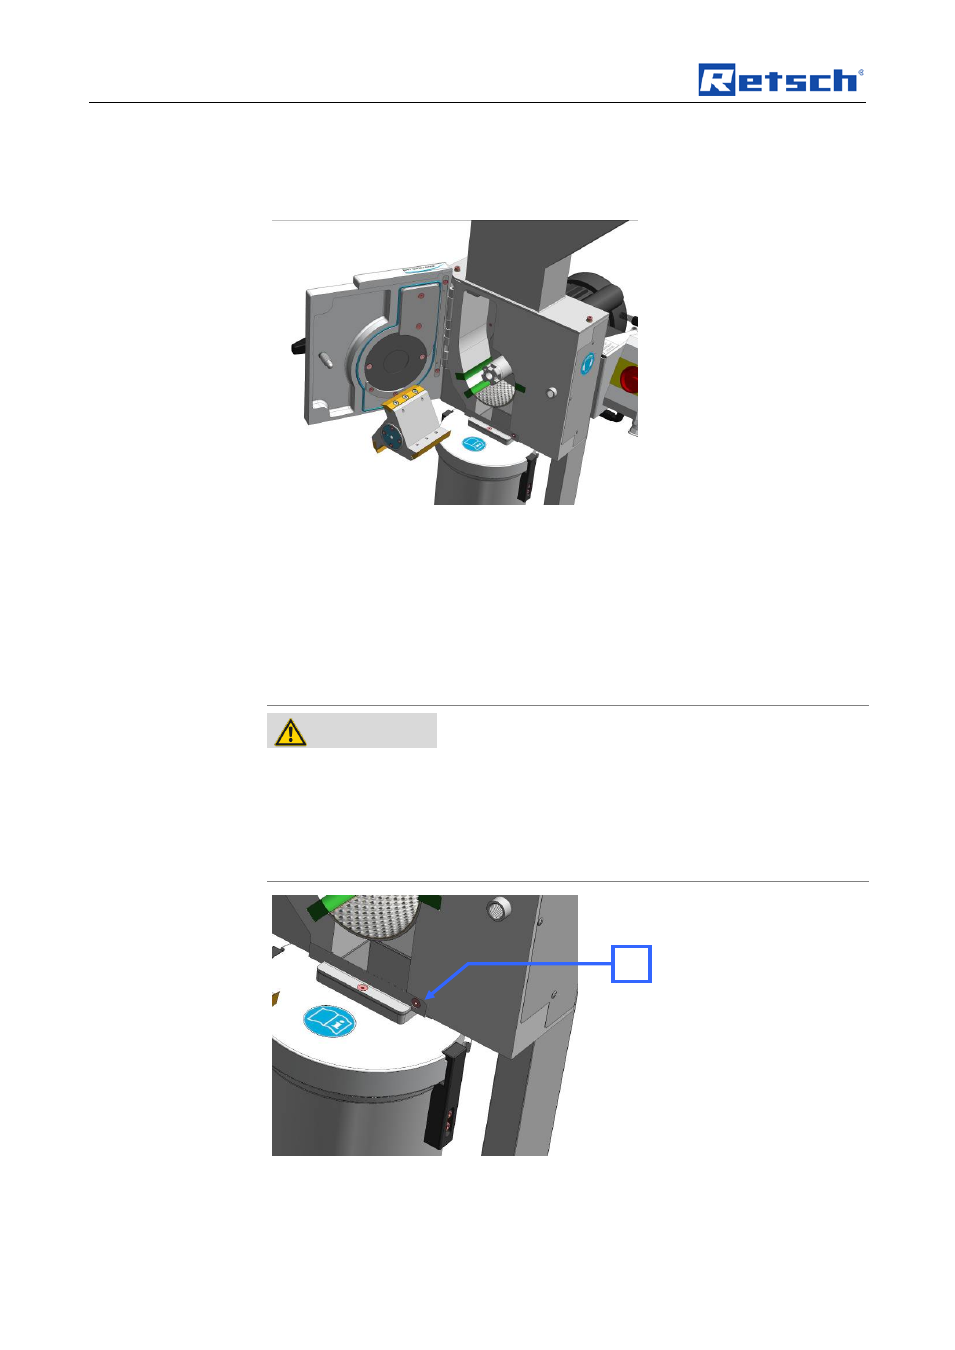
6.3.2 Clean grinding area
Fig. 26: Removing the rotor
•
Open the grinding area door (
T).
•
Pull the plunger (
B) into the uppermost latching position.
•
Screw the removal grip (
EG) onto the rotor and pull the rotor from the drive
shaft.
•
Remove the sieve.
6.3.3 Remove the discharge flange
WARNING
3.W0004
Risk of injury to skin and hands
Fast rotating blades
–
There is a risk of injury to hands, fingers and skin.
•
Never operate the device without the discharge flange
.
Fig. 27: Removing the discharge flange
•
Loosen the screw (
FS).
•
Pull the discharge flange (
AV) forwards out of the bracket.
FS
See also other documents in the category Retsch Equipment:
- BB 50 (41 pages)
- BB 100 (24 pages)
- BB 200 (24 pages)
- BB 300 (24 pages)
- Cryomill (68 pages)
- CryoMill Autofill 50l (28 pages)
- DM 200 (20 pages)
- DM 400 (60 pages)
- Emax (67 pages)
- GM 200 (44 pages)
- GM 300 (44 pages)
- MM 200 (32 pages)
- MM 400 (32 pages)
- PM 100 (44 pages)
- PM 400 (36 pages)
- PM GrindControl (48 pages)
- RM 200 (36 pages)
- RS 200 (32 pages)
- SK 100 (24 pages)
- SM 200 (48 pages)
- SM 300 (44 pages)
- Cyclone - SM 300 (20 pages)
- SR 200 (24 pages)
- SR 300 (24 pages)
- TWISTER (44 pages)
- ZM 200 (32 pages)
- AS 200 jet - Automatic Vacuum Regulation (6 pages)
- AS 200 control - natural frequency (32 pages)
- AS 200 (36 pages)
- AS 200 jet (56 pages)
- AS 200 jet (48 pages)
- AS 200 tap 30.025.0001 (28 pages)
- AS 200 tap 30.025.1001 (28 pages)
- AS 300 (32 pages)
- AS 400 (32 pages)
- AS 400 (28 pages)
- AS 450 basic (40 pages)
- AS 450 basic (44 pages)
- AS 450 control (52 pages)
- DR 100 (40 pages)
- DR 100 (28 pages)
- PP 25 (32 pages)
- PP 40 (28 pages)
- PT 100 (36 pages)