Installation of the machine, Transport, scope of delivery, installation, 10 installation of the machine – Retsch SM 100 User Manual
Page 19
Transport, scope of delivery, installation
19
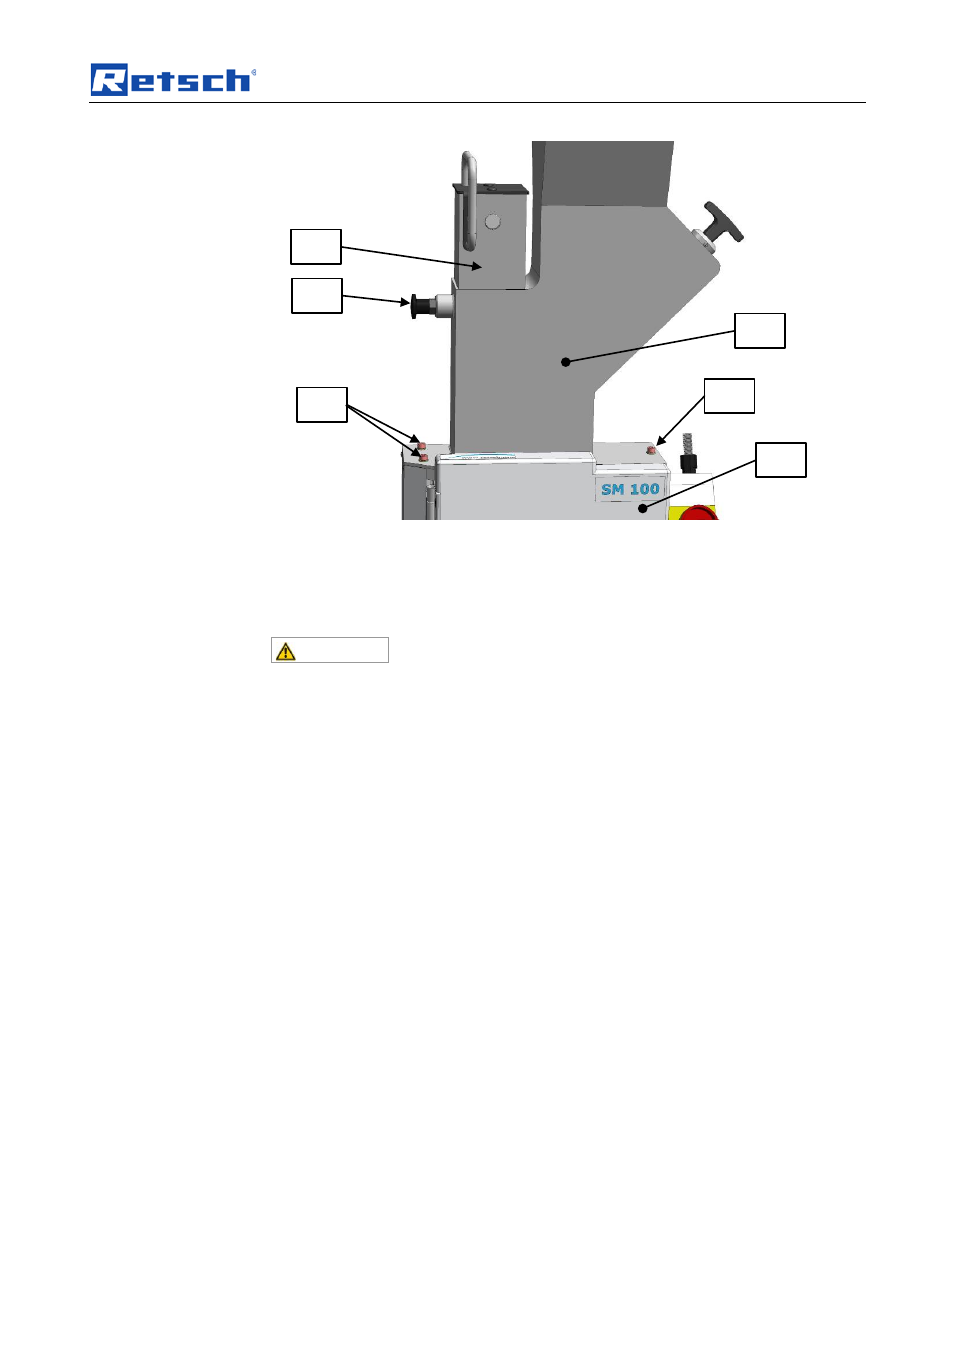
Fig. 3: Mounting the feed hopper
•
Open the grinding area door (T).
•
Pull the plunger (B) so it engages in the uppermost position.
•
Place the feed hopper (R) on the device (see diagram)
CAUTION
It is possible for the feed hopper (R) to fall from the device as long
as it is not secured by the three socket screws.
•
Unlock the locking pins (D) of the plunger (B).
•
Slide the plunger down.
•
Screw in the three supplied socket screws (S).
•
Initially only tighten the screws loosely.
•
Close the grinding area door (T).
•
Twist the rotary grip of the grinding area door.
•
Align the feed hopper so that the plunger can be easily moved up and down
without tilting.
•
Screw the three socket screws tight (10Nm).
•
Check again that the plunger can be easily moved up and down without
tilting.
NB
The grinding area door and the grip of the door lock are somewhat stiff when new.
Pos : 5. 31 /00005 Ü berschrif ten/ 1. 1 Ü bersc hrift en/ 1. 1 Übersc hrift en BD A/ 11 Aufs tell en des Ger ät es @ 0\ mod_1226498849756_9.doc @ 3464 @ 2 @ 1
3.10 Installation of the machine
Pos : 5. 32 /00003 St andard Kapit el/ General M odul Aufst ellungshöhe @ 0\ mod_1228918538349_9.doc @ 4724 @ @ 1
Installation height: maximum 2000 m above sea level
Pos : 5. 33 /00004 Warnhinweis e/H 0004 HIN WEIS Boden Aufst ellen Vibr ationen Boden @ 0\ mod_1228918882236_9. doc @ 4774 @ @ 1
S
T
B
R
D
S