Assembly – MacDon 2000B Pick-Up Reel User Manual
Page 8
7
ASSEMBLY
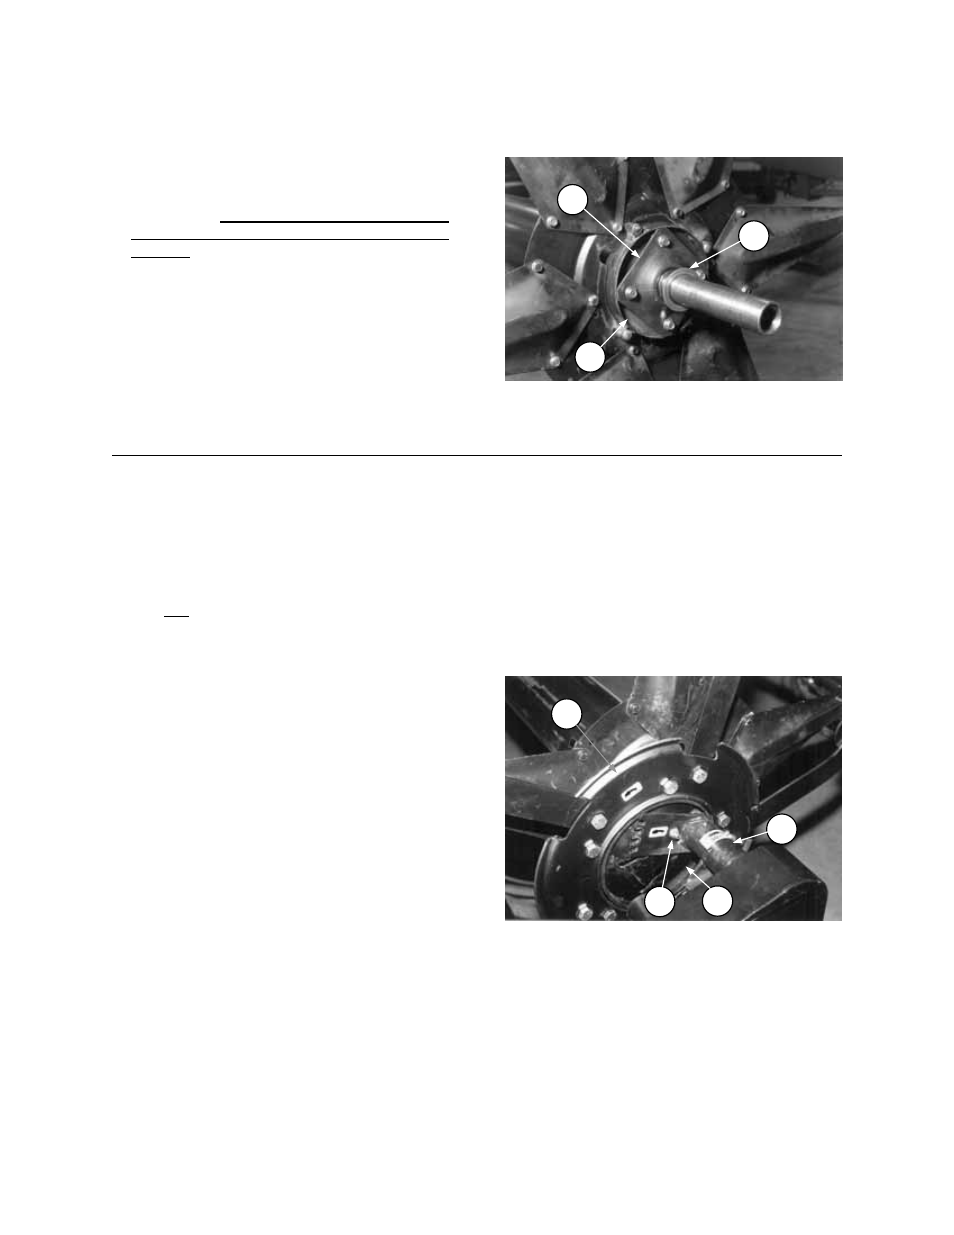
4.
INSTALL END SHAFTS from mounting
package using four 3/8 NC flange bolts.
NOTE: End shaft can be identified as right or
left by the decal on the support to which it is
assembled. Be sure the drive end shaft is
installed at the proper end of the reel for your
machine.
IMPORTANT: Tighten the four bolts evenly to
pull shaft straight into tube. Plate (A) must
contact disc (B). When contact is made, torque
bolts to 35 ft.lbs. (47 N
⋅m).
Slide one 3 inch O.D. washer (C) from mounting
package onto each end shaft.
5. ASSEMBLE AND INSTALL CAMS.
a. Identify left and right reel supports (A) (from
mounting package) by the decal on each part.
b. Attach each reel support (A) to a cam track (B)
with one 3/8 NC x 3/4 carriage bolt and flange
nut at (C). (Both cam tracks are the same.)
IMPORTANT: Do not install bolt in adjustment
slots until reel is mounted. Damage to reel may
result if ends are not evenly adjusted.
c. Slide reel support/cam track assemblies onto
end shafts, matching rotation decals on center
tube to decals on reel supports.
d. Identify right and left cam arm assemblies (D)
by the decal on each cam ring. Position the cam
arms collapsed or removed for shipping and
tighten locknuts to 150 ft.lbs. (200 N
⋅m).
e. Slide right and left cam arm assemblies (D)
over cam tracks at respective ends of reel,
ensuring that rotation decals on center tube,
reel supports and cam rings all match.
INSTALL END SHAFTS & WASHER
A
C
B
ASSEMBLE AND INSTALL CAMS
(LEFT HAND SHOWN)
B
A
D
C