Assembly – MacDon 2000B Pick-Up Reel User Manual
Page 12
11
ASSEMBLY
12. INSTALL END SHIELDS
a. Insert shield bearing (C) into pocket (with hole)
in end shield (D). The step on the bearing must
protrude through hole in end shield.
b. Attach bearing to crank (or end bat for 36') with
3/8 x 5/8 inch flange head self-tapping screw.
Tighten enough to prevent rotation of the shield
bearing against end of crank tube. Do not over-
tighten, plastic bearing may split.
c. Bring the closed end of the next end shield up,
enclosing the bearing. Fasten end shields with
5/16 x 3/8 Phillips truss head machine screws
and nuts (E).
IMPORTANT: To avoid damage to reel bats
and shields, screw heads must be to the inside
of the reel.
Leave hardware loose until all shields are
attached.
d. Clearance between end shields and header end
sheet (or nearest point of contact) should be 1
to 2 1/2 inches (25 - 64 mm).
If necessary, adjust reel support arm braces to
center the reel in the header. See your header
Operator's Manual.
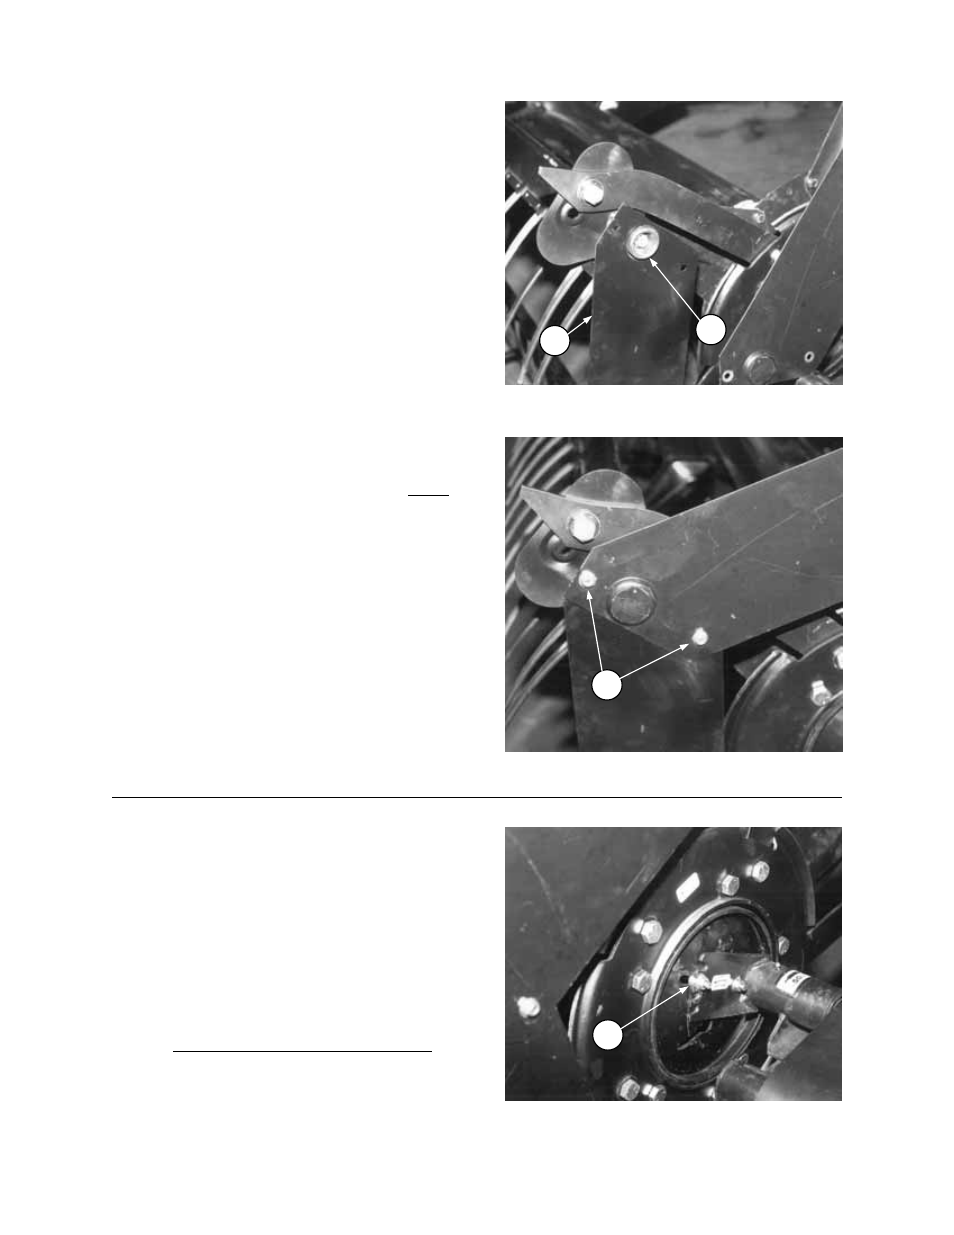
13. ADJUST FINGER PITCH POSITION.
See "Recommended Settings" on page 14 and
choose a position best suited to your conditions.
IMPORTANT: To prevent twisting damage to
the reel, be sure reel support arms on header
are lifting in phase before installing bolt (A). If
installing reel on a new header, bleed reel lift
hydraulics before installing bolt (A).
Install 3/8 x 3/4 carriage bolt (A) and flange nut
in the same position at both ends of the reel.
IMPORTANT: Reel damage can result if reel is
unevenly adjusted.
INSTALL END SHIELD BEARINGS
C
D
ASSEMBLE END SHIELDS
E
ADJUST FINGER PITCH
A