Camera adjustment – Paxton SONY number plate reader User Manual
Page 5
Page 5
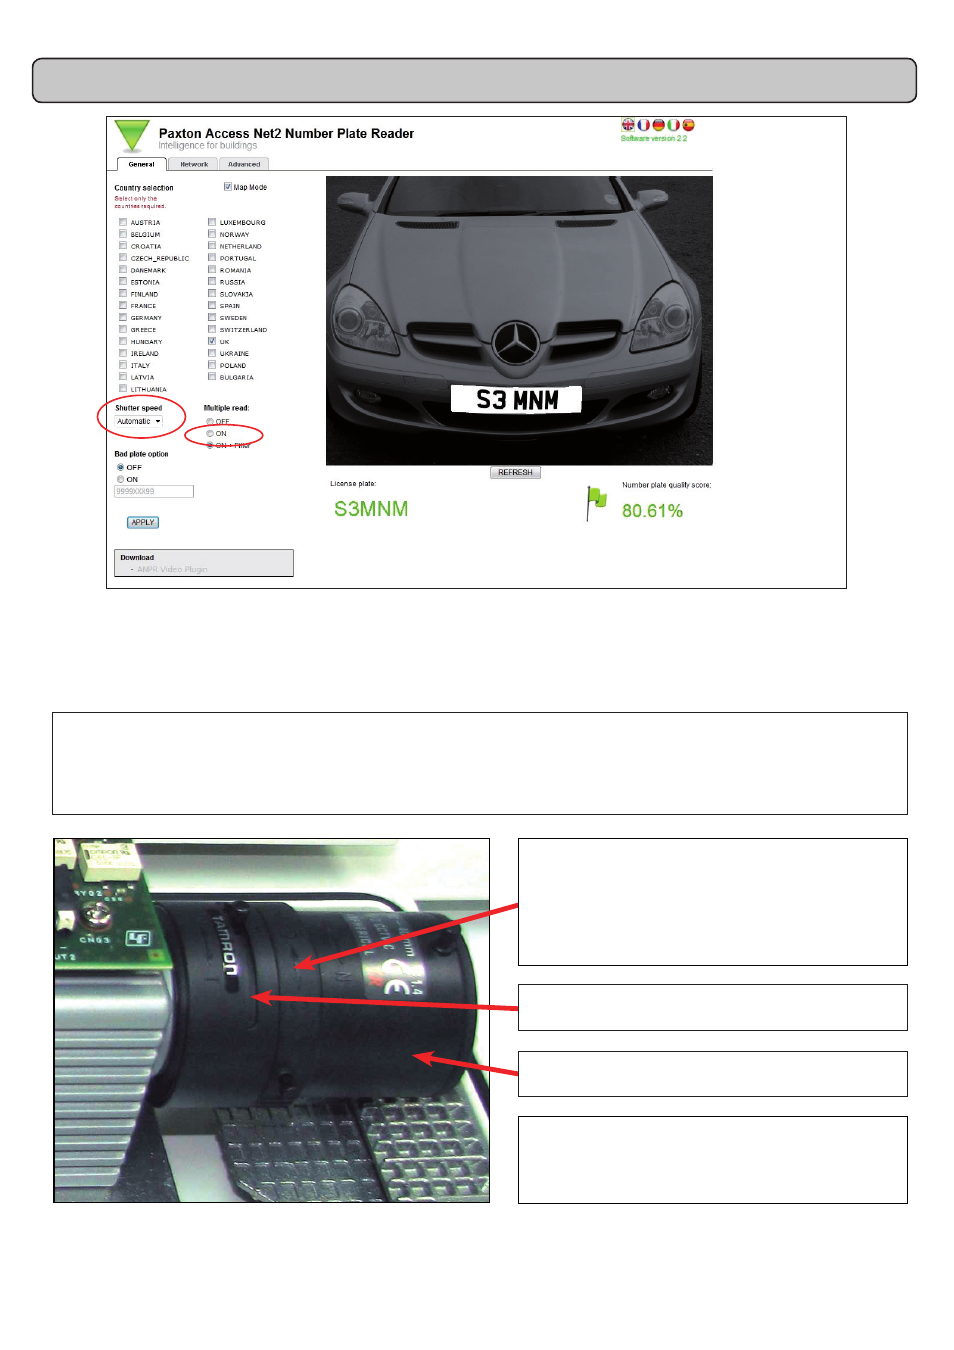
3. Zoom - Adjust the Zoom until the number
plate is one third of the screen width.
4. Focus - Adjust to achieve the sharpest
image at the required distance.
2. Iris - Position a vehicle at the 'capture
point'. Start with the iris fully closed
(C = Closed) and slowly rotate the ring
until the number plate comes into view.
This should be further adjusted later to
achieve the maximum plate contrast.
There is a delay with the viewer so do not make large or quick adjustments while focusing the camera.
Camera adjustment
Each adjustment ring can be locked in position by means of the finger screws.
5. Calibrate - Position a vehicle at the 'capture
point'. Power the camera off and on again.
Leave the vehicle in position for 3 minutes
to allow the camera to fully calibrate.
1. Shutter speed - Under outdoor conditions, the shutter speed should be set to AUTOMATIC. If installed
indoors under a constant level of artificial light, a fixed shutter speed should be selected.
Start at 1/500 and check the contrast level seen on the plate. Adjust this setting up and down,
waiting 30 seconds each time while the camera reconfigures, to achieve the maximum contrast level.
The camera should be adjusted to achieve a green quality flag. The percentage score is based on the
amount of software processing that the image required to achieve the license plate displayed. Red or
amber warning flags will display if the data is considered unreliable. (See also: Image Verification)
While adjusting the camera, set 'multiple read' to ON.