Step six, Step seven, Step eight – Pavement Ends 51204 Replay User Manual
Page 3: Step five
51204 pg 3
0612 Rev. A
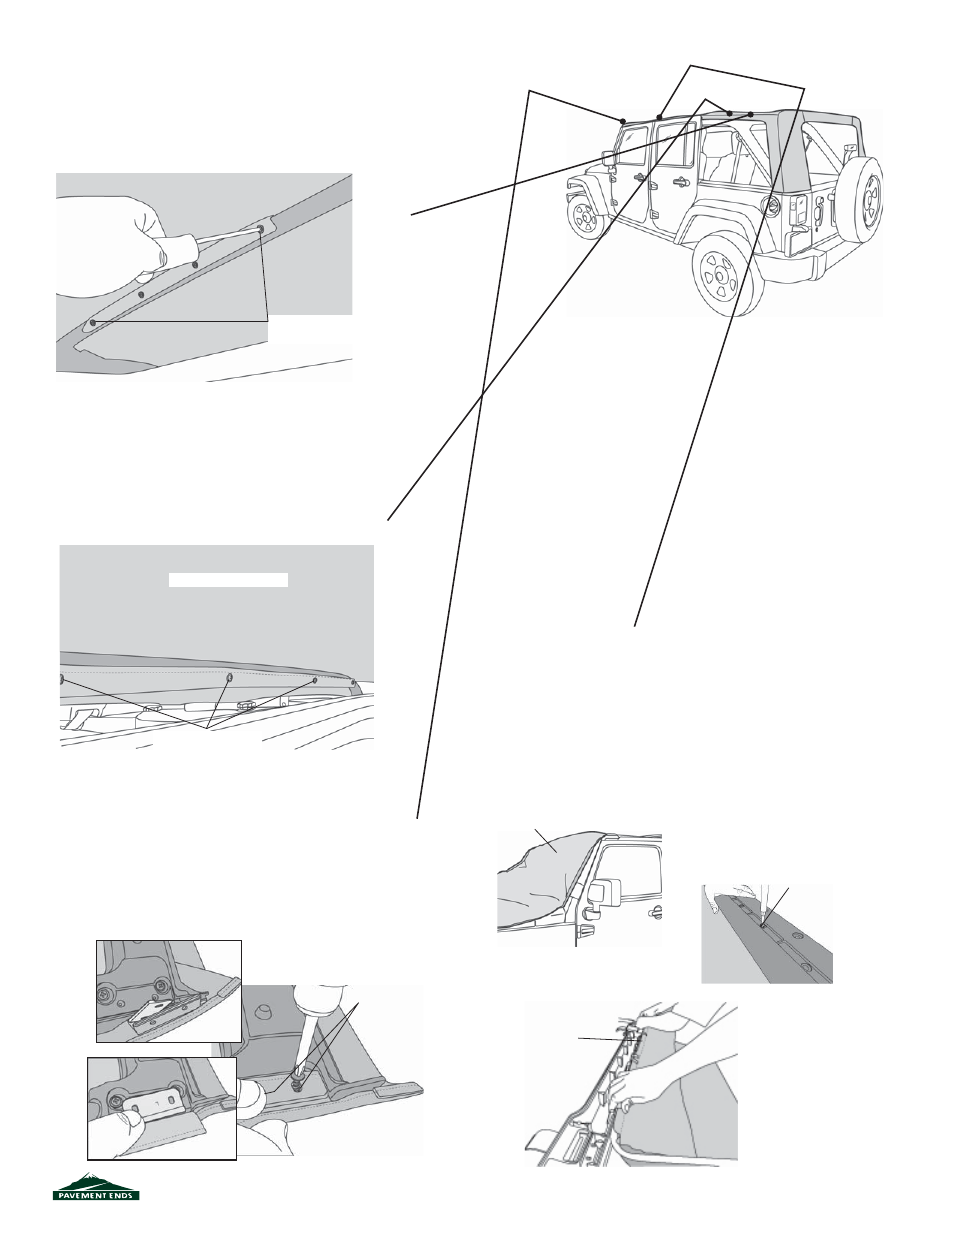
Step Six
R
ELEASE
C
ENTER
B
OW
Use a phillips screwdriver to remove the fi ve (5)
screws that attach the fl ap in the top to the Center
Bow. Set the screws aside to be reused later.
Step Seven
R
EMOVE
H
EADER
S
CREWS
Collapse the bow assembly down onto the tailgate
to access the header. Remove the foam covering the
screws. Use a T-15 Torx to remove the two screws that
secure the fabric to the header. Repeat on both sides.
Step Eight
R
EMOVE
T
OP
F
ABRIC
Raise the bow assembly and lock the header to the windshield.
Drape the top fabric, backing side up, over the hood and
windshield. Remove the twenty-seven (27) screws that secure
the fabric to the upper and lower headers. Set the screws aside
for use in installing the new top. Slide the extrusion along the
front edge of the top out of the channel in the lower header and
remove the old top from the vehicle.
Top Fabric - Backing Side Up
Remove Screws (27)
Across Header
Slide Extrusion along
the Front Edge of the
Channel to remove
Top
View from inside vehicle
Unscrew the fabric
from the Center Bow
Remove
Screws
Step Five
R
ELEASE
#3 B
OW
Use a phillips screwdriver to remove the four (4)
screws that attach the fl ap in the top to the #3
Bow. Set the screws aside to be reused later.
Unscrew the fabric
from the #3 Bow