Warning, Step ten, Step nine – Pavement Ends 44523 Flip Top User Manual
Page 9
Rev. D 0210
44523 pg 9
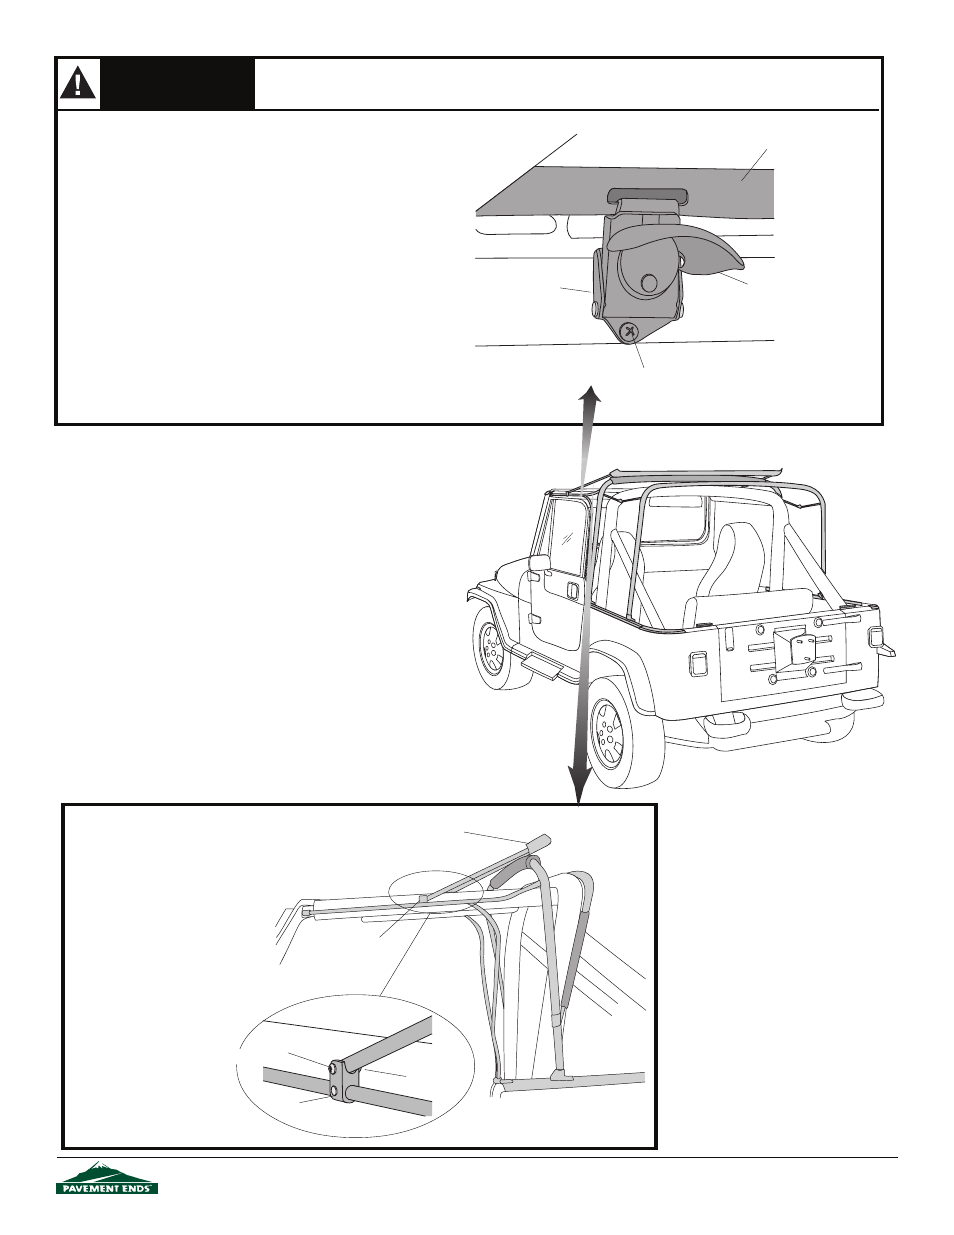
Windshield Header
Horizontal
Sport Bar
Windshield Frame
#8 x 5/8" Screw
Step Ten
I
NSTALL
W
INDSHIELD
H
EADER
Orient the Windshield Header on
the vehicle. Lay the header on
top of the bows with the snap
studs facing up. Place the legs
of the header into the bracket
above the door opening on each
horizontal rod. Install the legs in
the brackets with a #10-15/16
Bolt and Lock Nut on each side.
Bracket
Windshield
Header
Front
#10-15/16
Bolt
Lock Nut
Bracket
Lever (Horizontal Position)
Windshield Header Latch
WARNING
Improper Latch installation will result in a poor fitting Header that could rattle or release under driving
conditions.
Step Nine
I
NSTALL
W
INDSHIELD
H
EADER
L
ATCH
Rotate the Windshield Header down onto the top of the wind-
shield.
Locate the two Windshield Header Latches in the parts kit. Make
sure that the latches are in the closed position. Hook each latch
in the slots in the Windshield Header. Pull Header down flat on
the windshield. Pop the lever out into the horizontal position and
mark the location of the bottom hole in the latch. Remove the
latch from the slot and spring the body of the latch out so that it
is horizontal to the base and so that you can access the top
mounting hole. Place the latch back in position with the bottom
hole over the mark on the windshield and mark the location of
the top hole. Remove the latch, center punch the marks and drill
two 1/8" holes per latch in the windshield frame. Install each
latch with two #8 x 5/8" Screws.