Replacing the knives, Cambio de las cuchillas – Brother UM 103D User Manual
Page 63
56
Chapter
Chapter
Chapter
Chapter
Chapter
Chapter
Chapter
Chapter
Cambio de las cuchillas
Cambio de la cuchilla superior
(1) Para quitar la cuchilla, afloje el tornillo de instala-
ción de la cuchilla superior y levante dicha cuchilla.
(2) Introduzca la nueva cuchilla en el soporte de la
cuchilla superior.
(3) Luego, gire la polea con la mano hasta que la
cuchilla quede en la posición baja. Averigue que
la cuchilla superior quede enfrente de la inferior y
ajuste el espacio entre ella y la extremidad de la
cuchilla inferior entre 0,5 y 1 mm.
(4) Vuelva a apretar la cuchilla.
1
Tornillo de instalación de la cuchilla superior
2
Placa de agujas
3
Cuchilla superior
4
Cuchilla inferior
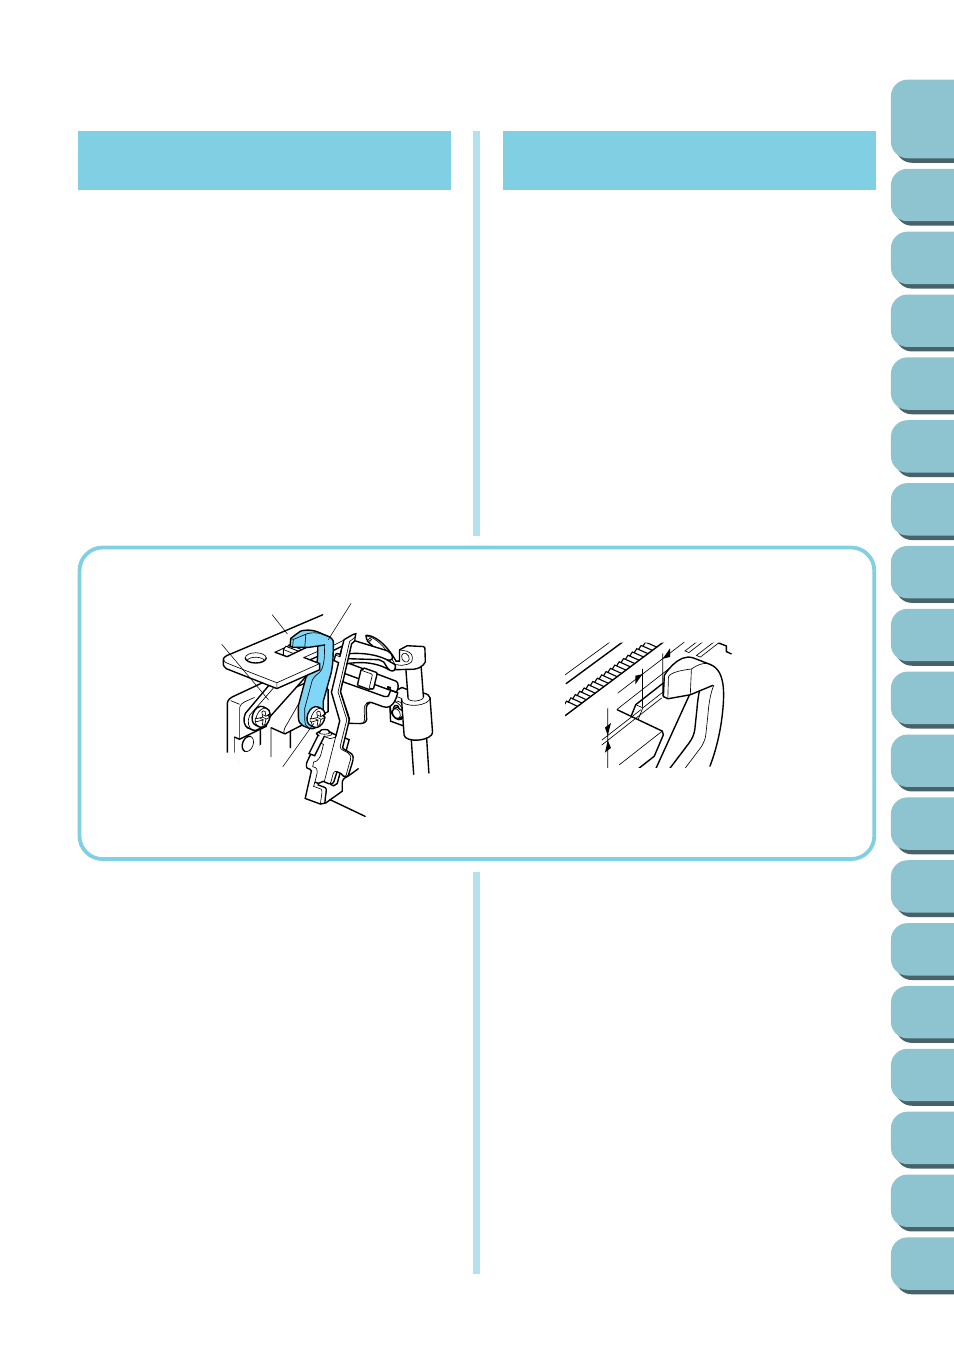
Replacing the knives
Replacing the upper knife
(1) To remove the knife, loosen the upper knife set
screw and pull up the upper knife.
(2) Insert the new knife into the upper knife holder.
(3) Then turn the pulley by hand until the upper knife
is in the down position. Check that the upper knife
is in front of the lower one and adjust the clear-
ance between it and the edge of the lower knife to
between 0.5 mm and 1.0 mm.
(4) Retighten the upper knife securely.
1
Upper knife set screw
2
Needle plate
3
Upper knife
4
Lower knife
Cambio de la cuchilla inferior
(1) Para quitar la cuchilla, afloje el tornillo de instala-
ción de la cuchilla inferior y baje dicha cuchilla.
(2) Introduzca la nueva cuchilla en el soporte previs-
to.
(3) Coloque la cuchilla inferior para que su extremi-
dad quede muy cercana a la placa de agujas.
(4) Vuelva a apretar el tornillo de instalación de la
cuchilla inferior.
•
Cabe ajustar el alineamiento de las cuchillas
superior e inferior para que corten adecuada-
mente.
Replacing the lower knife
(1) Loosen the lower knife set screw and pull down
the lower knife.
(2) Insert the new knife into the lower knife holder.
(3) Position the lower knife so that its edge is flush
with the needle plate.
(4) Tighten the lower knife set screw.
•
It is important to adjust the alignment of the upper
and lower knives for sharp cutting.
4
3
1
2
1.2~1.7mm
0.5~1.0mm