Ch10_sewing, To start sewing, Sewing – Brother UM 103D User Manual
Page 42: Chapter, Costura, Para empezar a coser
35
Chapter
Chapter
Chapter
Chapter
10
Chapter
Chapter
Sewing
To start sewing
•
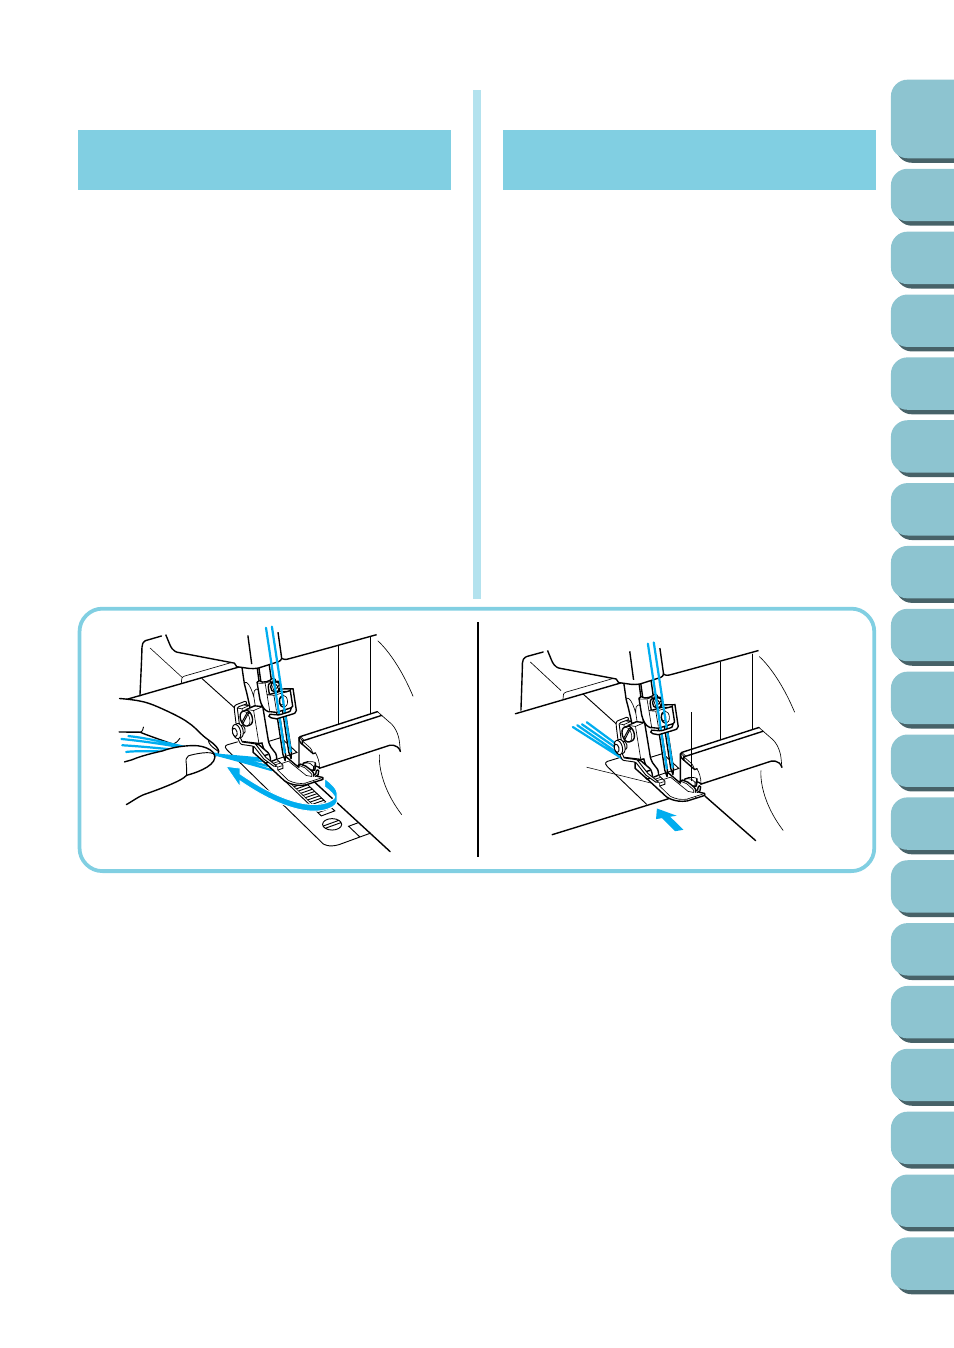
Thread the machine and pull the threads out
about 15 cm (6 inches) behind the presser foot.
•
Lift the presser foot and place the material well
underneath the presser foot before starting to
sew. Slowly sew a few stitches by turning the
pulley by hand.
•
The fabric will be fed automatically. You need
only guide it in the required direction.
•
Check the stitch formation (stitch chain) to see if
it is uniform. If the stitch is not uniform, re-check
that the threading has been done properly and in
sequence.
•
Follow the Seam Allowance Guide (3/8, 1/2, 5/8,
1”) for consistent cutting of the fabric seams.
1
Presser foot
2
Upper knife
Costura
Para empezar a coser
•
Enhebre la máquina y saque unos 15 cm de hilo
detrás del prensatelas
•
Levante el prensatelas y coloque bien el tejido
debajo del prensatelas antes de empezar a co-
ser. Cosa lentamente algunas puntada girando
la polea con la mano.
•
El tejido adelantará solo, automáticamente. Sólo
hará falta guiarlo en la dirección deseada.
•
Compruebe la información de las puntadas (en la
cadeneta) para ver quedan uniformes. Si las
puntadas no son uniformes, vuelva a comprobar
que el hilo esté bien enhebrado y según la se-
cuencia adecuada.
•
Siga la Guía de Tolerancia de Costura (0,9 mm,
1,2 cm, 1,5 cm, 2,5 cm) para poder cortar adecua-
damente las costuras de los tejidos.
1
Prensatelas
2
Cuchilla superior
1
2