5 directional fixture for specimen clamps, Operation – Leica Biosystems SM2010 R User Manual
Page 25
23
Leica SM2010 R
5. Operation
5.1.5 Directional fixture for specimen clamps
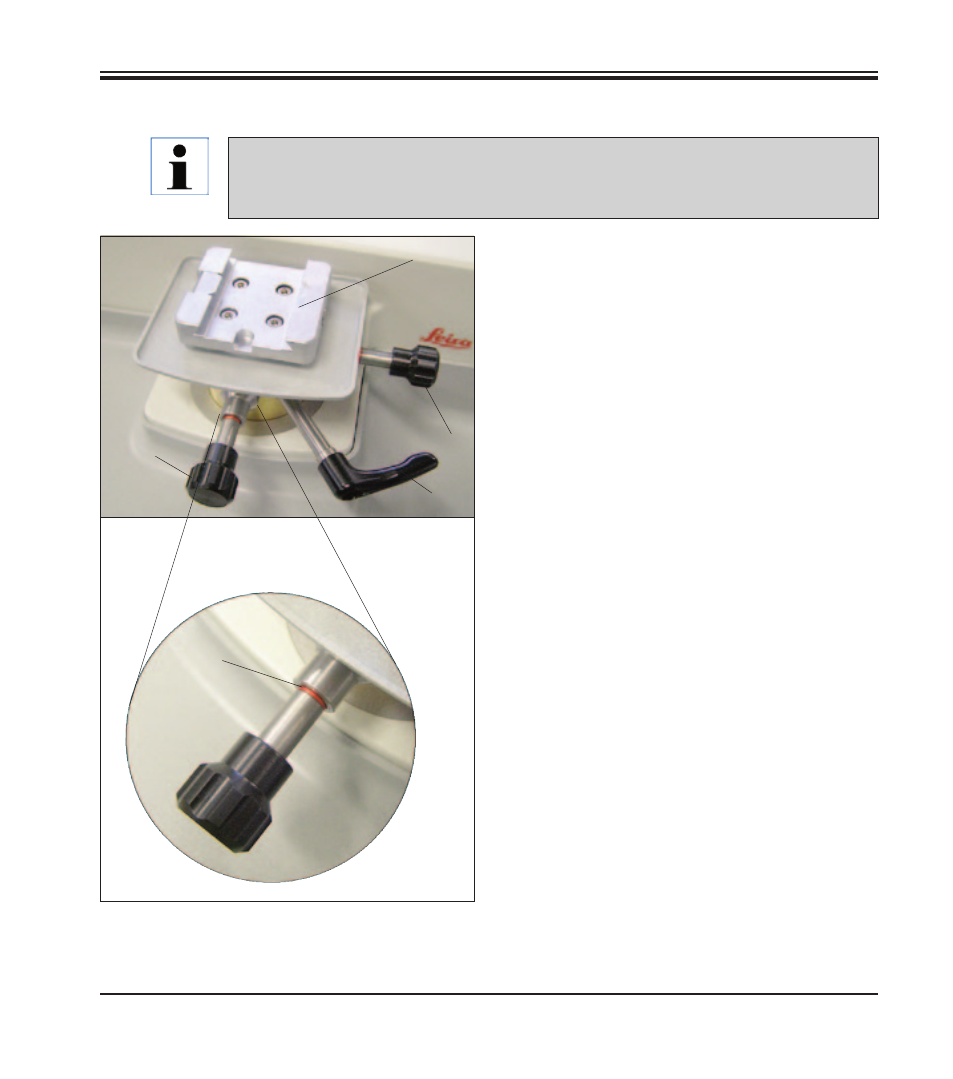
Orienting the specimen
• To loosen the clamp, rotate the eccentric
lever (34) upwards (until you feel it click into
position).
Caution! Turning it further to the left re-clamps
the orientation!
• Turn setscrew (30) to orient the specimen in
the cutting direction. Turn setscrew (31) to
orient the specimen transverse to the cutting
direction.
Each complete turn of the screw inclines the
specimen by 2°. A total of 4 complete turns =
8° are possible in every direction.
The accuracy is approximately ± 0.5°.
For better orientation, there is a noticeable
notch point after each complete turn of the
setscrew.
• To lock the current orientation, turn the ec-
centric lever (34) backwards.
Display of the zero position
For better display of the zero position, each set-
screw (30, 31) has a red mark (32).
When both marks are visible and both setscrews
are in zero position at the same time (notch point!),
the specimen orientation is in zero position (0°).
The object orientation allows for simple position
correction of the specimen surface when the
specimen is clamped into place.
32
30
34
31
29
All object clamps available as optional accessories can be inserted into the quick
clamping device (29) of the directional specimen holder fixture, all object clamps avail-
able as optional accessories can be used.
Fig. 26