Labnet Z233M-2 High Capacity MicroCentrifuge User Manual
Page 8
8
-Load the rotor symmetrically by inserting tubes into spaces opposite from each
other. The rotor must always be balanced in this fashion prior to operation.
ATTENTION:
ATTENTION:
ATTENTION:
ATTENTION:
ATTENTION:
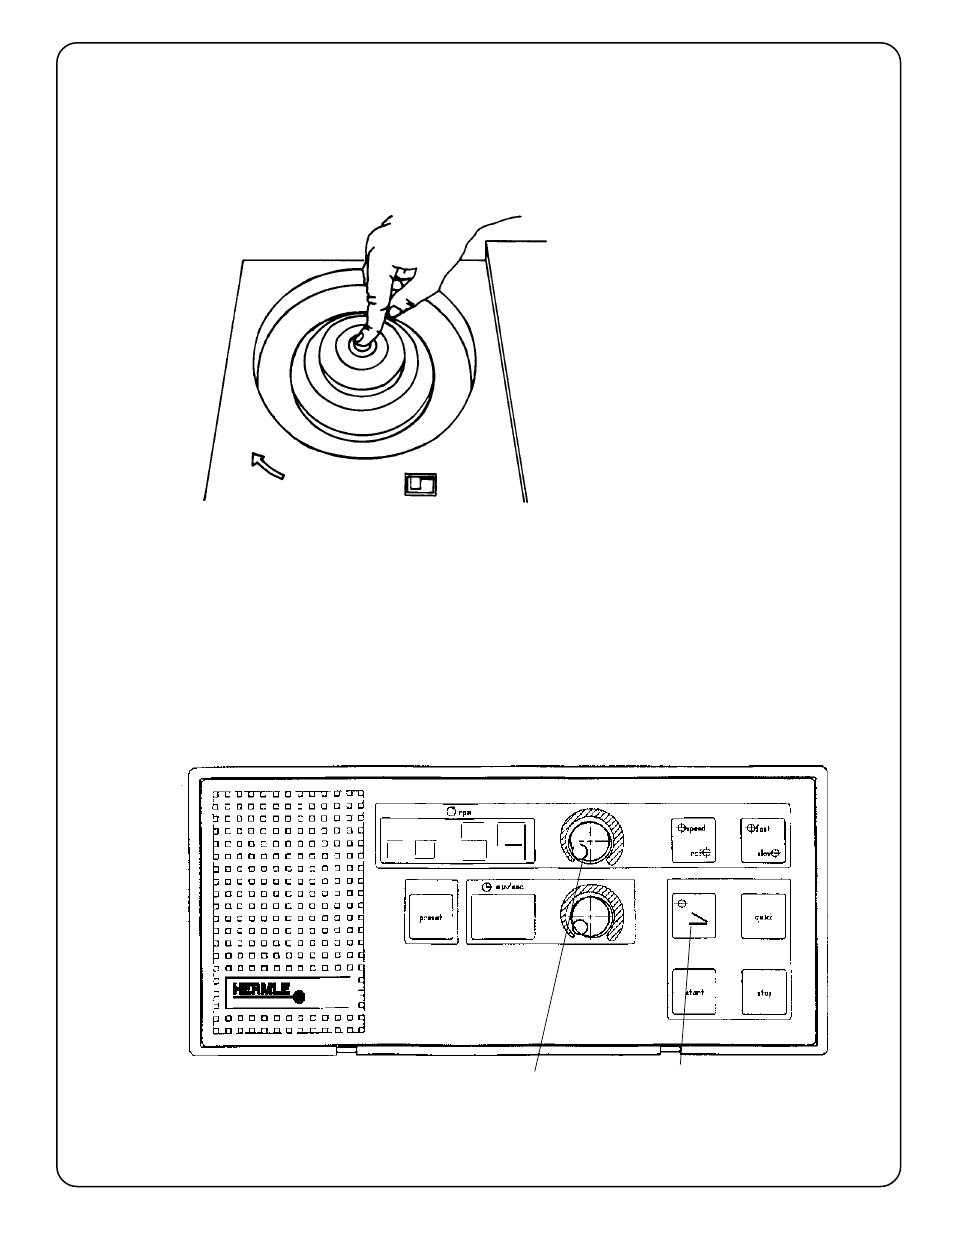
Before operation, secure the rotor lid to the rotor by pressing the snap
Before operation, secure the rotor lid to the rotor by pressing the snap
Before operation, secure the rotor lid to the rotor by pressing the snap
Before operation, secure the rotor lid to the rotor by pressing the snap
Before operation, secure the rotor lid to the rotor by pressing the snap
connector lightly on the rotor nut (see figure 3).
connector lightly on the rotor nut (see figure 3).
connector lightly on the rotor nut (see figure 3).
connector lightly on the rotor nut (see figure 3).
connector lightly on the rotor nut (see figure 3).
Figure 3
3.2
3.2
3.2
3.2
3.2
Set or change rotor-code .
Set or change rotor-code .
Set or change rotor-code .
Set or change rotor-code .
Set or change rotor-code .
With a new unit, the centrifuge is programmed with the rotor-code for the rotor that
has been ordered with the machine. If you wish to use another rotor you have to
change the rotor code.
Please proceed as follows:
Open centrifuge lid and unplug the centrifuge. Press the"lid" key (2), (see figure 4),
hold it and at the same time plug in the centrifuge.
1
2
Note: To check rotor code turn power on (plug in), open lid and press the "Quick"
Note: To check rotor code turn power on (plug in), open lid and press the "Quick"
Note: To check rotor code turn power on (plug in), open lid and press the "Quick"
Note: To check rotor code turn power on (plug in), open lid and press the "Quick"
Note: To check rotor code turn power on (plug in), open lid and press the "Quick"
button. Rotor code is now displayed.
button. Rotor code is now displayed.
button. Rotor code is now displayed.
button. Rotor code is now displayed.
button. Rotor code is now displayed.
Figure 4
Z233M-2