Labnet Z233M-2 High Capacity MicroCentrifuge User Manual
Page 7
7
2.3
Installation
Check that:
- the power supply corresponds to that on the manufacturer's rating label which is
mounted on the rear panel, then connect the power cord to the centrifuge and the
socket.
- The line voltage circuit breaker has a maximum of 16 Amp. type K slow release
for commonly used instruments.
- An emergency switch is installed outside the room to disconnect the power
supply in case of a troubled run.
- The digital indications on the display are lighting up.
- Press the "lid" key. You can open the centrifuge lid now.
3.
3.
3.
3.
3.
How to install and load a rotor
How to install and load a rotor
How to install and load a rotor
How to install and load a rotor
How to install and load a rotor
3.1
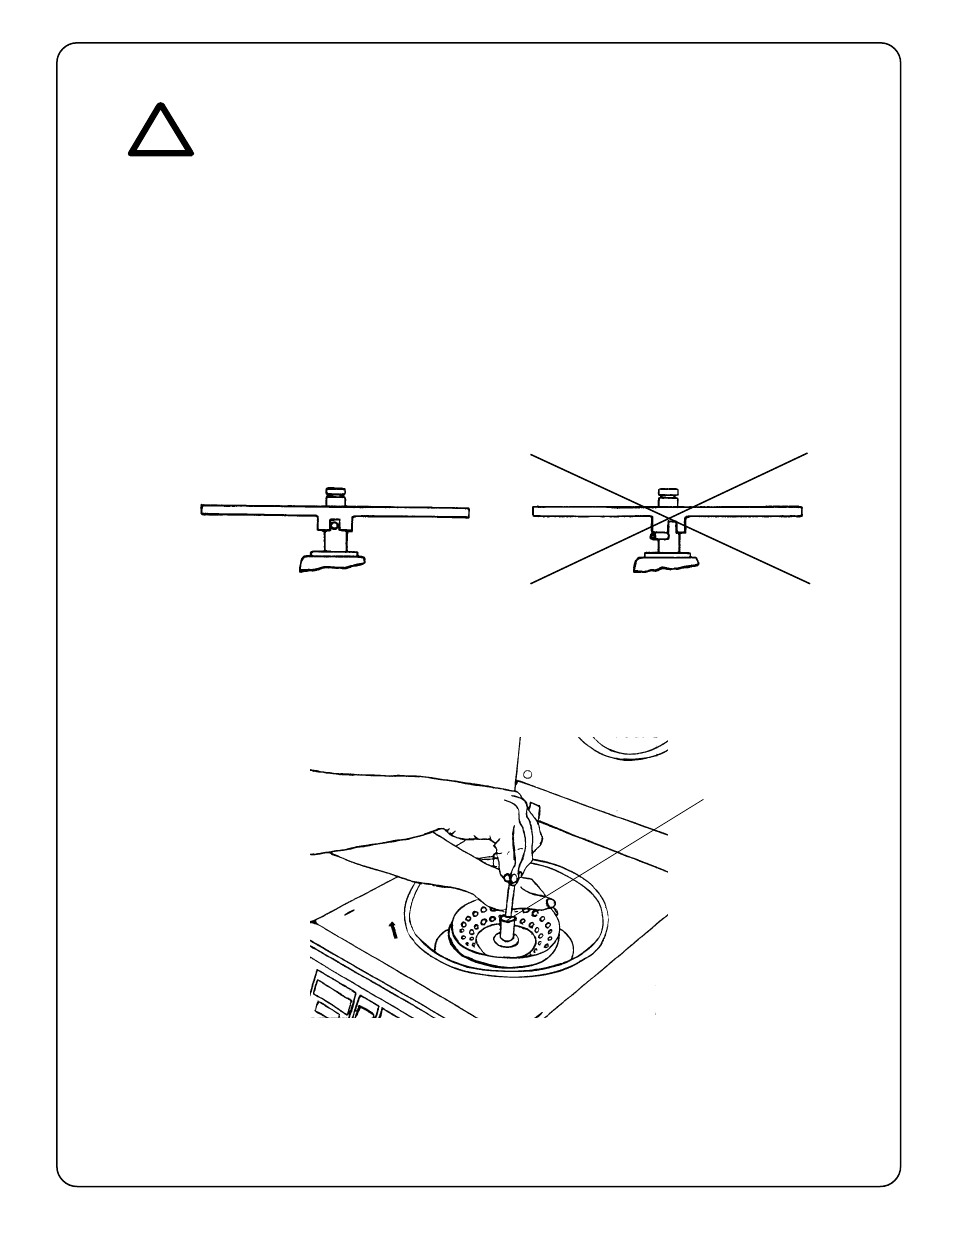
Mounting and securing an angle rotor
Clean the motor shaft, as well as the rotor mounting hole with a piece of cloth and
place the rotor on the motor shaft ensuring that the pins align correctly with the rotor
slots.
Figure 1a
Figure 1b
Hold the rotor with one hand and secure the rotor to the shaft by turning the rotor
nut (1) counter-clockwise (see figure 2).
1
Figure 2
ATTENTION !
ATTENTION !
ATTENTION !
ATTENTION !
ATTENTION !
If using a rotor that was not originally supplied with the centrifuge, you have
If using a rotor that was not originally supplied with the centrifuge, you have
If using a rotor that was not originally supplied with the centrifuge, you have
If using a rotor that was not originally supplied with the centrifuge, you have
If using a rotor that was not originally supplied with the centrifuge, you have
to change the standard rotor-code which is programmed (see chapter 3.2,
to change the standard rotor-code which is programmed (see chapter 3.2,
to change the standard rotor-code which is programmed (see chapter 3.2,
to change the standard rotor-code which is programmed (see chapter 3.2,
to change the standard rotor-code which is programmed (see chapter 3.2,
page 7 E).
page 7 E).
page 7 E).
page 7 E).
page 7 E).
!
!
!
!
!