Gamber-Johnson MCS-ERGOBOX12 User Manual
Page 2
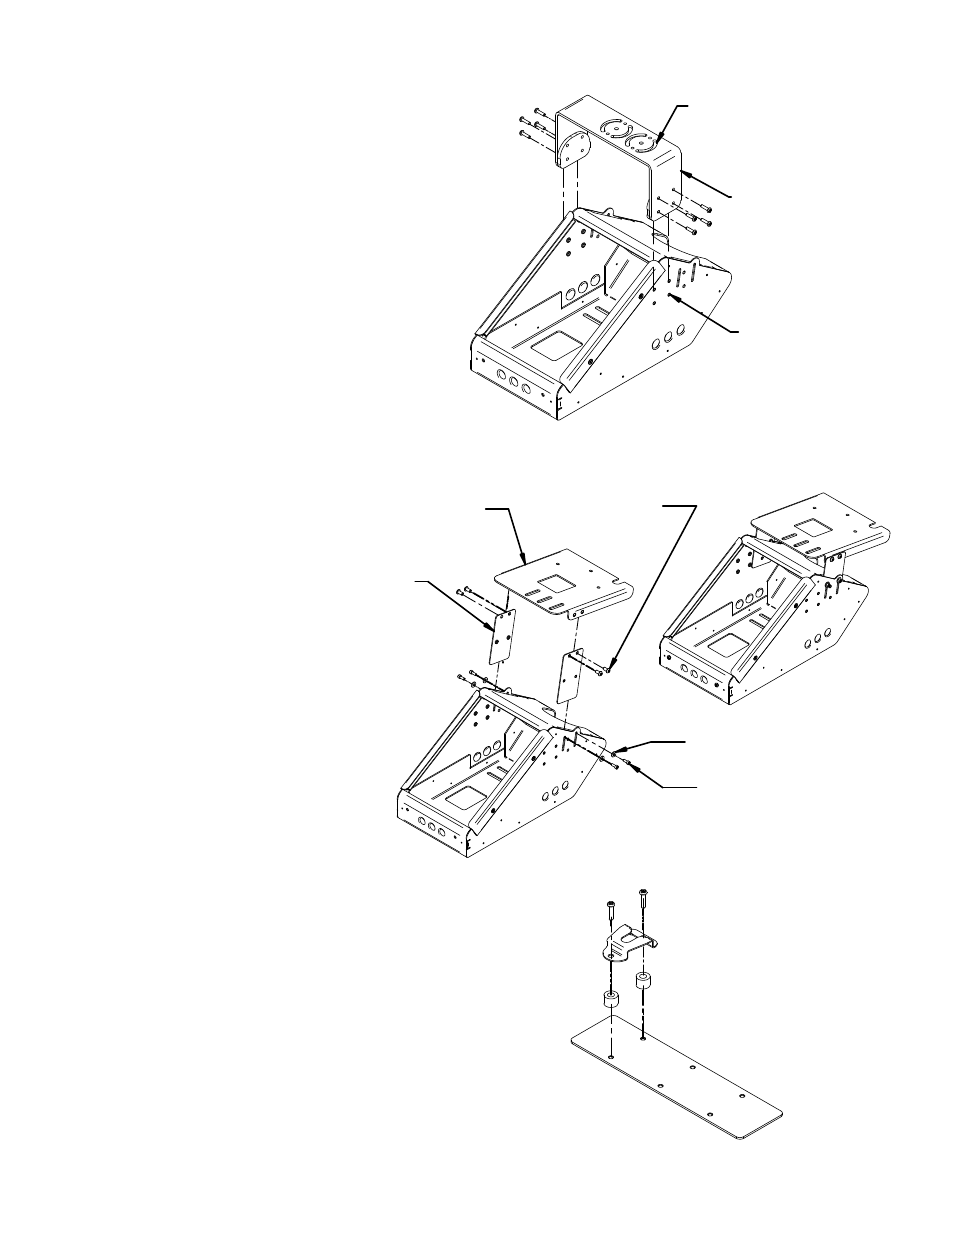
Communications Bracket (MCS-COMBRKT)
1. The communications bracket is designed to
have any Gamber Johnson Clevis device
mounted to it. In order to mount a
Clevis/Docking Station, or Computer Cradle,
assembly to the MCS-COMBRKT, the
MCS-ERGOBOX12 must be pulled away from
the dash. Assemble the MCS-COMBRKT,
desired Clevis Device, and MCS-ERGOBOX12
prior to attaching the box to the Top Plate (see
FIG. 4).
2. Adjust the assembly to the desired position.
Attach to Top Plate by assembling four 1/4-20
carriage bolts, four 1/4" DIA. flat washers, four
1/4" lock washers and four 1/4-20 hex nuts
about the bottom of the box and the Top Plate.
NOTE: The pattern of mounting holes for the
MCS-COMBRKT is known as an AMPS
pattern.
FIG. 4
SMILEY FACE PATTERN FOR
MOUNTING CLEVIS DEVICE
MCS-COMBRKT
AMPS PATTERN
Mounting to the In-Dash Bracket
1. If mounting the MCS-VERTBOX12 in
a Ford Crown Victoria, the box can also
attach to the In-Dash Bracket for further
stability, using NP-DASH-KT (see FIG.
5).
2. After the In-Dash Bracket is attached to
the vehicle, align the MCS-ERGOBOX12
and fasten to the In-Dash Bracket using
two braces, four 1/4-20 x .50" Socket
Button Head screws, four 10-32 x .50"
Socket Head Cap Screws and four #10 flat
washers all found in NP-DASH-KT.
Assemble as illustrated in FIG. 5.
FIG. 5
IN-DASH
BRACKET
BRACE
Assembling the MCS-MICPLT
1. The MCS-MICPLT is a kit that allows a
radio microphone to be mounted in the same
fashion as all Gamber Johnson Faceplates.
The mic clip itself is not provided with the
MCS-MICPLT kit as it is standard that a mic
clip is shipped with most communication
devices that use a microphone. Assemble as
illustrated in FIG. 6.
2. It is recommended that if using the
MCS-MICPLT kit to place the finished
assembly in the lowest position on the
MCS-ERGOBOX12. By assembling the kit
in this fashion you be able to avoid using the
short Faceplate Vertical Offset (see FIG. 2).
FIG. 6
SHEET 2 OF 3
#10 WASHER
10-32 X .50"
1/4-20 X .50"