Flint & Walling SP Self-Priming Sprinkler Pump User Manual
Page 10
10
© Copyright 2014 Flint & Walling. All rights reserved.
MAINTENANCE
LUBRICATION
The pump and motor requires no lubrication. The
ball bearings of the motor have been greased at
the factory. Under normal operating conditions
they should require no further greasing.
ROTARY SEAL ASSEMBLY REPLACEMENT
CAUTION: Make certain that the power
supply is disconnected before attempting to
service the unit. The rotary seal assembly must be
handled carefully to avoid damaging the precision
lapped faces of the sealing components.
See Parts List For Reference Letters
1. Disengage pump body
G from motor assembly
by removing bolts
H.
2. Remove diffuser
D.
3. Unthread impeller
C from motor shaft and
remove spring.
NOTE: To remove impeller, place screwdriver
within slot in shaft end and hold shaft firmly.
Rotate impeller counterclockwise to remove from
shaft.
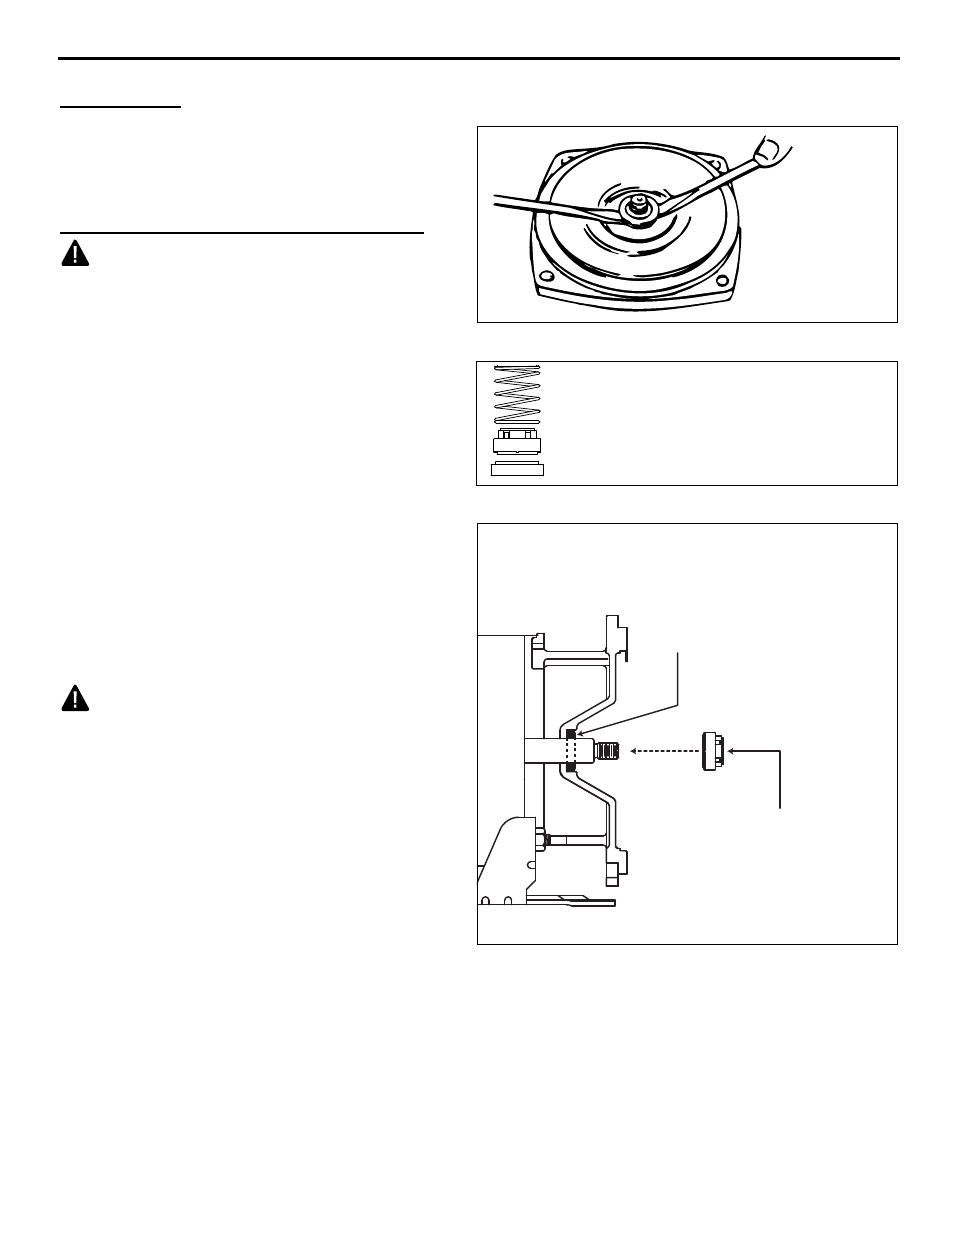
4. Use a screwdriver to remove the rotary seal
B.
Pry the ceramic seal and rubber gasket from
the recess of the mounting bracket. (Fig 1).
CAUTION: Be careful not to damage the
motor shaft or recess surface.
5. Clean the recess and motor shaft thoroughly.
6. Install the new rotary seal assembly (Fig 2):
NOTE: To make installation easier, apply a drop
of liquid soap to the outside diameter of the rubber
gasket. Make certain that the ceramic seal is kept
clean and free of dirt and/or oil.
a. Insert the ceramic seal and the rubber
gasket into the recess. (Fig 3).
b. Slip the remaining parts of the rotary seal
assembly onto the motor shaft.
7. Replace the spring, impeller, and diffuser
removed in steps 2 and 3.
8. Reassemble the pump body to the motor and
mounting bracket.
Fig 1
Fig 3
Remove
Mechanical
Seal
Press ceramic
and gasket into
housing
Press rotary
seal onto shaft
against ceramic
Ceramic seal and rubber gasket
Rotary seal half
Stainless steel spring
Fig 2 - Rotary Seal Assembly