Install into backbox, Unison heritage series – ETC Unison Heritage Fader Station User Manual
Page 3
E T C I n s t a l l a t i o n G u i d e
Unison Heritage Series
Unison Heritage Fader Station
Page 3 of 4
Electronic Theatre Controls, Inc.
c:
Use the WAGO connector to connect the installed ground wire
to the pigtail wire provided. Open the terminal levers on the
WAGO connector and insert the installed (typically green/
yellow) ESD drain (ground) wire and the green/yellow lead
from the pigtail into the terminals.
d:
Close the levers onto the wires.
e:
Install the ground spade onto the receptacle on the control
board.
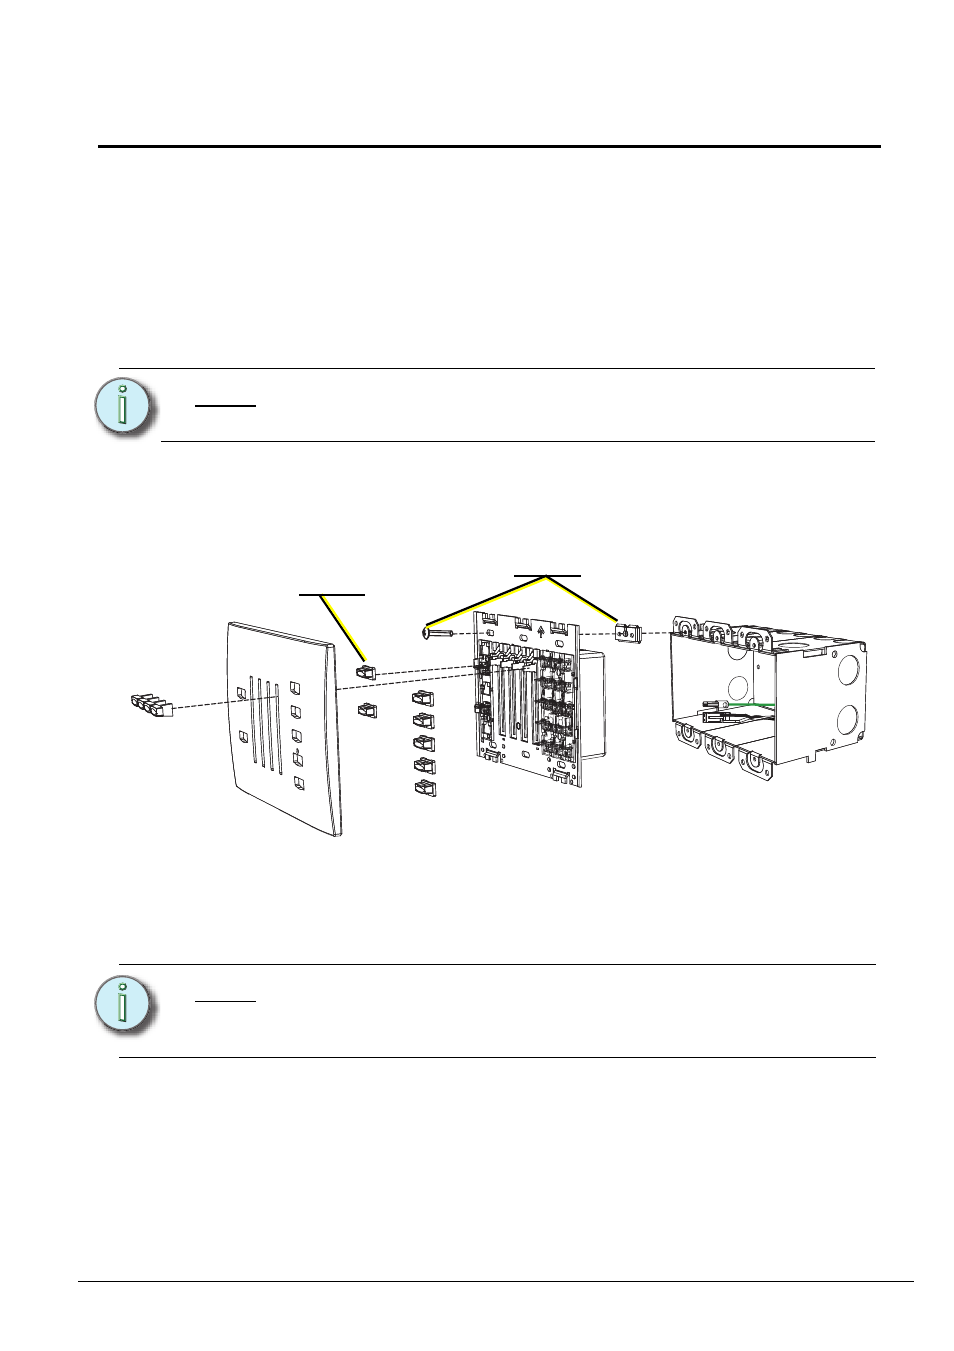
Install the Station into the Backbox and Attach the Faceplate
Spacers are provided to help, as needed, to align the station and cover flush
against the wall in flush mount applications. The spacers are not needed on
surface mount backboxes.
Install into Backbox
Step 1:
Insert the station electronics and wiring into the backbox. The arrow
on the mounting plate must point up.
Step 2:
If needed, fold the receptacle spacer in a zig-zag fashion and press
together to achieve the required thickness to fill the gap between the
station and backbox. Cut off the excess and place between the
station and flush backbox.
Step 3:
Secure the station with screws provided. If using spacers, insert the
screws through them.
N o t e :
A ground connection is required for all Heritage Fader Station
assemblies if not installed in a grounded metal backbox.
N o t e :
For some flush mount applications with certain trim rings it may
be necessary to remove the station’s back cover for installation
into the backbox.
Step 3
Step 4