Finish up, Rack door baffle replacement, N o t e – ETC Sensor+ Touring Rack CEM+ to CEM3 Retrofit User Manual
Page 14
12
CEM3 Sensor+ Touring Rack Retrofit Manual
Step 3:
Place the lock assembly in the new door and secure it with the retention nut using
a 7/8” open end wrench.
Rack door baffle replacement
Doors with straight baffles (regardless of lock type) will need to have the baffles replaced
with new, curved baffles. The doors will be reused and the locks need not be removed.
Step 1:
Remove the old CEM rack door baffle from the door (outlined below) by removing
the four 5/16” nuts.
Step 2:
Install the new CEM3 door baffle on the rack door with the four 5/16 nuts.
Finish Up
Step 1:
Remove the CEM baffle from the spare CEM slot (if available). It is held by two
screws, one in each upper side corner, similar to the backplane screws. You
must bend the baffle to get it out of the spare module slot.
Step 2:
Install the new CEM3 baffle into the spare module slot using the screws and
spacers provided in the kit.
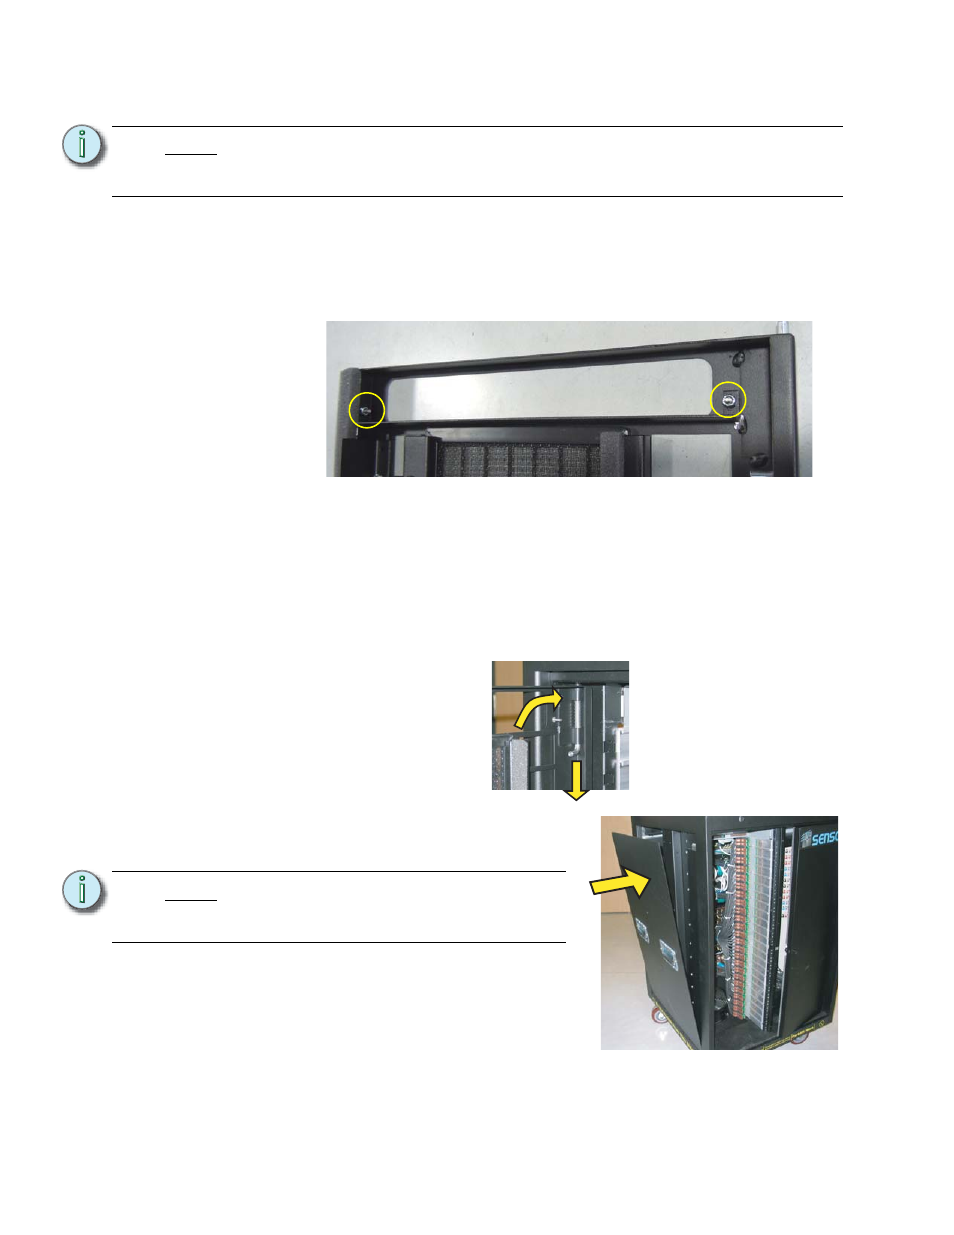
Step 3:
Install the rack filter
door(s) on the rack by
pushing down on the tab
in the hinged corner and
sliding the door back in
place.
Step 4:
Reinstall any removed
side panels of the rack with their original
screws.
Step 5:
Remove the Sensor+ sticker from the
appropriate door.
Step 6:
Apply the new Sensor3 sticker to the
door.
Step 7:
Dispose of all waste materials in a safe
manner per local ordinances.
N o t e :
Locks must go back in the same door location from which they were removed. If
you removed the lock from a left opening door, it must be installed back in a left
opening door.
N o t e :
Use caution when starting the six screws
along the outer edges, being careful not
to damage the spring retaining clips.
1-
P
u
sh
2-
R
ei
nsta
ll
Reinstall