The ht3100 data collector – Cooper-Atkins GL300 User Manual
Page 16
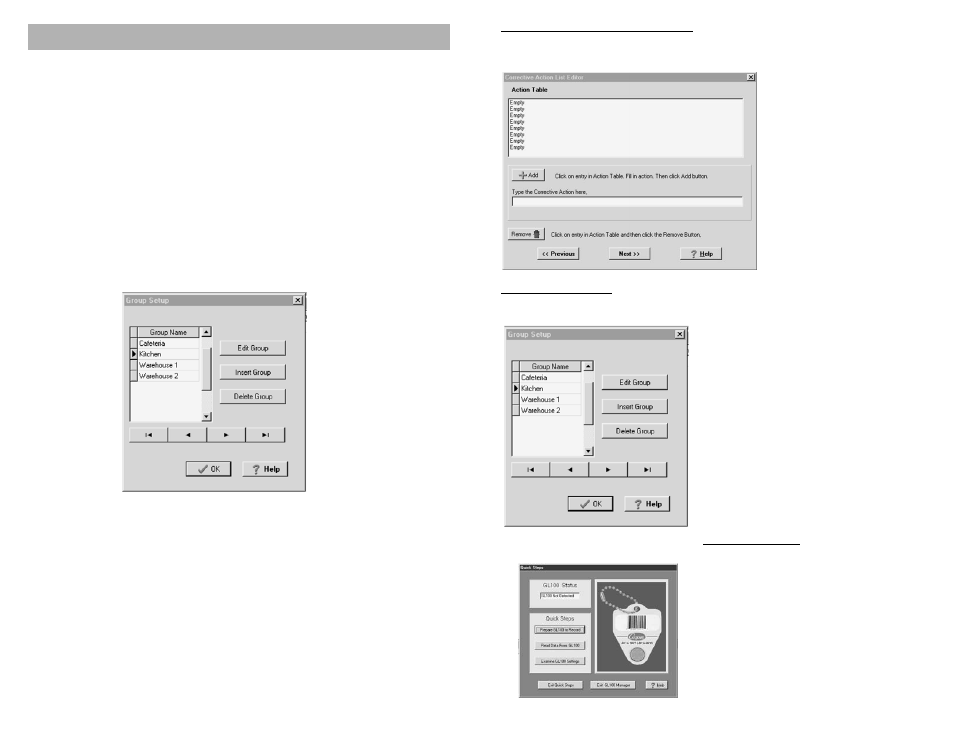
Corrective Action List Editor Window
The “Corrective Action List Editor” allows you to create your own list of corrective actions that you
may select from while analyzing data. To build your own corrective action list:
• In the Action Table, click on any
line that shows “Empty”. All the
Empty lines will highlight.
• Click inside the edit box under
“Type the Corrective Action here”.
• Type a corrective action statement.
• Click on the Add button.
Your corrective action will be added
to the list.
• Continue adding your own
corrective actions (up to eight may
be added) then click on the Next>>
button to continue.The “Group
Setup” window will appear.
Group Setup Window
The “Group Setup” window allows you to create a list of groups to which you may assign a
GL100 Mini Data Logger. Assigning a GL100 to a
specific group will help you later on when you need
to look at data from a set of devices and create a
report. To add a group name to the list:
• Click on the Insert Group button.
• Click inside the blank space in the list.
• Type the name of your new group. You can create
as many groups as you like.
When finished making groups...
• Click on the Finish button.
The initial settings have been completed, and the
GL100 Manager “Quick Steps” window is displayed.
Using Quick Steps
From the “Quick Steps” window you can easily
perform these functions: Tag setup, data download,
and examine the GL100 logger. If there is not a
GL100 in the reader, or if the reader is not
connected to the proper COM port, the GL100
Status will display “GL100 Not Detected”. Examine
all connections and check the COM port assignment
to verify that the setup is correct. When the GL100
Manager program detects a GL100 device, the
GL100 status will show “Found GL100”.
3
Corrective Action List Editor allows you to create your own list of corrective actions that you may
select from while analyzing data. To build your own Corrective Action List...
•
Click on Setup from the main menu bar.
•
Click on Corrective Action List In the Action Table.
•
Click on any line that shows “Empty”. All the “Empty” lines will highlight.
•
Click inside the edit box under Type the Corrective Action here.
•
Type a corrective action statement.
•
Click on the Add button. Your corrective action will be added to the list.
Continue adding your own corrective actions (up to eight may be added).
•
Click on the OK button to close the window.
The “Group Setup” window allows you to create a list of groups to which you may assign an
HT3100 HACCP Manager. Assigning an HT3100 to a specific group will help you later on when you
need to look at data from only certain devices and to create a report.
•
Click on Setup from the main menu bar
•
Click on Groups. The “Group Setup” window will open.
To add a group name to the list....
•
Click on the Insert Group button.
•
Click inside the blank space in the list, then type the name of your new group. You can create
as many groups as you like.
To edit the name of an existing group...
•
Highlight the group in the table.
•
Click on the Edit Group button.
•
Make changes to the group name. When edits are complete...
•
Click on a different group name in the table, and your changes will be saved.
To delete an entry in the group table...
•
Highlight the group to delete.
•
Click on the Delete Group button. The highlighted group will be removed from the table.
THE HT3100 DATA COLLECTOR
14