Auto Meter 6345 User Manual
Digital pyrometer gauges, Installation, Important
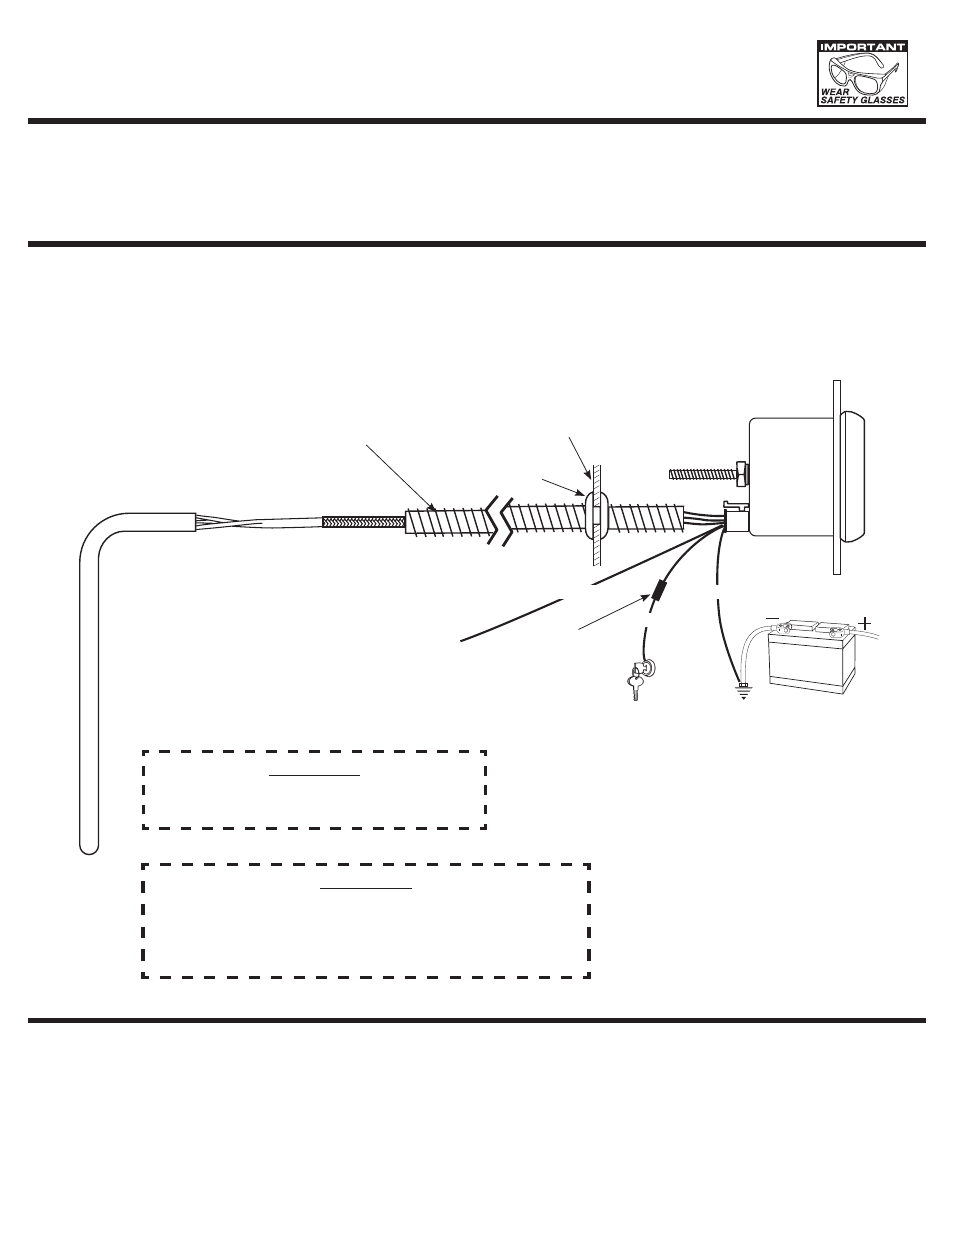
12V BATTeRy
INSTALLATION INSTRUCTIONS
DIGITAL pyROmeTeR GAUGeS
2650-1240-00
GOOD ENGINE
GROUND
GROMMET
+ 12v CONNECTION
RED
BLACK
WHITE
CAUTION:
As a safety precaution, the +12V terminal of this product
should be fused before connecting to the 12V ignition switch.
We recommend using a 1 Amp, 3AG fast-acting type cartridge
fuse (Littlefuse
®
# 312 001 or an equivalent).
INSTALLATION
1. Check that you have all parts required for installation, and the engine is cool.
2. Disconnect the negative (-) battery cable.
3. Gauge mounts in a 2
1
/
16
" hole. Use supplied brackets and nuts to secure gauge to dash.
4. Drill 1" diameter hole where wires pass through sheet metal (such as firewall) and install rubber grommet provided.
(Grommet will require slit.)
5. Connect the white wire to dash lighting or switchable 12v light source, the red wire to switched +12V source and
the black wire to ground. (see diagram for details) Digital diaplay will dim when power is applied to the white wire.
FUSE
(SEE CAUTION
BELOW)
FIREWALL
+12v
DASH
Important
Pyrometers are sensitive, high accuracy instruments. They must be handled and installed with care to insure
proper performance. Carefully read and follow these instructions, and your pyrometer will provide you with a
long and accurate life.
CAUTION:
Wear Safty glasses and disconnect the battery
before making any electrical connections.
OPTIONAL
SLIT TUBING
RECOMMENDED
(AVAILABLE AT MOST
HARDWARE STORES)
QUESTIONS
?
If after completely reading these instructions you have questions regarding the operation or installation of your instrument(s),
please contact Auto Meter Technical Service at 815-899-0801.
You may also email us at [email protected].
Additional information can also be found at http://www.autometer.com