Step 3 - raising the beam arches – Anchor NAVI-TRAC LITE PAVILLION - 12 TO 24 User Manual
Page 8
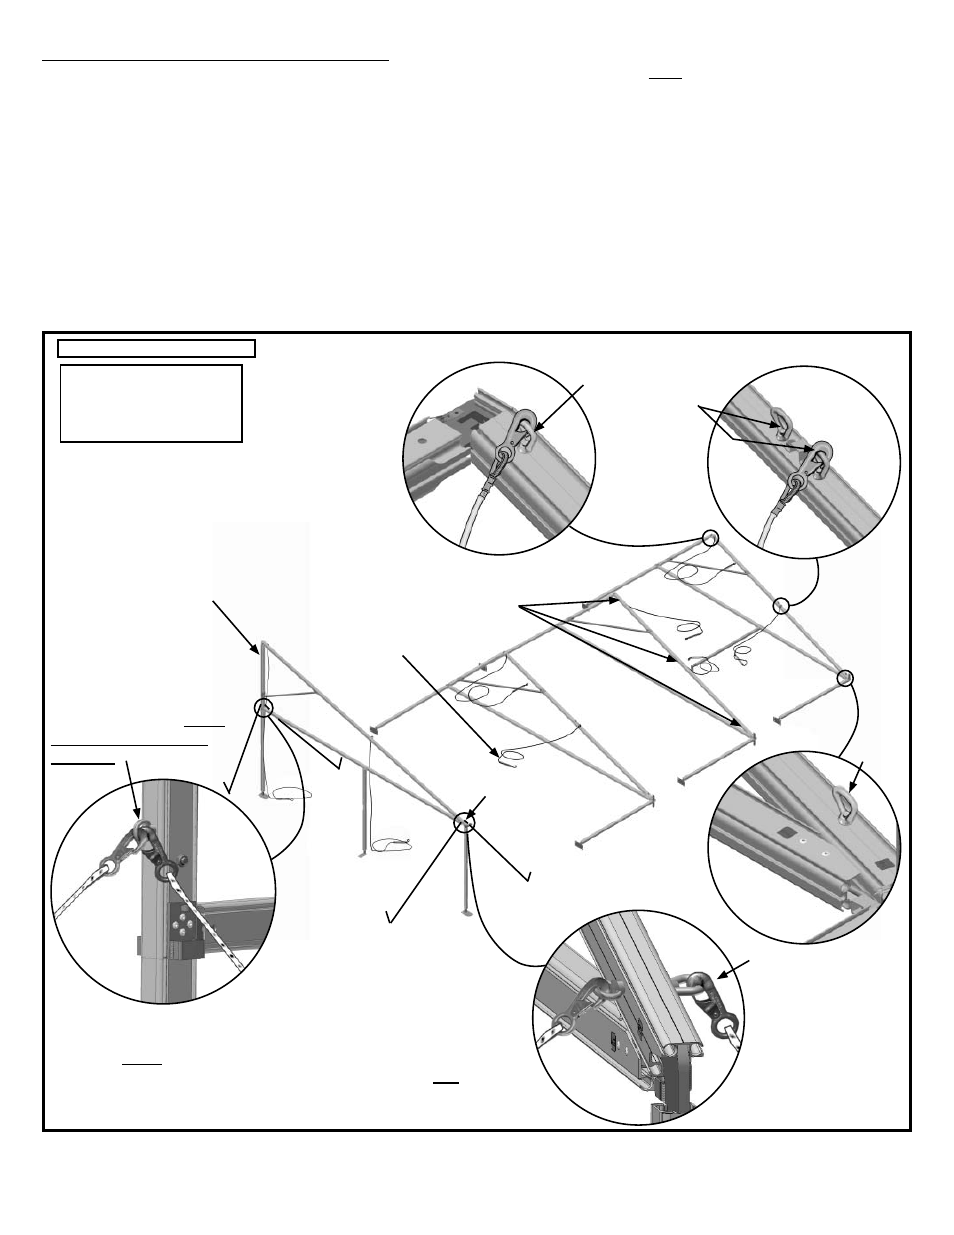
Step 3 - Raising the Beam Arches
Raise fi rst beam. Tie off securely or hold up using adequate installation personnel. Note: There are no stakes or guys
included with this frame, however, the installation kit (sold separately) includes eye bolt and eye nut for attaching to frame
along with safety webs that may be used to stake or tie-off frame to stabilize the fi rst beam while frame is being assem-
bled. See Figure 3a.
Raise the second beam arch, keeping base plate in place by using installation personnel or stakes (not included).
Note: Before Raising Beam Arches, all eye nuts and “X” Cables must be in place as
shown in Figure 3a. Turnbuckles should be open all the way.
•
•
8
Figure 3a
First beam arch as-
sembled and raised.
Note: Turnbuckles
at free end.
Eyenuts on
inside of Rafter
Eyenuts face
ground on sec-
ond rafter.
Eyenuts on
inside of Rafter
22’ Projection Frame Shown
Frame sizes under 16’
projection have only (2)
cables per bay and no
purlins.
Note: If you are installing a 2-bay pavilion, both
bays must be “X” cabled, therefore, eye nuts and
eye bolts must be used at center beam arch (similar
to confi guration at right).
1/2” x 3 1/4” cap screw
and eye nut may be used
with safety web guys from
installation kit for stabilizing
fi rst raised beam. (instal-
lation kit is an optional
purchase)
Eyebolt and safety
webs from installation
kit may be temporarily
installed for stabiliz-
ing fi rst raised beam.
(Use eyebolt with
eyenut from standard
frame hardware.)
Eyenut