Step 7 - fabric tensioning – Anchor NAVI-TRAC LITE PAVILLION - 12 TO 24 User Manual
Page 13
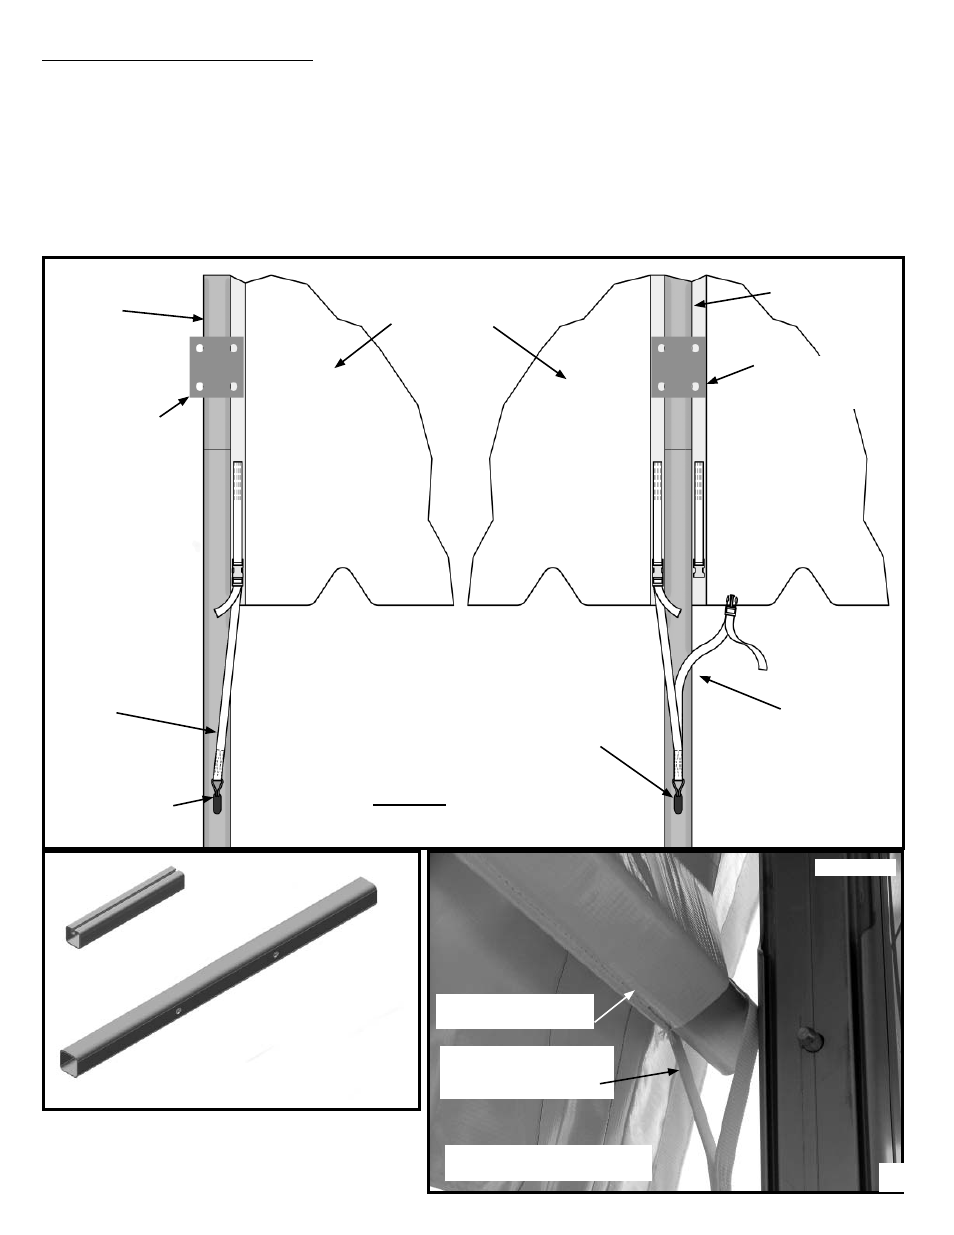
Step 7 - Fabric Tensioning
At back of pavilion, snap buckles of back-end straps to corresponding buckles at bottom of mids. Insert bottom hook into
slot at back of upright. Tighten just enough so that hook does not fall out of slot. (Figure 7a)
At front of mids, insert tension tubes into pockets under curtain. Between mids, use a tension tube splice to connect
tubes. (Figure 7b) Before insertion, hang tension strap with ratchet and hook over the tension tube splice. At ends, hang
tension strap over end of tension tube as shown in Figure 7c.
Insert hook of tension strap into slot in front upright. Crank ratchet until tension strap stays in place but do not tension.
Check mids to be sure they are all pulled to the same point in front and back. Check back end straps to be sure they are
tightened uniformly. When you have checked these things, you may now ratchet the front tension straps. Tighten until all
mids are uniformly snug.
•
•
•
Figure 7c
Tension strap over end
of tension tube at front
corner.
Back View
Mid Fabric
Mid Fabric
Rear Corner Up-
right
Rear Upright
Slot in upright
Slot in upright
Use single back
end strap at corner
upright.
Connect male buck-
le to female buckle
at bottom of mid.
Use double back
end strap at
uprights between
mids.
Figure 7a
Frame attaching
bracket
Frame attaching
bracket
TENSIONING
TUBE SPLICE
TENSIONING TUBE
Figure 7b
13
Inside view looking at tension
pocket under curtain.
Tension Pocket with
tension tube inserted.
Tensioning Tube Splice
is used between mids
fi ts into ends of tension
tubes.