3 battery and charger - installation, Battery - remove/install, Battery charger - remove/install – JLG 9MP Service Manual User Manual
Page 33: Battery and charger - installation -3
SECTION 4 - CONTROL COMPONENTS
3121163
– JLG Lift –
4-3
4.3
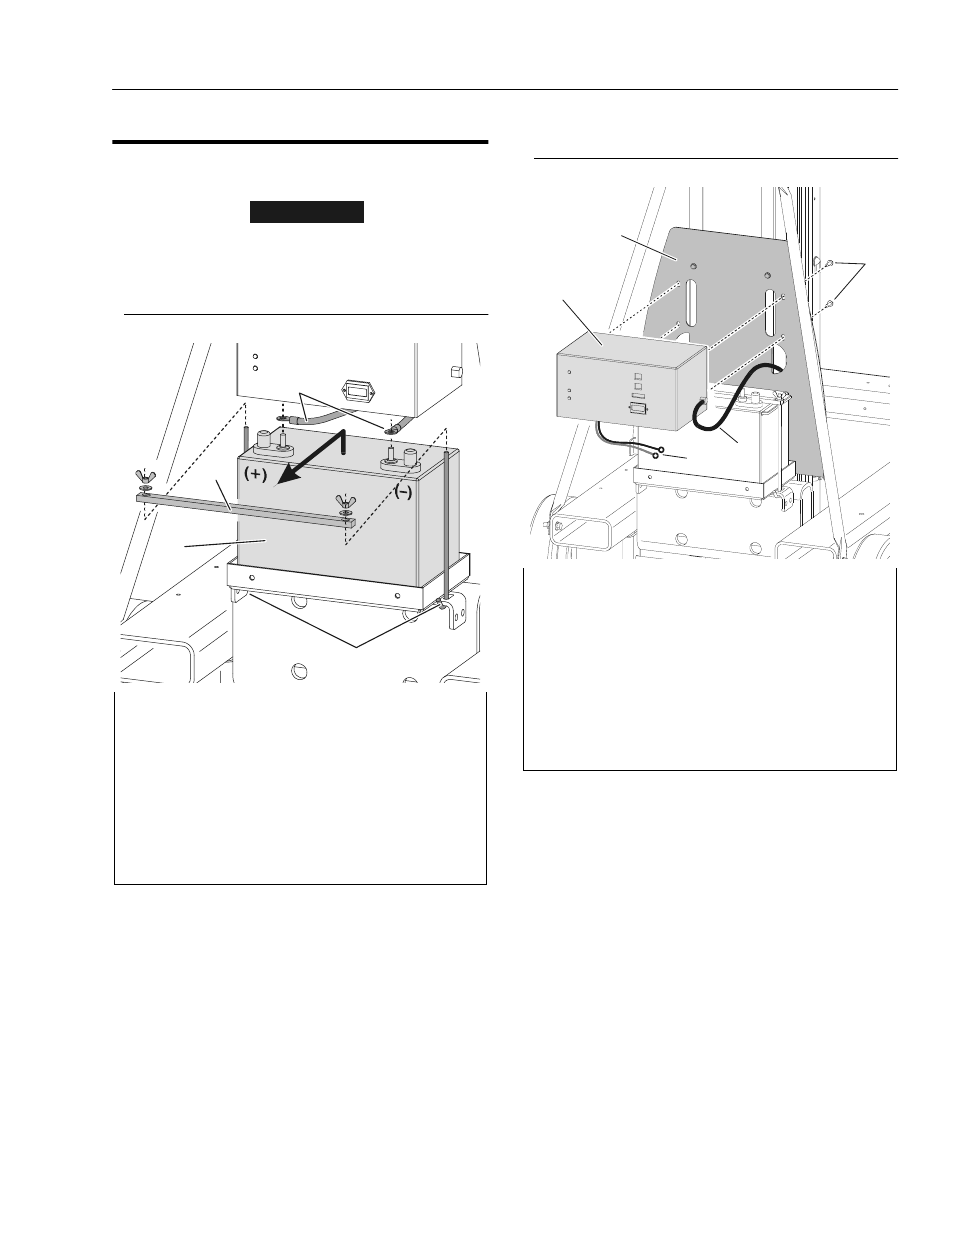
BATTERY AND CHARGER -
INSTALLATION
IMPORTANT
BEFORE REMOVING ANY COMPONENT FROM THE ELECTRICAL
SYSTEM, DISCONNECT THE POSITIVE TERMINAL FROM THE BAT-
TERY.
Battery - Remove/Install
Battery Charger - Remove/Install
• Remove the battery/battery charger cover, see Section 4.2.
• After hold down bar, battery cables and battery charging leads
are removed, lift battery up and out of battery tray.
1. 12 Volt (AGM) Battery (a) 3. Hold Down Bar Attach Rods
2. Hold Down Bar and Nuts 4. (–) and (+) Battery Cables (b)
Notes: (a) Install the battery with the (+) terminal on the left
side of machine, as shown in illustration above.
(b) RED cable is (+) / BLACK cable is (–), install terminal
boots over each post. (not shown)
1
2
3
4
• Remove the battery/battery charger cover, see Section 4.2.
1. Battery Charger
4. (+) RED and (–) BLACK -
2. Charger/Rear Cover Battery Charging Leads (a)
Mounting Plate
5. AC Voltage Input Cable (b)
3. Attach Screws and
Washers (2 ea. side)
Notes: (a) Attach to battery terminal posts, RED to (+),
BLACK to (–).
(b) If equipped with optional cord reel, attach AC plug to
the input cable on the reel.
1
2
3
4
5