4l60e transmission reluctor kit – Advance Adapters 716073 User Manual
Page 3
ADVANCE ADAPTERS INC.
P/N: 716073
P.O. Box 247, 4320 Aerotech Center Way
Paso Robles, CA 93447
PAGE 3 OF 3
Telephone: (800) 350-2223
Fax: (805) 238-4201
Page Rev. Date:
08-05-05
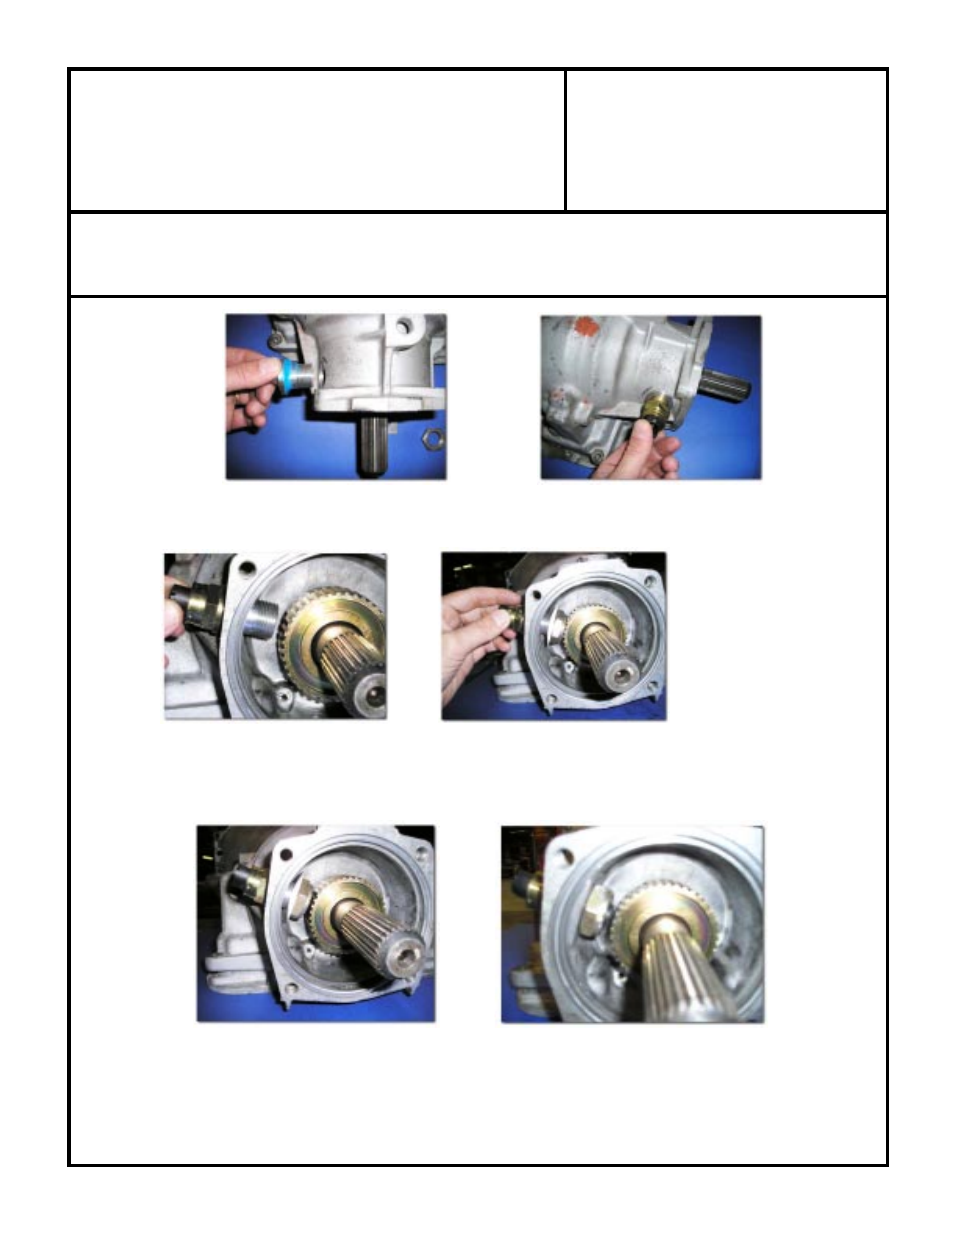
8.
You will now need to install the bushing back into the transmission housing. The bushing will require RTV Blue silicone
applied to seal the bushing to the transmission. Use just enough to form a bead around the outside of the bushing.
9.
With the sensor and bushing set into the transmission, slip the wedge over the bushing so that the radius portion fits the
inside contour of the case. Next, put Loctite thread retainer on the nut and then install the nut onto the bushing. The bushing
will need to be slightly pulled out of the transmission to fit on the nut. Be careful not to move the bushing to much because
you want to keep a good seal with the silicone.
10. Tighten the nut to retain the bushing and sensor onto the transmission ( the bushing should be snug). Inspect the
gap between the sensor and the reluctor ring. The gap should measure between .010"- .012".
4L60E TRANSMISSION
RELUCTOR KIT
SPECIAL NOTE:
The components packaged in this kit have been assembled and machined for specific type of conversions. Modifications
to any of the components will void any possible warranty or return privileges. If you do not fully understand modifications or changes that will be
required to complete your conversion, we strongly recommend that you contact our sales department for more information. This instruction sheet
is only to be used for the assembly of Advance Adapter components. We recommend that a service manual pertaining to your vehicle be obtained
for specific torque values, wiring diagrams and other related equipment. These manuals are normally available at automotive dealerships and parts
stores.