Advance Adapters 713015A User Manual
Page 3
BRONCO II & RANGER 2WD
FORD V8 ENGINE MOUNTS
ADVANCE ADAPTERS INC.
P/N: 713015A
P.O. Box 247, 4320 Aerotech Center Way
Paso Robles, CA 93447
PAGE 3 OF 4
Telephone: (800) 350-2223
Fax: (805) 238-4201
Page Rev. Date:
10-29-01
SPECIAL NOTE:
The components packaged in this kit have been assembled and machined for specific type of conversions. Modifications to any of the components will void
any possible warranty or return privileges. If you do not fully understand modifications or changes that will be required to complete your conversion, we strongly recommend that
you contact our sales department for more information. This instruction sheet is only to be used for the assembly of Advance Adapter components. We recommend that a service
manual pertaining to your vehicle be obtained for specific torque values, wiring diagrams and other related equipment. These manuals are normally available at automotive dealerships
and parts stores.
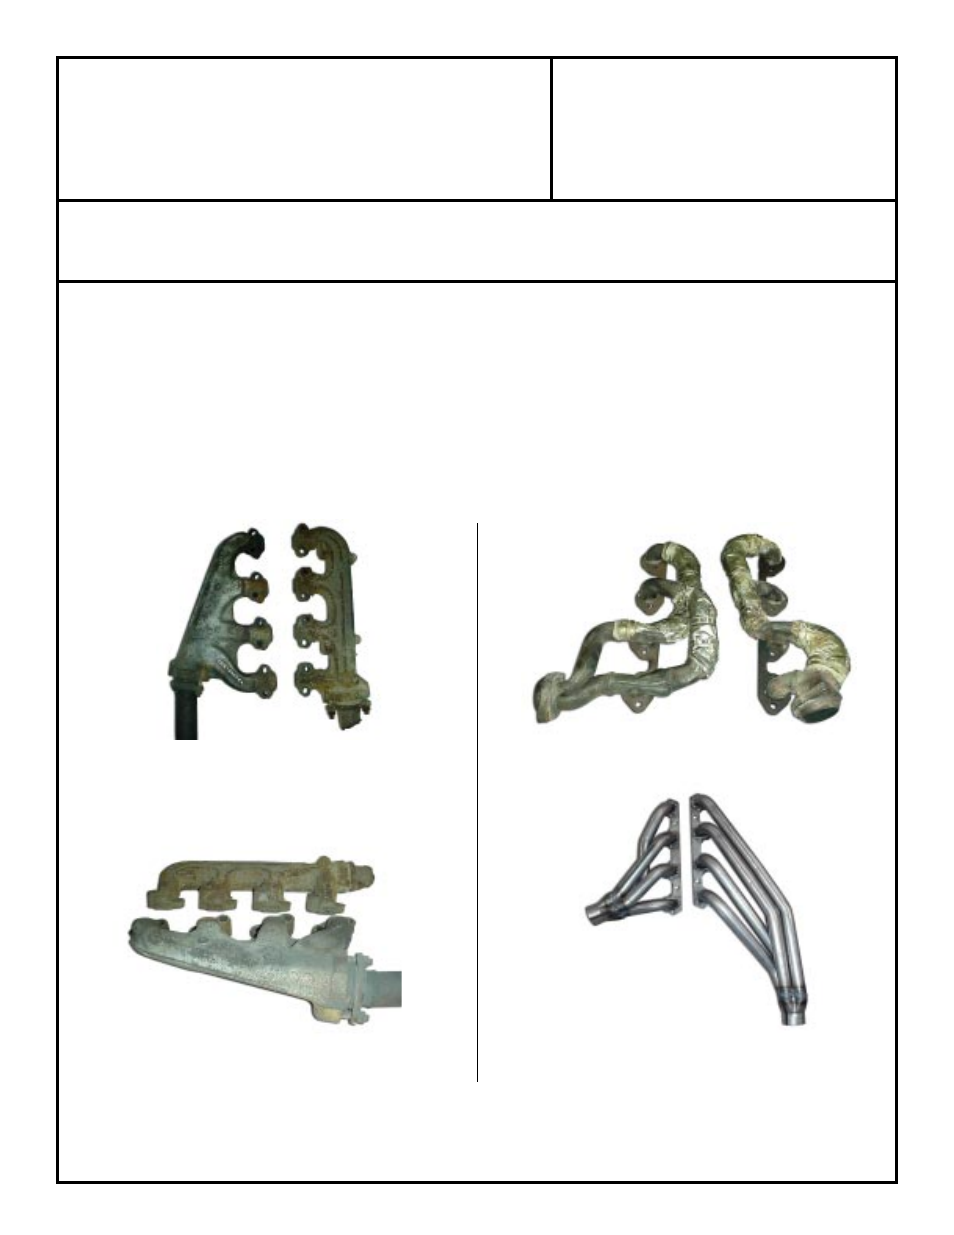
Side view of the early Ford manifolds.
Advance Adapters conversion headers for the 2WD Ford Ranger
Stock Ford Explorer V8 manifolds for most smog controlled vehicles.
Early stock Ford manifolds that fit with our motor mounts.
These mounts are designed to work with both exhaust headers and or stock manifolds. There are two styles of manifolds
that fit these vehicles. The Ford Explorer manifolds fit well and provide the correct emission controls for smog in most vehicles.
For vehicles not concerned about smog, the photos below show stock cast iron Ford manifolds that also fit well; however,
the vehicles that these stock Ford manifolds were off of is not known. If you would rather have an exhaust header, we also
manufacture a header to fit into Ford Rangers. Part number 717044A and 717044A-NP are custom headers designed for our
mounting system. When installing a V8 with our headers, the passenger side header is a tight fit. We recommend that you
set the passenger header alongside the frame rail before setting the engine into the engine compartment. The driver's side header
can be installed once the engine is in the proper location. Once the engine is installed and leveled, bolt both headers to the block
and check clearances.
After the exhaust system is bolted to the block and you've check for clearances on the block and exhaust, secure the motor
mounts to the cradle.