Tj 241 cable shifter – Advance Adapters 715543241 User Manual
Page 8
ADVANCE ADAPTERS INC.
P/N: 715543-241
P.O. Box 247, 4320 Aerotech Center Way
New Item: (10/10)
Paso Robles, CA 93447
PAGE 8 of 8
Telephone: (800) 350-2223
Fax: (805) 238-4201
Page Rev. Date:
10-11-10
SPECIAL NOTE:
The components packaged in this kit have been assembled and machined for specific type of conversions. Modifications to any of the components
will void any possible warranty or return privileges. If you do not fully understand modifications or changes that will be required to complete your conversion, we
strongly recommend that you contact our sales department for more information. This instruction sheet is only to be used for the assembly of Advance Adapter
components. We recommend that a service manual pertaining to your vehicle be obtained for specific torque values, wiring diagrams and other related equipment.
These manuals are normally available at automotive dealerships and parts stores.
TJ 241 CABLE SHIFTER
Barrel Mount
Figure 30: New Transfer Case
Shift Lever Orientation
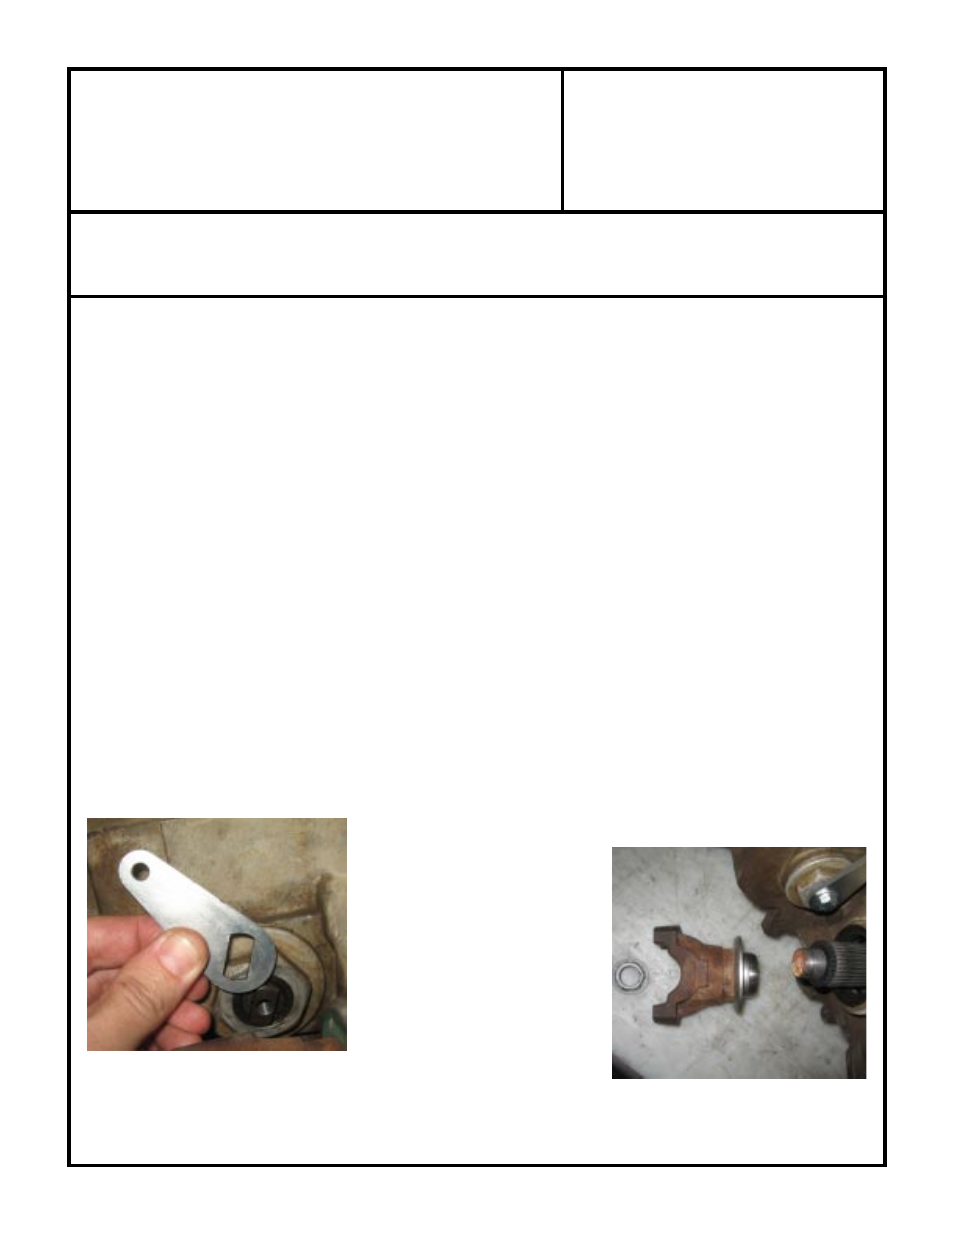
Figure 31: Proper Yoke
Installation Order
Transfer Case Installation and Transfer Case Shifter Cable Gear Box End Adjustment:
1.
Bolt the transfer case shifter bracket to the front of the transfer case where the stock bracket was bolted.
2.
Route the transfer case shifter cable through the transfer case shifter bracket hole with a jam nut on both
sides of the bracket and then completely thread the heim joint on to the end of the cable and tighten the
jam nut. This cable should already be routed under the transmission cooler lines.
3.
Remove the tranfer csae shift lever. Note: The transfer case front yoke must be removed. Use an 1-1/8"
socket and impact gun to remove the yoke nut and yoke. Do not allow any contaminants to enter the
transfer case while the yoke is off. Use a long T40 Torx bit and remove the shift lever bolt and then the
shift lever. To reinstall the yoke, install a new rubber yoke washer in to the yoke splines. Apply a bead of
silicone to the inside of the yoke. Apply ATF to the lip of the yoke seal, slide yoke over the rubber washer
until it bottoms out in the case. Secure using the new yoke nut, this is very important as the yoke nuts are
designed for one time use, and torque to 110 ft-lbs. (See Figure 31)
4.
Install the new supplied shift lever with the original bolt (use a medium strength thread locking compound
on the threads) and see Figure 30 for correct lever orientation. Torque to 20 ft-lbs.
5.
Adjust the transfer case shifter cable by adjusting the two 5/8" nuts so that the heim travels an 1/8" past the
shift lever for both directions of travel.
6.
Attach the cable shifter heim to the previously installed shift lever (See Figure30) using the supplied 1/4-
20x1" hex head bolt and a nylock hex nut.
7.
Check the position of the lever through the console, adjustments can be made by adjusting the cable
barrels below the shifter box assembly. The transfer case shift lever should change to approximately. 1.25"
from the console after installation and final adjustment.