Snorkel MX19-sn20000-20599CE User Manual
Page 14
Page 12
060570-028 MX15 / MX19 - Operation Manual
Maintenance
M
AINTENANCE
W A R N I N G
!
!
Never perform service while the platform is elevated without first blocking the elevating assembly.
DO NOT stand in the elevating assembly area while deploying or storing the brace.
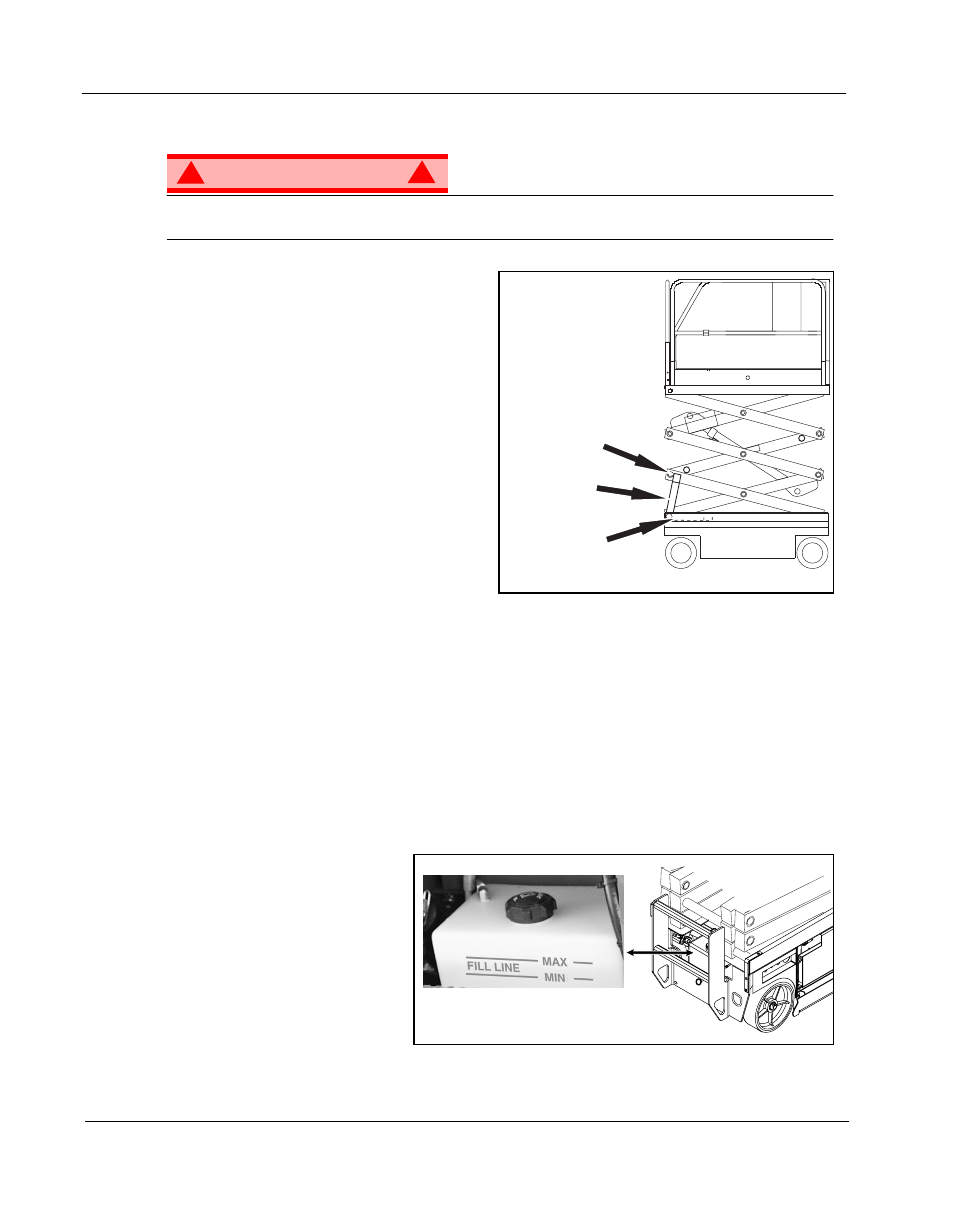
Figure 9: Scissor Brace
B
L O C K I N G
T
H E
E
L E V A T I N G
A
S S E M B L Y
S
CISSOR
B
RACE
I
NSTALLATION
1. Park the work platform on a firm, level surface.
Completely unload the platform before install-
ing the Scissor Brace.
2. Verify that the Chassis and Platform Emer-
gency Stop Switches are ON by pulling each
button out.
3. Turn and hold the Chassis Key Switch to
CHASSIS. Push the Chassis Lift/Lower Switch
to UP and elevate the platform approximately
2,1 m (7 ft.).
4. Rotate the Scissor Brace to a vertical position.
5. Carefully lower the platform until the end of the Scissor Arm Weldment rests on the Brace.
S
CISSOR
B
RACE
S
TORAGE
1. While holding the Brace, slowly raise the platform using the Chassis Controls until the end of the Scis-
sor Arm Weldment clears the Scissor Brace.
2. Rotate the Scissor Brace forward to rest on the Chassis.
3. Push the Chassis Lift/Lower Switch to LOWER and completely lower the platform.
H
Y D R A U L I C
F
L U I D
Figure 10: Hydraulic Reservoir
NOTE: Never add fluid if the platform is
elevated.
Check the level of the hydraulic
fluid with the platform fully lowered.
The hydraulic reservoir is located at
the rear of the machine. The fluid
level should be visible through the
side of the reservoir, and must be
between the MIN and MAX lines
(see Figure 10). Add hydraulic fluid
if necessary.
Scissor Arm
Weldment
Brace Installed
Brace Stowed