Snorkel LX50-sn2747-3299 User Manual
Page 7
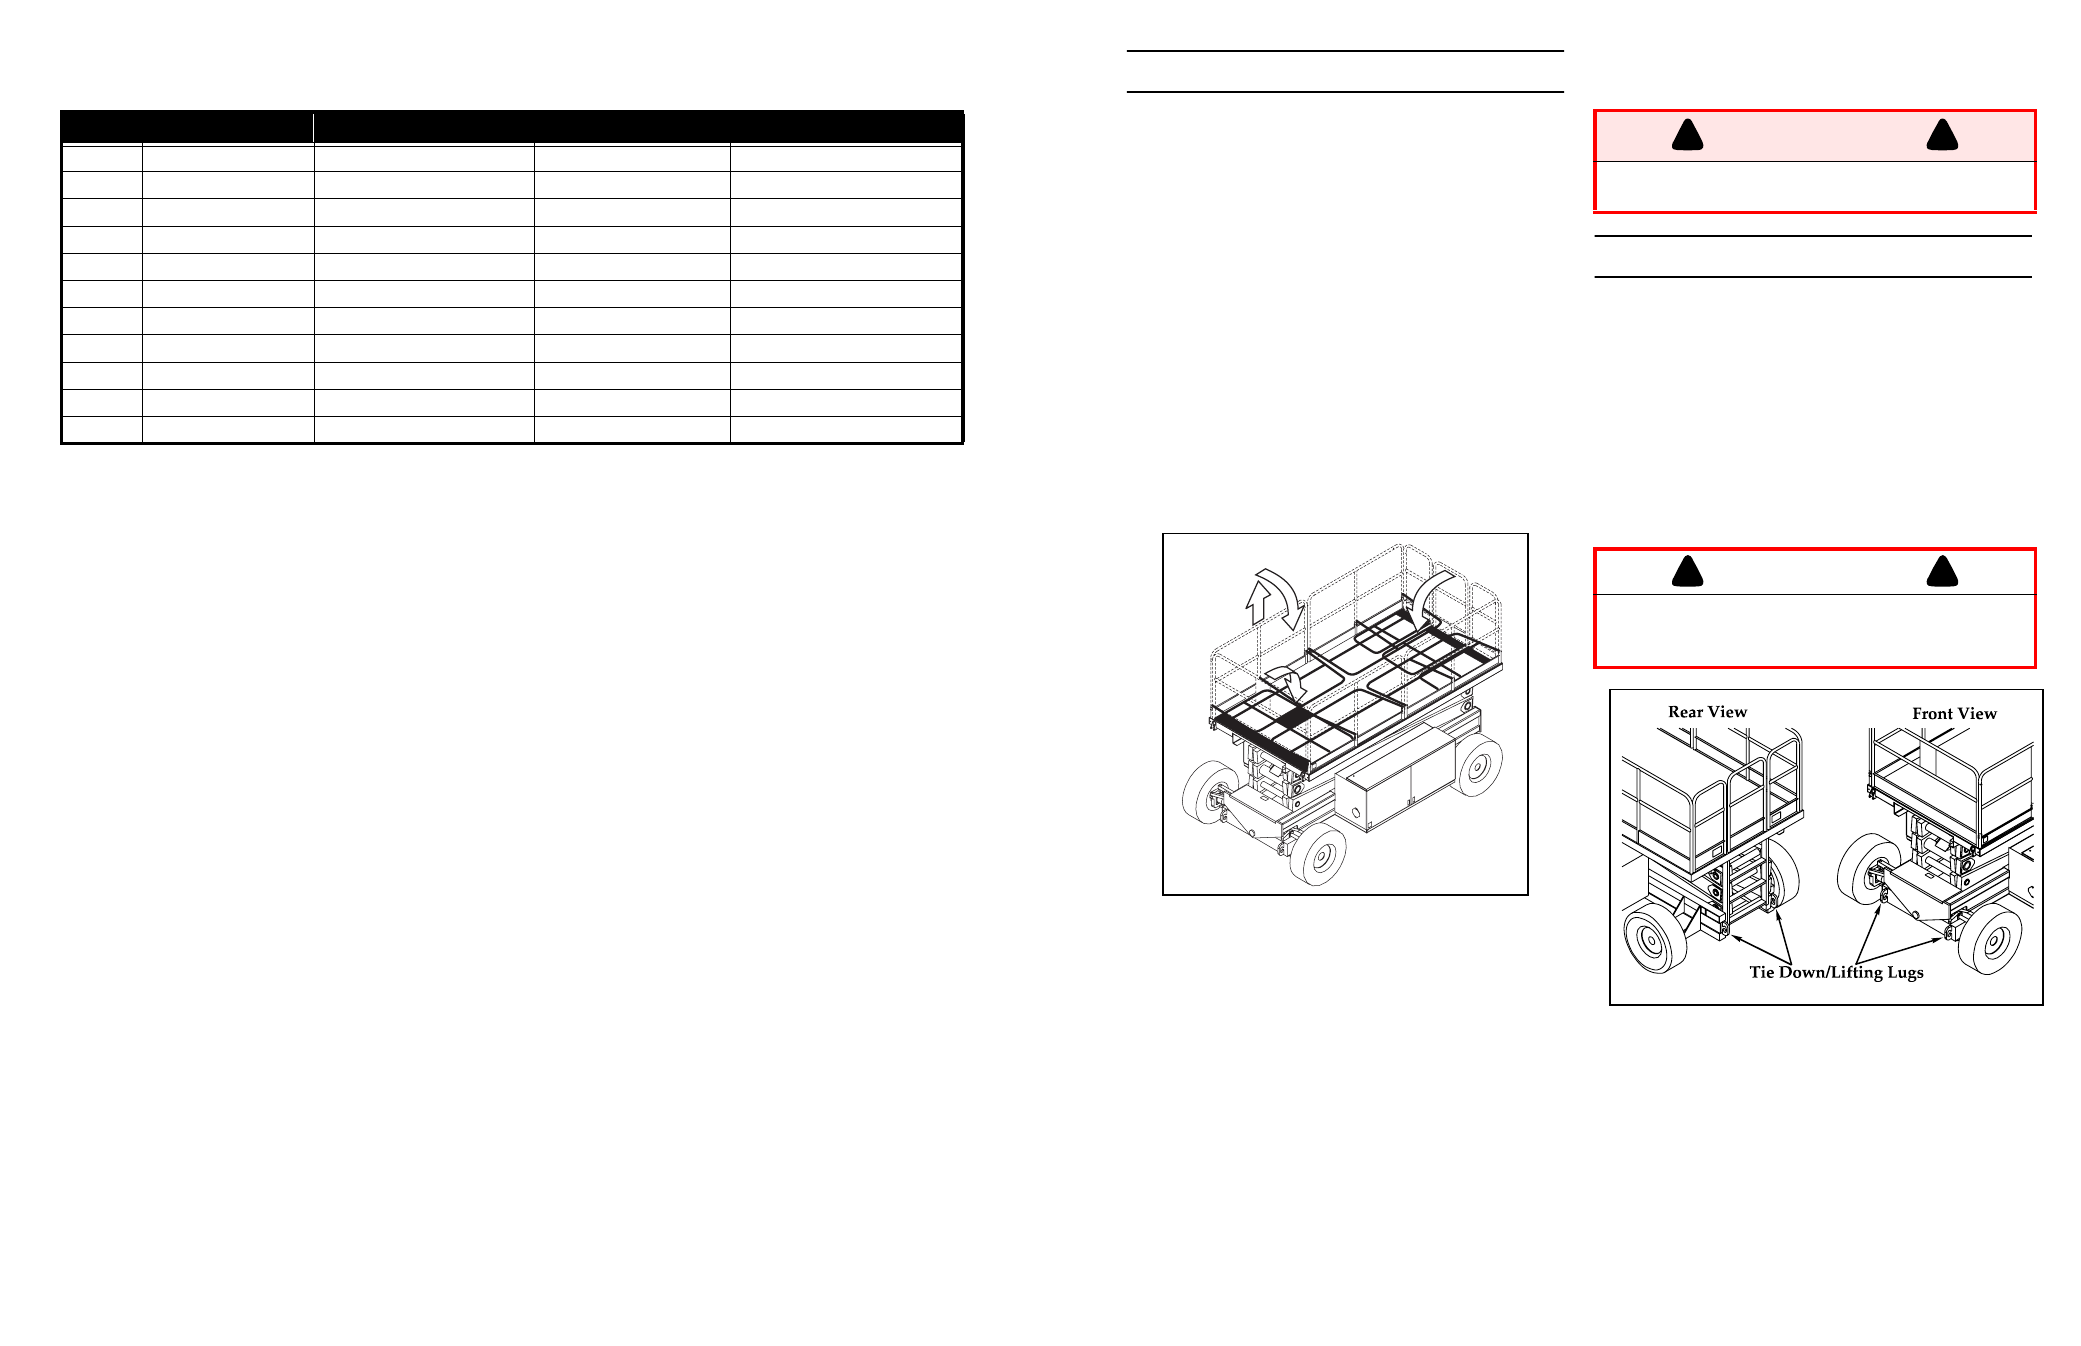
Table 0-1: Electrical Schematic (1 of 2)
ENGLISH
FRANCAIS
GERMAN
SPANISH
1
Switch
Commutateur
Schalter
Interruptor
2
Diode
Diode
Diode
Diodo
3
Relay
Relais
Relais
Relé
4
Fuse
Fusible
Sicherung
Fusible
5
Solenoid
Solénoïde
Magnetventil
Solenoide
6
Alarm
Alarme
Alarm
Alarma
7
Battery
Batterie
Batterie
Batería
8
Alternator
Alternateur
Generator
Alternador
9
Hour meter
Compteur horaire
Betriebsstundenzähler
Horómetro
10
Level Sensor
Capteur de niveau
Niveausensor
Sensor de nível
11
Motor Starter
Bougies de préchauffage
Glühkerzen
Bujía incandescente
38
7
F
OLD
D
OWN
G
UARDRAILS
(F
IGURE
6)
This procedure is only for passing through door-
ways. Guardrails must be returned to proper position
before using the machine.
F
OLD
D
OWN
P
ROCEDURE
Note:When performing the following proce-
dures retain all fasteners.
1. Place controller on platform
2. Starting at the front of the platform, remove nuts, bolts
and washers from the top of the front guardrail. Fold
the front guardrail down onto the platform.
3. Close and latch the gate.
4. Remove nuts, bolts and washers from the top of the
rear guardrail. Fold the rear guardrail down onto the
platform being careful to keep latched at all times.
5. Remove nuts, bolts and washers from the top of the
side guardrails. Lift up and fold one side guardrail in so
it rests on the deck. Repeat with other side guardrails.
Figure 1: Fold Down Guardrails
E
RECTION
P
ROCEDURE
1. Raise side guardrails making sure each is pushed down
to secure the guardrail in the vertical position.
2. Install bolts, washers and nuts between the side guard-
rails, tighten securely.
3. Raise rear guardrail assembly, aligning holes and install
bolts, washers and nuts. Tighten securely.
4. Raise front guardrail, aligning holes and install bolts,
washer and nuts. Tighten securely.
5. Hang controller from front guardrail.
6. Before operating work platform, check that all fasteners
are in place and properly torqued.
T
RANSPORTING
W
ORK
P
LATFORM
B
Y
C
RANE
1. Secure straps to chassis tie down/lifting lugs only (Fig-
ure 7).
B
Y
T
RUCK
1. Maneuver the work platform into transport position and
chock wheels.
2. Secure the work platform to the transport vehicle with
chains or straps of adequate load capacity attached to
the chassis tie down/lifting lugs.
Figure 2: Transporting Work Platform
P
REPARATION
FOR
S
HIPMENT
1. Grease all the grease fittings.
2. Fully lower the platform.
3. Disconnect the battery negative (-) lead from the bat-
tery terminal.
4. Band the controller to the front guardrail.
5. Band the elevating linkage to the frame.
Before operating machine, guardrails must be
securely fastened in their proper position.
Overtightening of chains or straps through tie
down lugs may result in damage to work
platform.
!
W A R N I N G
!
!
C A U T I O N
!